MANUAL | QUICK START GUIDE
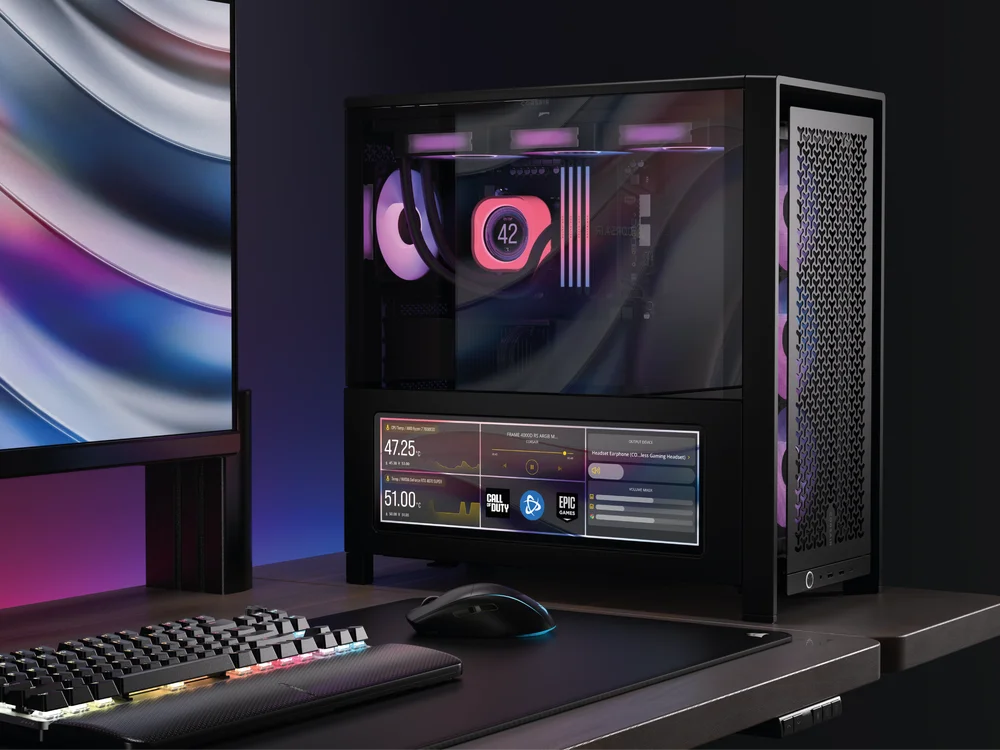
CORSAIR XENEON EDGE
14.5" LCD TOUCHSCREEN
SPECIFICATIONS
|
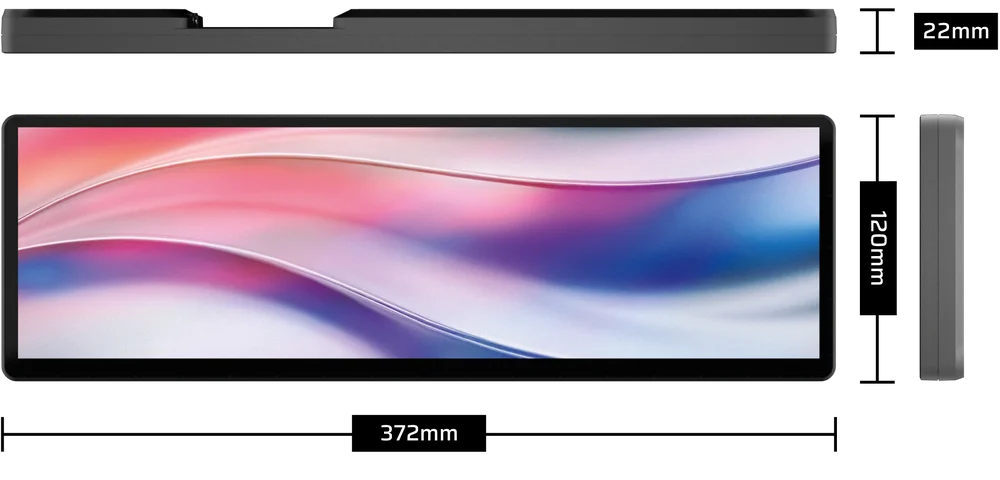
Width |
372mm |
|
Height |
120mm |
|
Thickness |
22mm |
|
Display resolution |
2560 x 720 pixels |
|
Refresh Rate |
60Hz |
|
Panel Type |
AHVA |
|
Video Connectivity |
- HDMI - USB Type-C DP-Alt Mode |
|
Power |
USB Type-C, 5V 2A |
|
Mounting Methods |
- Magnetic Stand - ¼-20" Mount - Magnetic Back - 360mm Fan Mount |
|
Optional Mounting Methods (sold separately) |
- Elgato Multi Mount - CORSAIR FRAME Series LCD side panel mount |
|
Compatible CORSAIR Software |
CORSAIR iCUE , Elgato Stream Deck |
|
Other Recommended Software |
SimHub, Elgato Wave Link, Rainmeter, AIDA64, Wallpaper Engine, and more… |
|
Supported Operating Systems |
Windows 11 |
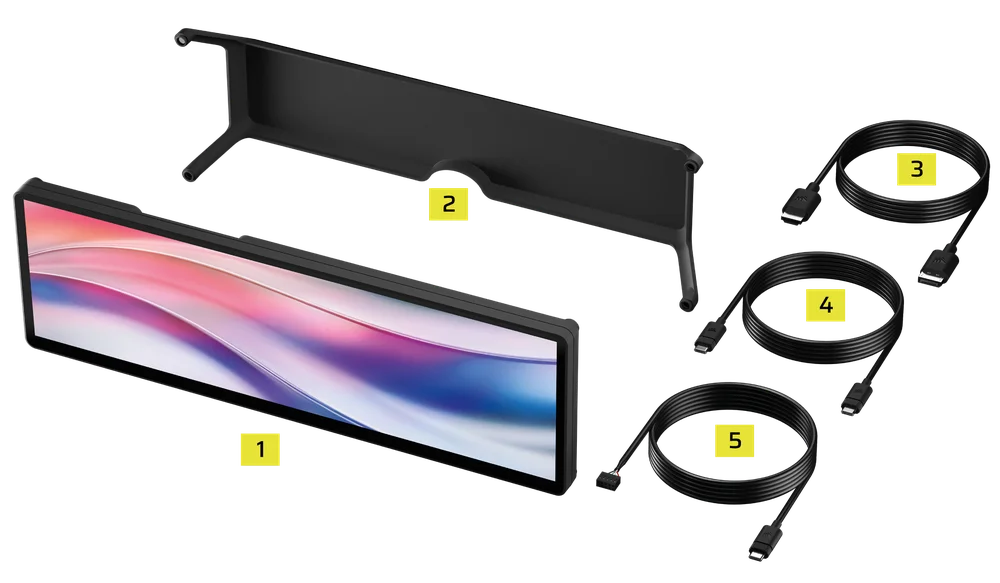
WHAT'S INCLUDED - BOX CONTENTS
|
1. XENEON EDGE LCD Touchscreen (1x) |
4. 1.8m USB Type-C DP-Alt Mode Cable (1x) |
|
2. XENEON EDGE Magnetic Stand (1x) |
5. 0.7m Internal USB Type-C Cable (1x) |
|
3. 1.8m HDMI-to-DisplayPort Cable (1x) |
|
MOUNTING YOUR XENEON EDGE
There are several choices for positioning or mounting your XENEON EDGE.
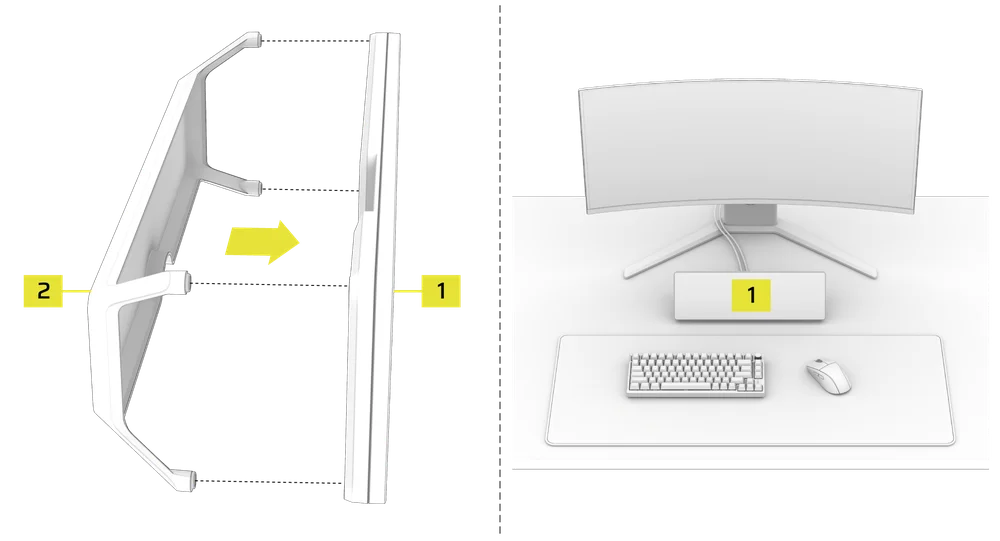
1. MOUNTING THE SCREEN USING THE INCLUDED MAGNETIC STAND
The included Magnetic Stand (2) allows the XENEON EDGE (1) to be positioned on any flat surface. The stand easily attaches to the back of the screen with four strong magnets.
2. MOUNTING THE SCREEN USING THE ¼-20" MOUNTS
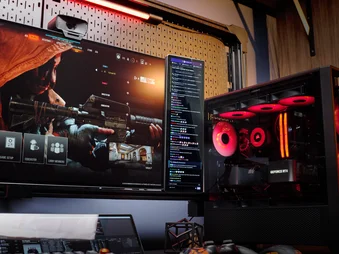
You can use either of the two standard female 1/4"-20 mounts (A) on the rear of your XENEON EDGE (1) to attach it to any Elgato Multi-Mount Arm, Fanatec® SIM Rig, CORSAIR Platform Series Desk, or any 3rd party device that uses this standard for mounting.

3. MOUNTING THE SCREEN USING THE MAGNETIC BACK
The XENEON EDGE (1) features 14 magnets built into the housing that allow you to stick it to anything ferrous.

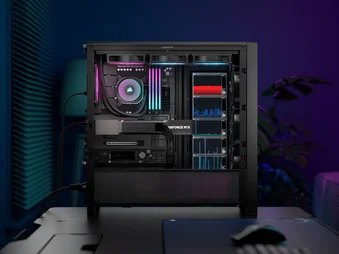
4. MOUNTING THE SCREEN USING A 360mm FAN MOUNT
The XENEON EDGE (1) can be mounted to any 360mm fan mount using the corner machine screws in the back of the casing:
- Unscrew and remove the four corner machine screws (C) from the back of your XENEON EDGE (1).
- Align the 360mm fan mount housing (D) over the back of the XENEON EDGE (1).
- Screw in the four previously removed machine screws (C).

- Install the 360mm fan mount housing with the mounted screen into the case.

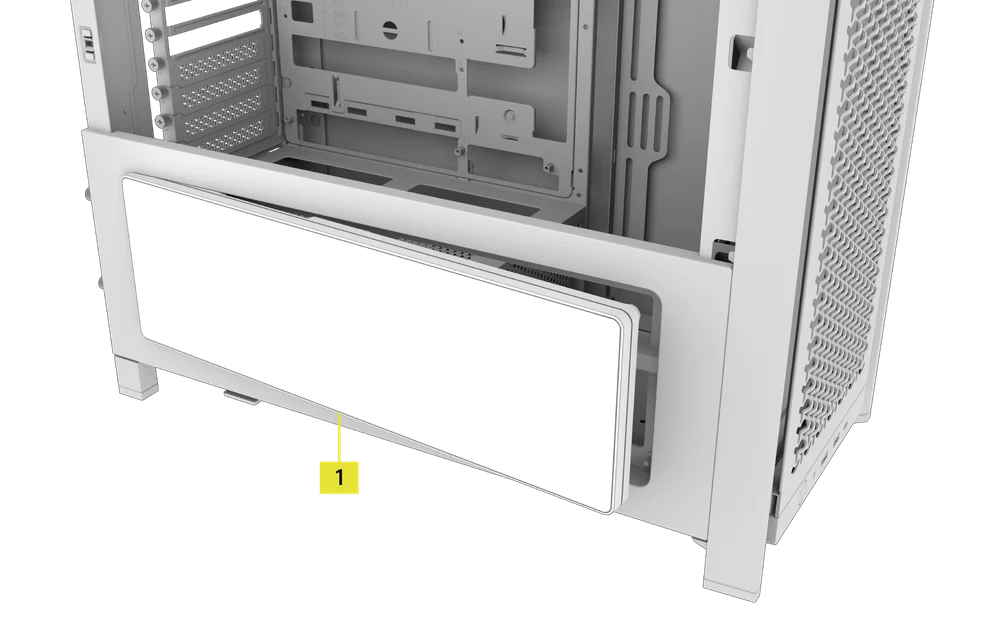
5. MOUNTING THE SCREEN USING THE FRAME SERIES LCD SIDE PANEL MOUNT
The XENEON EDGE (1) can also be mounted to the side panel of our newest FRAME Series cases using the LCD Side Panel Kit (Sold Separately).
- Install the side panel mount into your case by inserting the hooks into the mount and swinging the panel onto the case.
- Tip the XENEON EDGE (1) into the mount for it to magnetically grab onto the panel. For extra security, we recommend using the 1/4-20" screws that came with the mount to secure the XENEON EDGE in the side mount.
CONNECTING YOUR XENEON EDGE
1. GETTING TO KNOW THE CONNECTION PORTS
Your XENEON EDGE comes with two connection ports on the back:

A: USB Type-C port
The USB Type-C port provides power to the XENEON EDGE and is essential for its operation. It can be used for power and data transfer, or with a DP-Alt Mode cable for power and video.
B: HDMI port
The HDMI port on your XENEON EDGE is used for video display only.
2. CONNECTION WITH A SINGLE USB TYPE-C CABLE
By using the included 1.8m USB Type-C DP-Alt Mode cable (4), you can simplify your setup by carrying power, data, and video through a single connection.
- Connect one end of the included USB Type-C DP-Alt Mode cable (4) to the USB Type-C DP-Alt Mode connection port on the back of your XENEON EDGE (1).
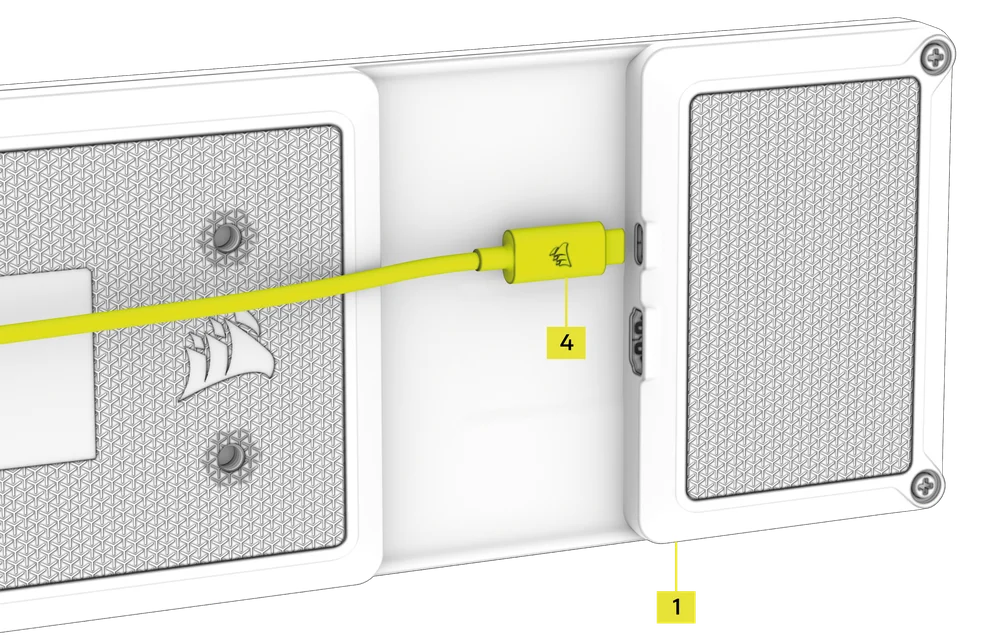
- Connect the other end of USB Type-C DP-Alt Mode cable (4) to the USB Type-C connection port on your GPU or laptop.

3. TWO-CABLE CONNECTION
If your computer or GPU does not support video transfer over USB Type-C, you'll need to use the included 1.8m HDMI-to-DisplayPort cable (3) for video output, along with one of the included USB Type-C cables (4 or 5) for power and data transfer.
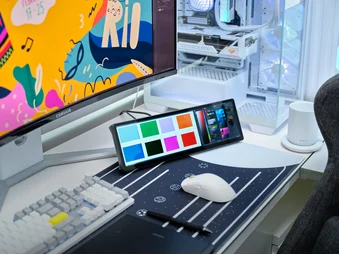
OPTION A: Externally mounted screen
- Connect one end of the included USB Type-C DP-Alt Mode cable (4) to the USB Type-C DP-Alt Mode connection port on the back of your XENEON EDGE (1).
- Connect the HDMI end of the included HDMI-to-DisplayPort Cable (3) to the HDMI port on the back of your XENEON EDGE (1).

- Connect the other end of USB Type-C DP-Alt Mode cable (4) to the USB Type-C connection port on your computer.
- Connect the DisplayPort end of the included HDMI-to-DisplayPort Cable (3) to a DisplayPort on your computer, laptop or GPU.

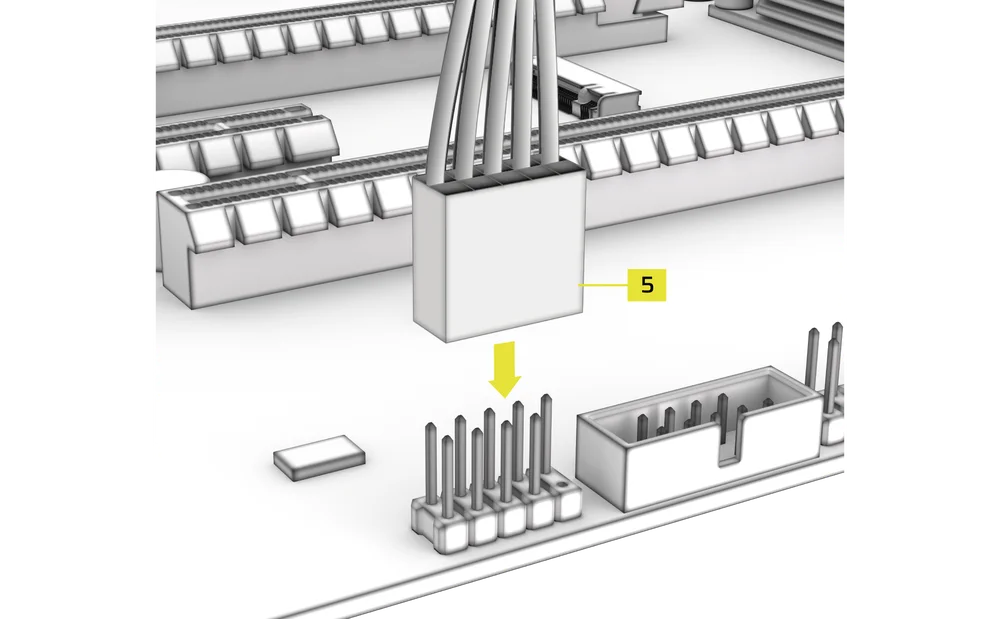
OPTION B: Internally mounted screen
- Connect one end of the included Internal USB Type-C Cable (5) to the USB Type-C DP-Alt Mode connection port on the back of your XENEON EDGE (1).
- Connect one end of the included HDMI-to-DisplayPort Cable (3) to the HDMI port on the back of your XENEON EDGE (1).

- Guide the HDMI-to-DisplayPort Cable (3) through one of the openings on the back of the case and connect the other end to the DisplayPort on your computer or GPU.
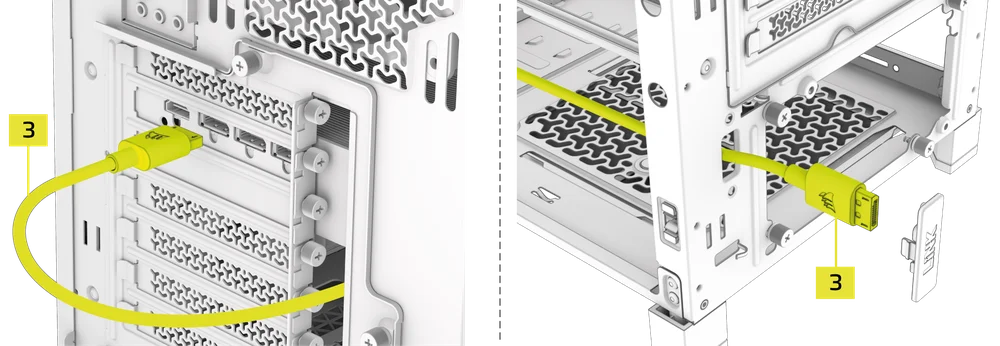
- Connect the other end of Internal USB Type-C Cable (5) to a USB header on your motherboard.
SOFTWARE SETUP
1. iCUE INSTALLATION
Download and install the latest version of iCUE from www.corsair.com/downloads
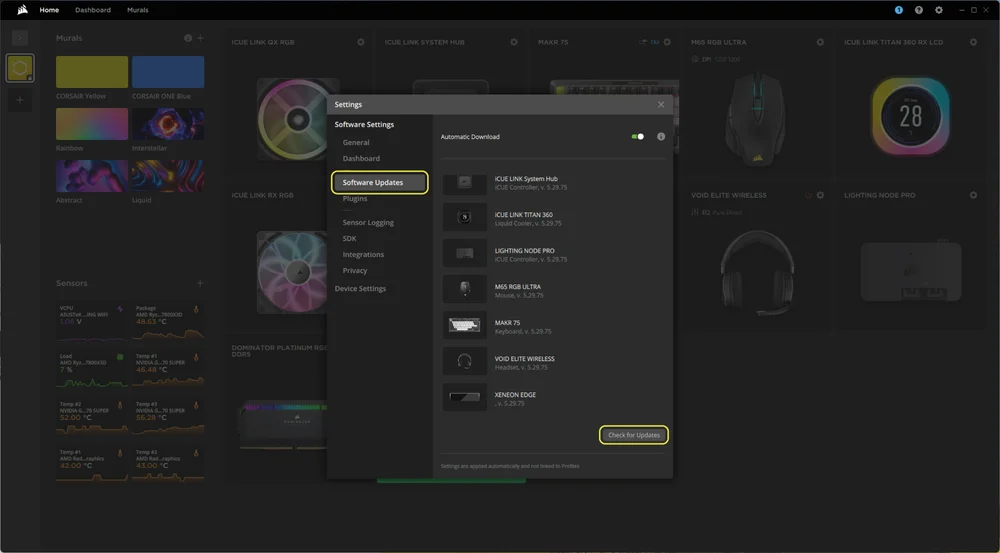
2. SOFTWARE UPDATE
- Click the cogwheel icon in the upper right-hand corner to open the Settings window, and select "Software Updates" as shown below, then click "Check for Updates" at the bottom of the window.
3. DEVICE SETUP AND CALIBRATION
Upon power on and iCUE launch, you should see the XENEON EDGE tile if everything is connected correctly and working as intended.
- When a notification about a detected device appears in the upper-right corner of the screen, click the "Run Wizard" button.

- Alternatively, hover over the XENEON EDGE tile with your mouse and click "Screen Setup".

Touchscreen calibration
- Follow the on-screen instructions in the "XENEON EDGE Setup Wizard" prompt.

Device settings
XENEON EDGE utilizes iCUE for complete screen control, eliminating the need for an OSD with buttons. Monitor settings are saved directly on the device and will remain consistent, even when iCUE is not running.
- Select XENEON EDGE LCD Touchscreen from the navigation bar.
- Click the cogwheel icon next to the device name to open the settings page.

- Customize the device settings to suit your preferences.
|
Setting |
Description |
Default Value |
|
Name |
Helps you to differentiate between multiple devices |
XENEON EDGE |
|
Auto Rotation |
Allows iCUE to rotate the display based on the built-in accelerometer |
On |
|
Brightness |
Controls the brightness of the display |
50% |
|
Backlight |
Controls the power of the backlight behind the display |
95% |
|
Contrast |
Adjusts contrast for the display | 50% |
|
Red |
Adjusts red color for the display | 151 |
|
Green |
Adjusts green color for the display |
127 |
|
Blue |
Adjusts blue color for the display | 139 |
|
Product Manual |
A link to the Quickstart Guide page |
|
|
Default Color Settings |
Resets color settings to factory defaults |

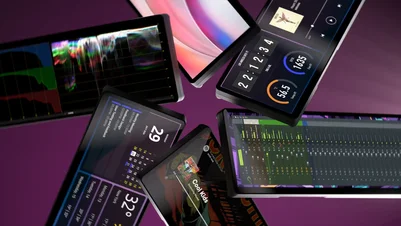
4. ADDING, CONFIGURING AND PERSONALIZING iCUE WIDGETS
Adding widgets
- Select XENEON EDGE from the navigation bar.
- Select "Widgets".
- Click on the “+” at the top of iCUE to add a new widget.

- Select one of the available widgets in the "Widgets" panel.
- Configure the widget using the various options available in the center panel.

Personalizing widgets
You can personalize each widget's appearance by adjusting the background, text, and accent colors using the customization panel on the right.
- Toggle widget personalization on or off by clicking the "Custom Style" button.

Personalizing display
Use the "Device Personalization" option to customize the display and uniformly apply appearance settings to all widgets.
- Select "Device Personalization".
- Customize the appearance of the display and widgets using the various options available in the "Device Personalization" panel.

Adding a new widget page
You can add up to 30 pages to your widget layout, allowing you to swipe between them.
- Click on the “+” under the widget layout panel to add a new widget page.

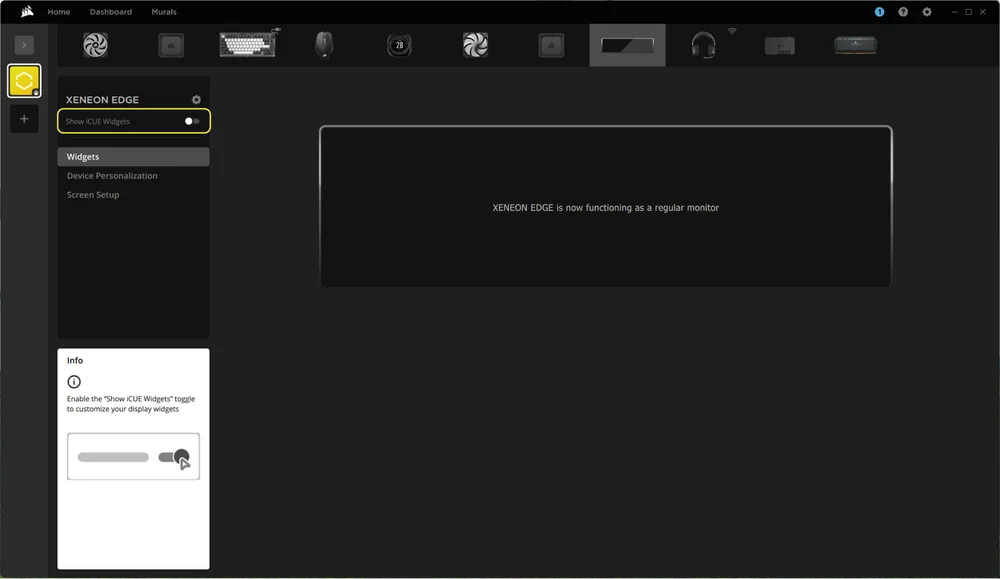
5. DISABLING iCUE CONTROL
iCUE can also release control of the monitor, allowing you to use it as a second monitor in Windows.
- Toggle iCUE control on or off by clicking on the "Show iCUE Widgets" button.
OTHER COMPATIBLE SOFTWARE
XENEON EDGE is also able to utilize other software that we have partnered with to optimize the display or usage based on our hardware configuration including but not limited to elgato Stream Deck, SimHub, and more to come.
FREQUENTLY ASKED QUESTIONS
I can't see the XENEON EDGE tile in iCUE. What do I do if the device is not detected?
If the XENEON EDGE is not detected, disconnect the USB Type-C and HDMI cables and reconnect them.
Can I use the XENEON EDGE LCD Touchscreen as a monitor without iCUE?
While it's possible to use the device without iCUE, the software offers unique customization options such as touch calibration and display adjustments that aren't available through Windows. For the best experience, we recommend using iCUE.
If I’m gaming and I click the screen, it minimizes my game. How do I prevent this?
Unfortunately, this is a limitation of the Windows operating system, where the cursor is essentially used to "click" the area where the touchscreen is activated. As a result, Windows prioritizes the window that is clicked.
You can mitigate this or mostly eliminate the issue by playing games in Borderless Windowed mode, which will allow you to freely click or move off the game window without causing issues.
Can I use any USB Type-C cable with the XENEON EDGE LCD Touchscreen?
For data and power, most USB Type-C to USB Type-C cables will work fine. However, for video over USB Type-C (USB Type-C DP Alt Mode), we recommend using cables specifically rated for video, typically 20Gbps or higher. The XENEON EDGE includes a 6'/1.8m 20Gbps USB Type-C cable.
Will I lose my widget layout if I disable iCUE control via "Show iCUE Widgets" button?
No, disabling iCUE screen control will not delete or wipe your defined layout but it will stop iCUE from displaying it. If you would like to see your widget layout, simply click "Show iCUE Widgets" to see your widgets again.
How do I switch between different pages of widgets on my XENEON EDGE LCD Touchscreen?
To switch between pages of widgets on your XENEON EDGE LCD Touchscreen, simply swipe left or right on the screen. If you swipe up or down along the edge of the screen, you will return to the initial screen.
Why is my display duplicating my main monitor? I cannot control my Xeneon Edge.
Please ensure your PC does not default to Duplicate vs Extend. Xeneon Edge must be in Extend mode to allow iCUE or other control of the display.
Why isn't a specific website displaying when I load it in iFrame mode?
Some websites prevent embedding in iFrames, a restriction set on their end. Unfortunately, this is beyond our control and cannot be bypassed through coding.
SPARE PARTS LISTING
|
CC-8900913 |
XENEON EDGE Replacement HDMI-to-DisplayPort Cable, Black |
|
CC-8900914 |
XENEON EDGE Replacement USB Type-C-to-Type-C Cable, Black |
|
CC-8900915 |
XENEON EDGE Replacement USB Type-C-to-Internal Cable, Black |
|
CC-8900916 |
XENEON EDGE Replacement Magnetic Stand, Black |
WARRANTY

The XENEON EDGE LCD Touchscreen has a 3-year warranty and is covered by our Pixel Perfect Policy.
LEGAL
© 2025 CORSAIR MEMORY, Inc. All rights reserved. CORSAIR, FANATEC, Elgato and the sails logo are registered trademarks of CORSAIR in the United States and/or other countries. All other trademarks are the property of their respective owners. Product may vary slightly from those pictured.
RELATED CONTENT