HOW TO
Comment faire : Installer un SSD CORSAIR MP600 PRO LPX dans votre PlayStation 5
Si vous possédez une PlayStation 5, vous pouvez utiliser ce guide pour y installer un SSD CORSAIR MP600 PRO LPX M.2 NVMe.
Before installation...
Before you begin installing your SSD into your PlayStation 5, make sure you do the following:
- Turn on your PlayStation 5 and make sure you update to the latest software version.
- After ensuring it is updated, turn off your PlayStation 5 and disconnect all cables from it.
- Find a soft cloth or towel to lay out on your work surface to protect your PlayStation 5 while you work on installation.
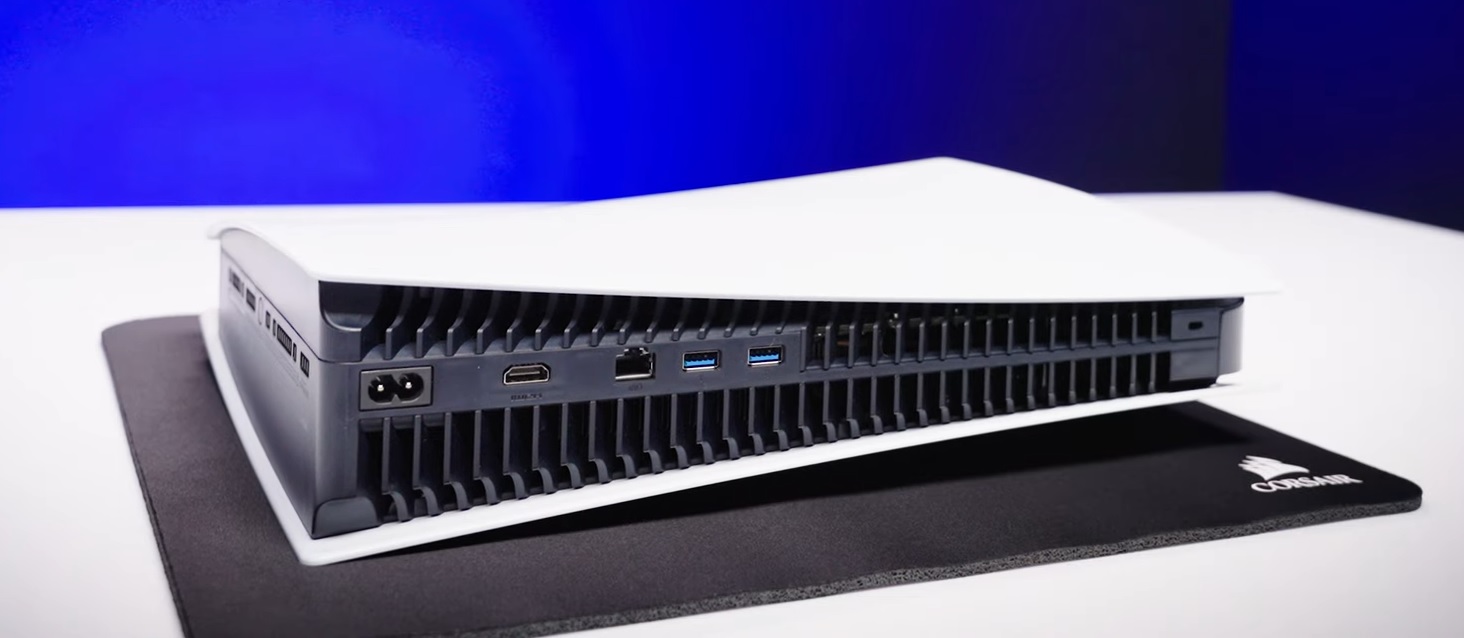
- Lay your PlayStation 5 on its side, making sure that the side with the cutout for the Blu-ray drive is facing up.
Installing your SSD
Once you have ensured your PlayStation 5 is up-to-date, is powered off, and all cables are disconnected, you can begin the installation.
- Gently lift and slide off the side panel of your PlayStation 5 to remove it.
- If you need help removing your PlayStation 5 cover, you can find instructions on this PlayStation webpage.
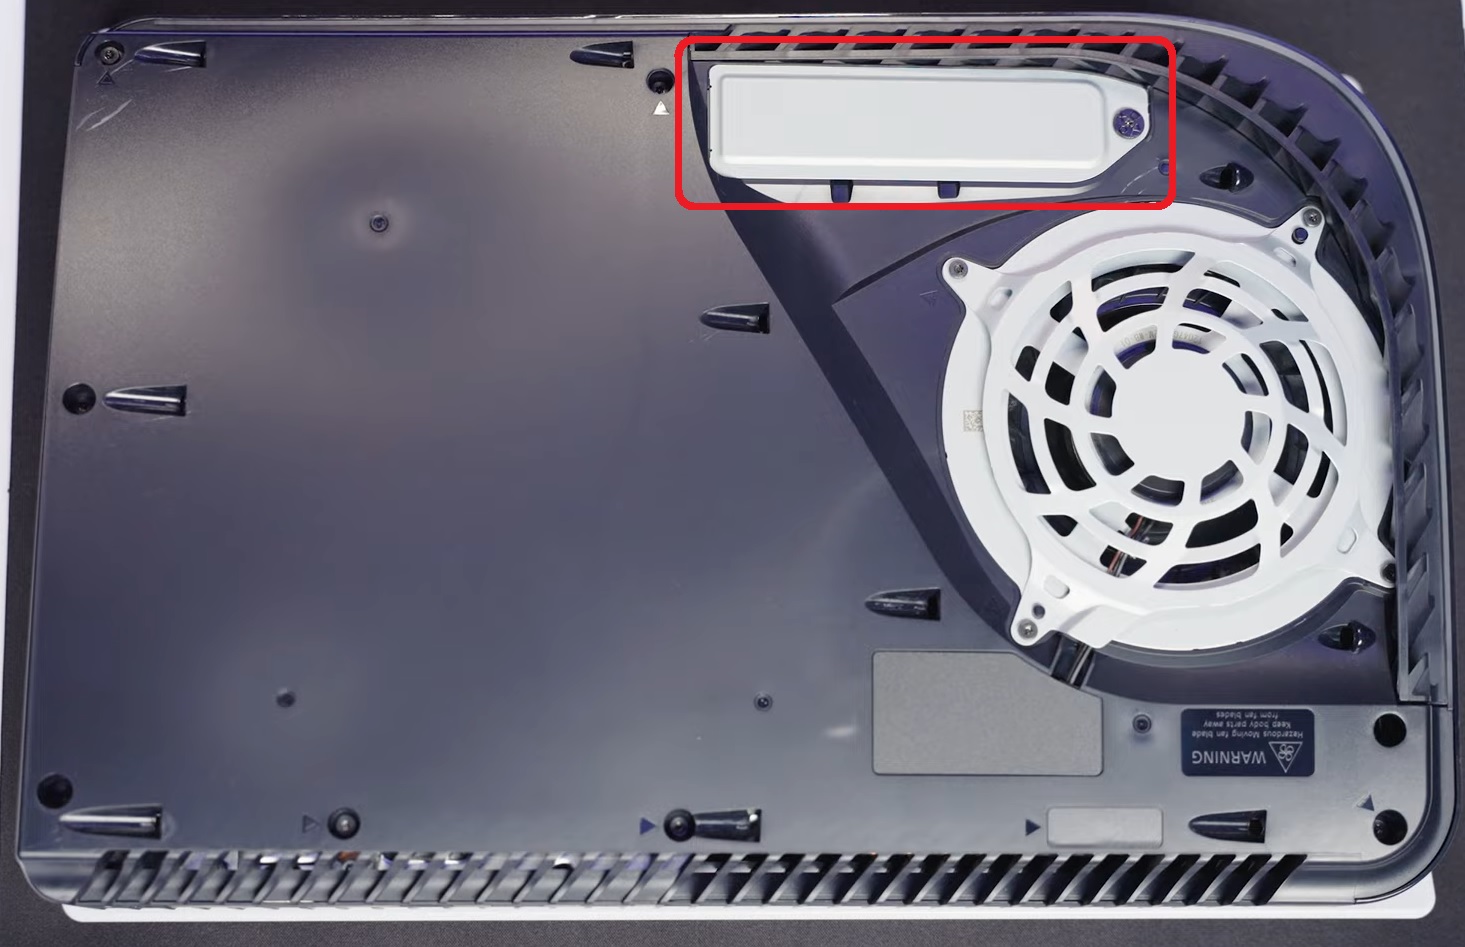
- Use a Phillips head screwdriver to remove the cover M.2 expansion bay.
- Use your Phillips head screwdriver to remove the screw securing the standoff in position 110.
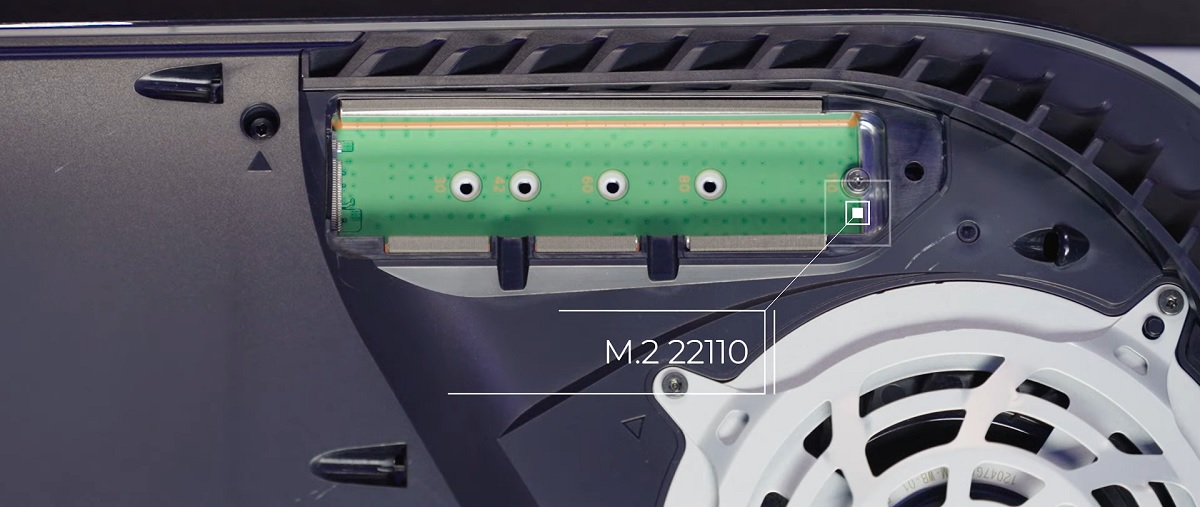
- Place the standoff into the position marked 80.
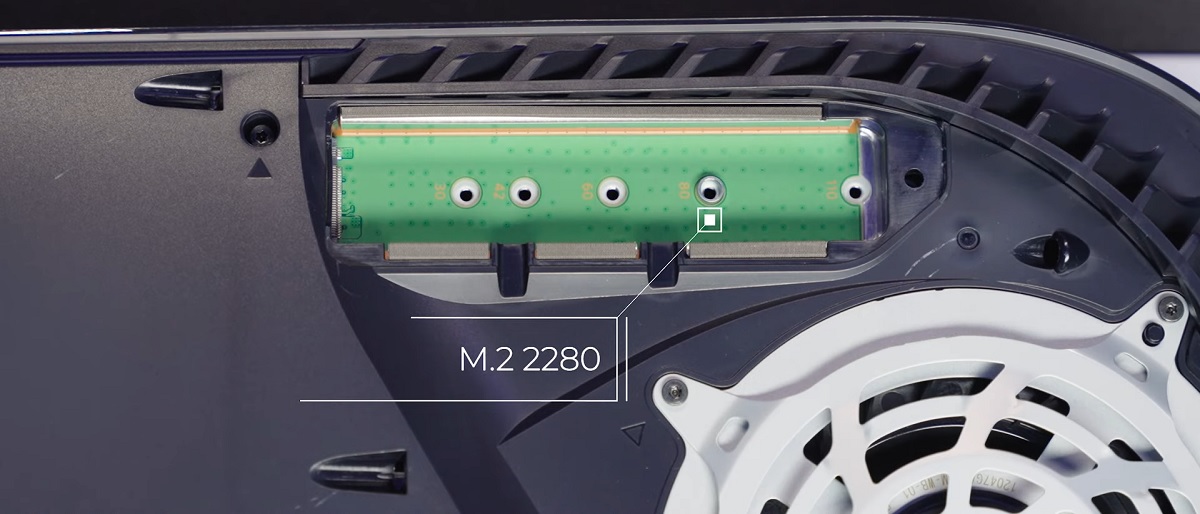
- Insert your MP600 PRO LPX SSD into the expansion bay, making sure to line up the connector on the SSD into the notch in the expansion bay.
-
- Make sure that the other end of the drive is resting on the standoff in position 80.
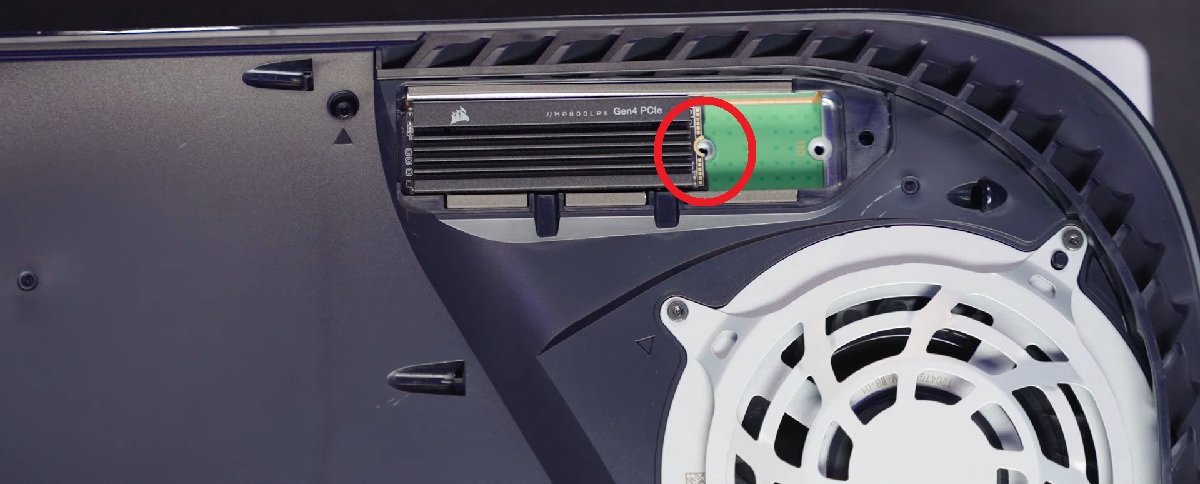
- Make sure that the other end of the drive is resting on the standoff in position 80.
-
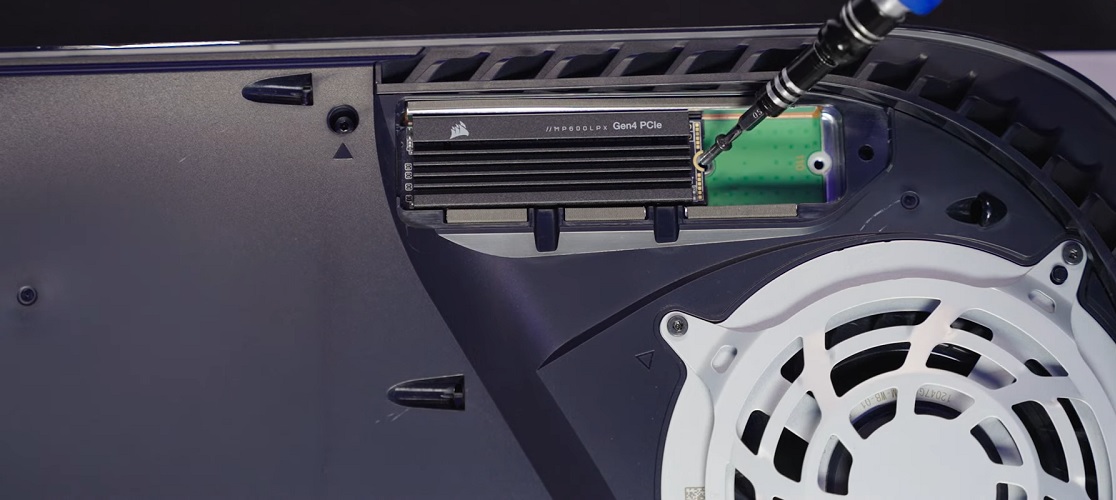
- Secure the SSD and standoff in place by using the screw you previously removed.
- Reinstall the cover of the M.2 expansion bay.
- Reinstall the side panel of your PlayStation 5.
- Reconnect your PlayStation 5 to power and video, then power it on.
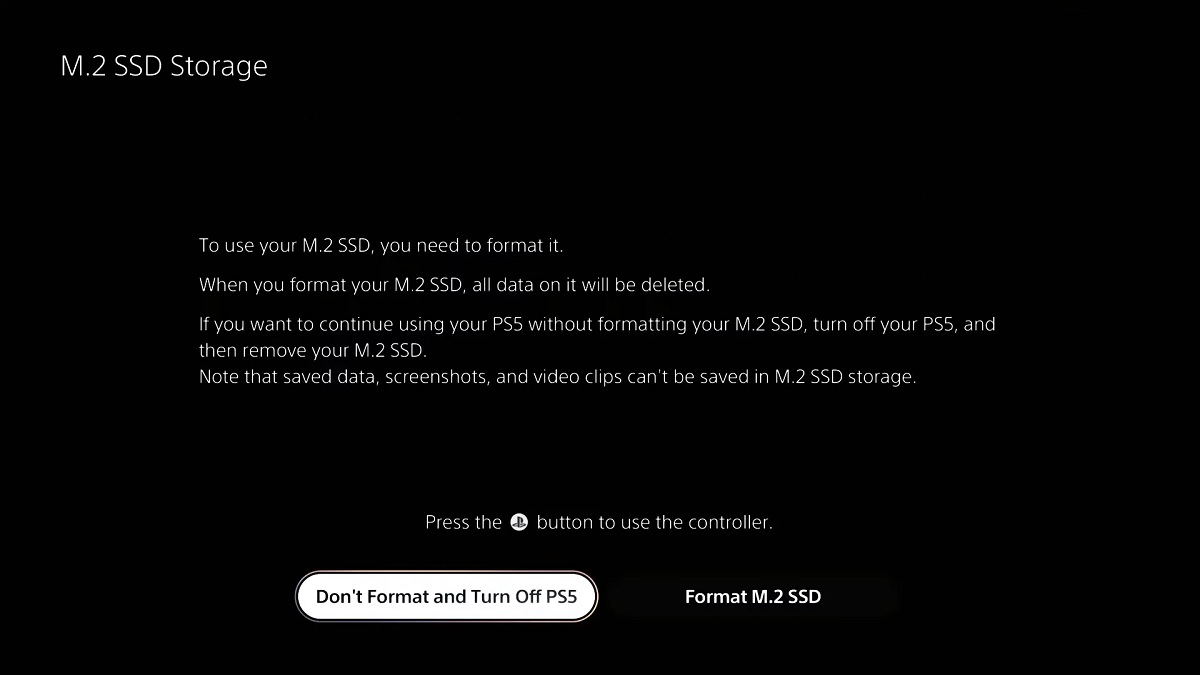
- You should see the M.2 SSD Storage utility; follow the prompts on the screen to format your SSD.
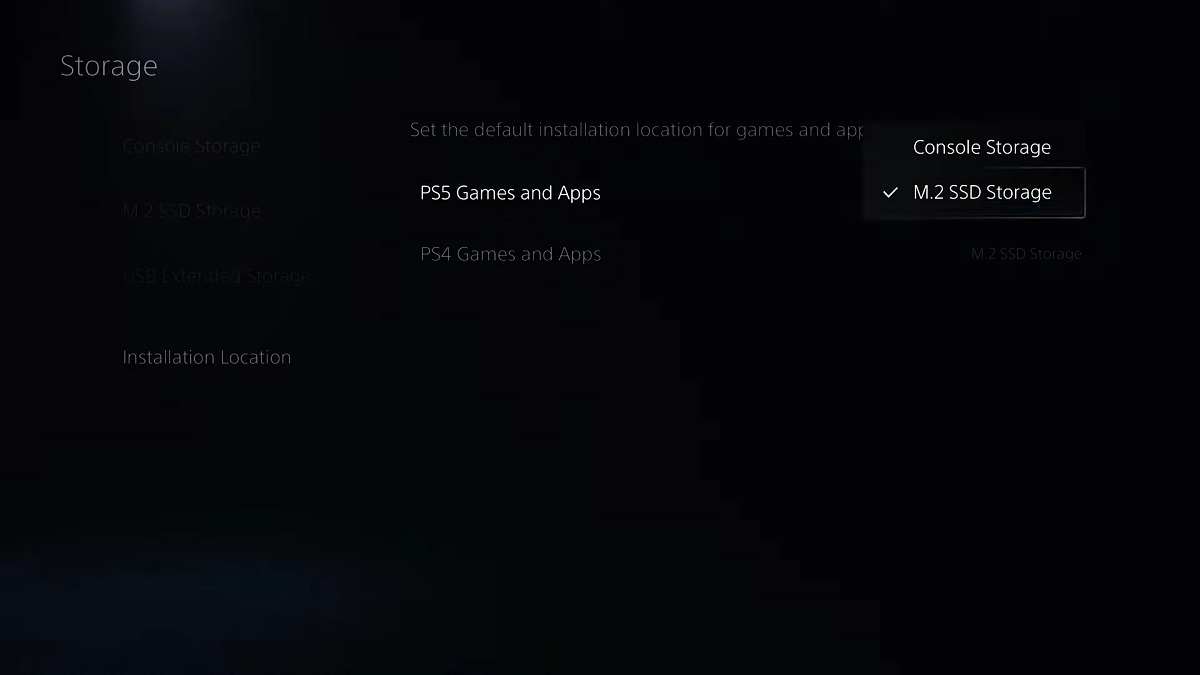
Once your SSD is formatted, you can go to the Storage Manager of your PlayStation 5 and select your M.2 SSD as the default storage location.
JOIN OUR OFFICIAL CORSAIR COMMUNITIES
Join our official CORSAIR Communities! Whether you're new or old to PC Building, have questions about our products, or want to chat about the latest PC, tech, and gaming trends, our community is the place for you.