MANUAL | QUICK START GUIDE
HARPOON v2 WIRELESS
Gaming Mouse
In this Guide
CHARGING THE MOUSE
IMPORTANT: The HARPOON v2 WIRELESS must be fully charged before its first use. Please update firmware via CORSAIR WEB HUB for the best experience.
Connect the mouse to an available USB 2.0 or 3.X port on your PC with the USB CHARGING / DATA CABLE (K).
The lighting zones on the mouse will light up according to the battery status and will turn solid green for 5 seconds when charging is complete.
GETTING TO KNOW YOUR MOUSE
- LEFT MOUSE BUTTON
- RIGHT MOUSE BUTTON
- MIDDLE CLICK / SCROLL WHEEL
- FORWARD BUTTON
- BACK BUTTON
- CORSAIR LOGO (RGB)
- DPI BUTTON
- USB CHARGING / DATA PORT
- POWER / WIRELESS MODE SWITCH (OFF / 2.4GHz / BT)
- USB WIRELESS RECEIVER
- USB CHARGING / DATA CABLE
SETTING UP 2.4GHz WIRELESS
- Connect the USB WIRELESS RECEIVER (J) to an available USB 2.0 or 3.x port located on the front panel of your PC or nearby USB port.
- Power on your mouse by switching the POWER / WIRELESS MODE SWITCH (I) to 2.4GHz wireless.
- The Multi-purpose indicator will blink battery status for 3 secs and turn solid white when successfully connected to the receiver.
SETTING UP BLUETOOTH
Bluetooth wireless is best for everyday computing tasks, productivity, and office applications.
- Initiate Bluetooth pairing on your Bluetooth 4.0 or higher enabled device.
- Power on your mouse by switching the POWER / WIRELESS MODE SWITCH (I) to Bluetooth.
- The Multi-purpose indicator will blink battery status for 3 secs and turn solid blue when connected.
- If the BT pairing device needs to be re-paired or changed, disconnect USB cable and switch to OFF first. Press and hold DPI BUTTON (G) and switch POWER / WIRELESS MODE SWITCH (I) to Bluetooth, then release DPI BUTTON (G) The lighting zones will start blinking blue upon entering BT pairing mode.
*HARPOON v2 WIRELESS can only be paired to one device. If you need to pair with another device, please enter re-pairing mode to initialize the pairing process.
DEFAULT DPI STAGES
Default DPI profiles are available for fast configuration.
- Press the DPI BUTTON (G) to cycle through DPI stages.
- When switching to the corresponding DPI Stage, the Multi-Purpose Indicator LED will show the DPI color for 3 seconds and then the LED indicator will turn off.
*Advanced configurations are available via CORSAIR WEB HUB.
MOUSE STATUS AND INDICATIONS
Wireless connection, DPI stages and battery status are communicated through the lighting zones.
| DPI STAGE | LED LIGHTS |
| STAGE 1 - 400 | RED |
| STAGE 2 - 800 | ORANGE |
| STAGE 3 - 1200 | YELLOW |
| STAGE 4 - 1600 | GREEN |
| STAGE 5 - 3200 | BLUE |
|
DPI SHIFT STAGE – 200 |
PURPLE |
| BATTERY STATUS | LED LIGHTS |
| Charging | Breathe Green for 2 secs |
| Battery high | Blink Green 3 times |
| Battery medium | Blink Amber 3 times |
| Battery low | Blink Red 3 times |
| Battery critical, recharge required | Breathing Red |
| Battery fully charged | Solid Green for 5 secs |
| CONNECTION MODE | STATUS | LED LIGHTS |
|
2.4GHz |
Not Paired | Breathe White 2 times |
| Pairing | Rapidly Blink White | |
| Paired/Connected | Solid White for 5 secs | |
| BT | Not Paired | Breathe Blue 2 times |
| Pairing | Rapidly Blink Blue | |
| Paired/Connected | Solid Blue for 5 secs |
STEP-BY-STEP MOUSE SETUP GUIDE
Step 1 – Connect Your Mouse
A. Plug in the HARPOON v2 WIRELESS's receiver.
B. Make sure the power switch is set to 2.4GHz (RF).
Step 2 – Open CORSAIR WEB HUB and Select the Mouse
A. Go to https://www.corsair.com/web-hub/index.html.
B. Click [Authorize].
C. Choose HARPOON v2 WIRELESS Receiver.


B. Click the profile you want to edit (for example: “Profile 1”).
C. This profile stores your DPI, and button assignments.
Step 4 – Set DPI Levels
A. Click [DPI] in the left sidebar.
B. Choose how many DPI stages you want (1~5).
C. Enable the DPI stages you want to use (e.g., 800 / 1200 / 1600).
*Sniper (DPI Shift button) is only available if assigned to a button
Suggested DPI settings:
- Desktop/general: 1200–1600 DPI
- FPS games: 800–1200 DPI
- MOBA/MMO: 1600–2400 DPI

Step 5 – Remap Buttons (Assignments)
A. Click [Assignments] in the left sidebar.
B. Click the button on the mouse diagram you want to change.
C. Choose the Assignment Type:
- Keyboard (remap to a key like R, E, or P)
- Macro (record multiple keystrokes)
D. Confirm the assignment and test it.
A. Click Device Settings at bottom left.

- Battery – Wireless connectivity or battery status.

- Polling Rate – Select [ 1000 Hz / 1 msec ] polling for 1000Hz polling.
Wired:
Wireless:
- Brightness – Brighter lights will deplete battery life more quickly.

- Sleep Time – Adjust time before mouse enters Sleep Mode.

- Power Saving Mode – Enables power-saving optimizations

- Button Response Optimization – Optimizes debounce time

- Motion Sense Power Saving – Activates power save mode when the sensor is not detecting any movement.

- Angle Snapping – Smooths out mouse movement via sensor prediction when ON.

- Lift Height – Sensor cut off height.

- Pair Wireless receiver – Pair or reset the wireless receiver.

- Reset to Factory Settings – Reset your mouse to default setting.

- Connect your mouse via cable to the PC.
- Authorize Access and choose your mouse.

- If there is an update available, the “Update Firmware” button will light up.

- Press “Update Firmware” and “Proceed” to initiate update.
* Do not unplug the mouse or close the browser during the update process *
- Connect your dongle to the PC.
- Click on the three dots at the top right of the dongle.
- Click "Pair" and select device you would like to pair with.
- Follow the steps to enter re-pair mode on the mouse.
- Complete pairing.

BATTERY REMOVAL INFORMATION
This product uses a rechargeable battery and safety guidelines must be followed in the event that the product is disabled for disposal and recycling. To safely remove the battery for disposal and recycling, follow the numbered steps with the below diagrams.
- Remove the receiver cover.
- Disassemble 2 screws.
- Disassemble top case sub assy.
- Disassemble 2 screws.
- Remove the battery assembly.
CORSAIR MEMORY, Inc. encourages customers to recycle used electronic hardware and rechargeable batteries in accordance with local laws and regulations.
BATTERY CHARGING INFO
The power delivered by the charger must be between min 0.5 Watts required by the radio equipment, and max 3.0 Watts in order to achieve the maximum charging speed.

BATTERY INFORMATION
- M/N(型號): 602538
- Rating: 3.7V, 600mAh, 2.22Wh
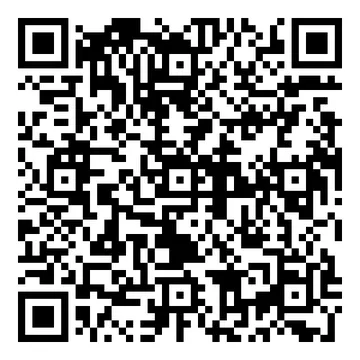
- Scan QR code for battery detail information
Mouse
M/N(型號): RGP0187
Rating(電壓電流): 5V  700mA
700mA
Dongle
M/N(型號): RGP0146
Rating(電壓電流): 5V 100mA
FCC ID: 2AAFM-RGP0187 (Mouse)
FCC ID: 2AAFM-RGP0146A (Dongle)
IC: 10954A-RGP0187 (Mouse)
IC: 10954A-RGP0146 (Dongle)
COPYRIGHT / LEGAL INFORMATION
© 2026 CORSAIR MEMORY, Inc. All rights reserved. CORSAIR and the sails logo are registered trademarks of CORSAIR in the United States and/or other countries. All other trademarks are the property of their respective owners. Product may vary slightly from those pictured.



RELATED CONTENT