BLOG
DIWhy - Reasons You Might Want To Consider Building a DIY Keyboard
For most hobbies, there’s a general progression that goes something like, “interested, but complete newcomer” to “fairly knowledgeable” to “this is my life now”. The world of mechanical keyboards is no different. That progression would follow a course where the final stop would be DIY mechanical keyboards.
Let’s take a look at the reasons why people choose to go the DIY route and see if there’s maybe a way you can get most of the benefits of a DIY build without having to drop tens of thousands of Simoleans on rare group buys.
Embarking on The Journey to Endgame
The allure of a DIY keyboard is pretty simple on the surface. You want some keycaps that feel better, or you want switches that are loud, but not quite as loud as the ones you have currently… Little disquieting thoughts like that which prick the back of your mind. They tell you, this keyboard you have is nice…but couldn’t it be just a little bit better?
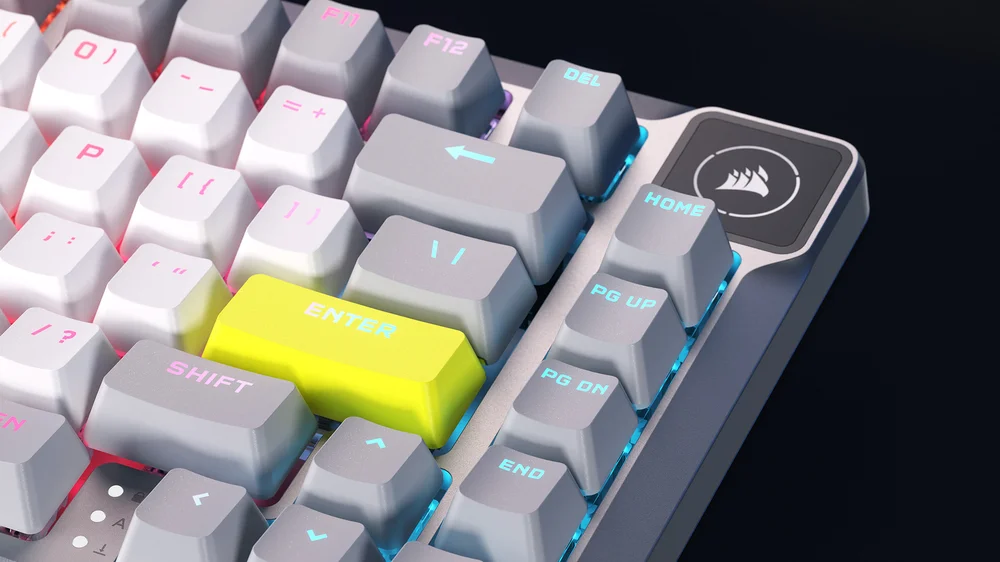
Aesthetic customization is one of the primary drivers of people making the jump to DIY. Why settle for a keyboard that doesn’t match your vibe, after all? Another is the ability to tune a keyboard for feel and responsiveness. Sometimes people just want to have the switches they want in the form factor that they want. A less common, but emerging reason is that you can add functionality to a keyboard build.
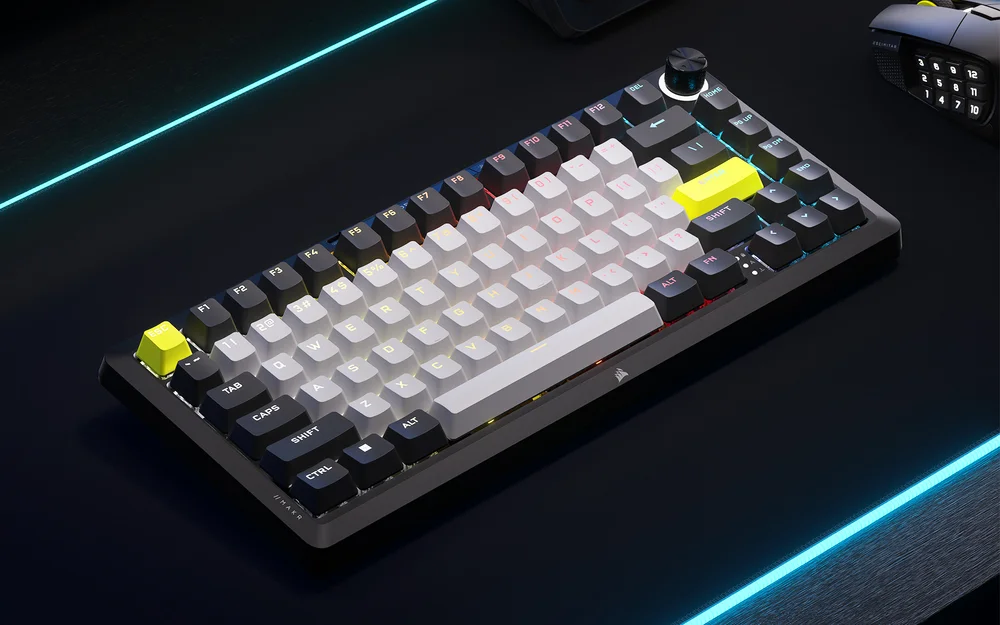
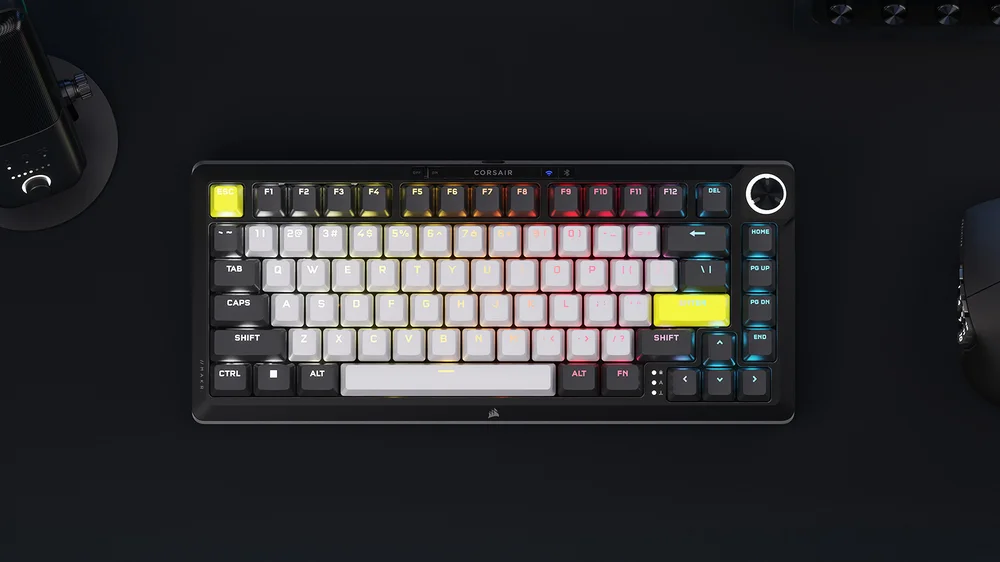
The CORSAIR MAKR 75 allows everyone from DIY veterans to first timers to address all of those reasons and more. It’s hotswappable, meaning you can easily swap in the compatible switches of your choice. There are plenty of great-looking keycaps available in a variety of materials, styles, and profiles. You can enhance it with modules that add an LCD screen or responsive, low-latency wireless, and your foundation is a premium full-aluminum 75% form factor frame with gasket mounting, FlashTap SOCD handling, and 8k polling. It’s a great place to start your journey to endgame.
Peeling Back the Layers
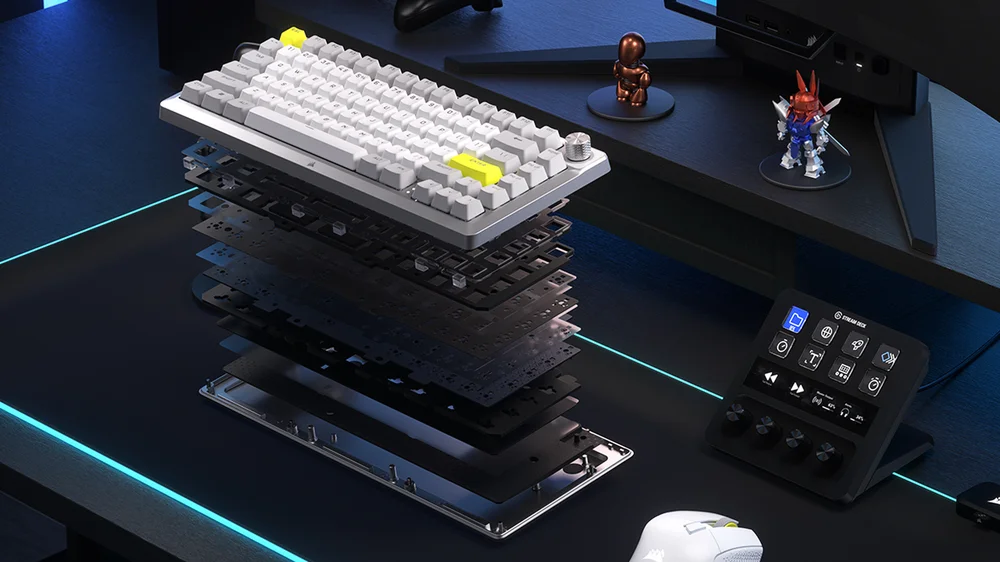
We’ll go on a layer-by-layer tour of how different components can affect different aspects of your keyboard experience. First up are the keycaps. Obviously, these are going to change the color and aesthetics of your build. They can also affect things that you might not even consider like the keycap font letting different amounts of RGB lighting shine through.
Then we have keycap materials. PBT keycaps are typically more durable and resist the plastic “shine” phenomenon that occurs when keys are used frequently. But that’s not a knock on ABS. Newer formulations of ABS have started to come out that combat some of those perceived woes. The keycap profile, or the shape of the keycap, plays a role in keycap look and feel. Some people like flatter keycaps because of the way they make the finished keyboard look. Others prefer more rounded keycap shapes with curvatures that gently nestle the fingers so typing and holding down W aren’t such a burden.
We’re just covering the keycaps, and I’m betting that this might already seem like a lot to take in for some people. Don’t worry! You don’t have to care about every one of these little details. Just make a mental note of characteristics that seem important to you, so you can figure out what you want or don’t want on your keyboard. You are, after all the feudal lady or lord, of what you put in your DIY keyboard.
Switching Things Up
Onto the next component, and this is arguably the biggest in terms of keyboard use, and that’s keyswitches. We’ve already gone over the litany of different types of keyswitches that you can outfit your keeb with – magnetic, optical, linear, tactile… Basically, keypress acoustics, actuation force, keypress feel, actuation speed, and actuation style are all big factors that will determine whether a switch is right for you. Again, some of these characteristics may not matter to you. They might matter a great deal. You’ll just have to try a few to figure out what works for you.
One concept you might not realize is an option is mixing and matching switches for different parts of the keyboard. Maybe you want your Enter key to sound like an old-school typewriter, but you don’t want your teammates on voice chat to think you’re making popcorn every time you jiggle peek. You can swap in individual switches to make different banks of keys feel dramatically different.
Next stop, sound dampening. There are certain components of keypress sound that have that “fingernails on a chalkboard” effect on some people. Misophonia is a tough thing to deal with! Fortunately, keyboards have a fix for that. There are DIY options for sound dampening foam that can muffle parts of the keypress acoustics or reduce the hollow echoes that some keyboards produce. There are also DIY kits like the MAKR 75 that feature multiple layers of sound dampening to address that from step one.
Switch Plates, Form Factors, and More
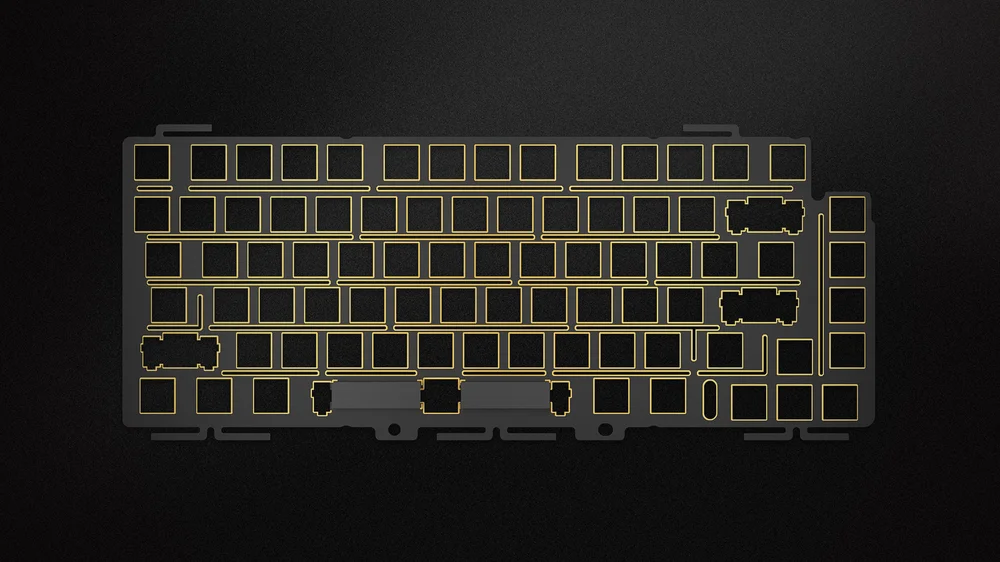
The next level down is the switch plate. Switch plates are a component that you’ve probably never thought about if you haven’t built a DIY keyboard before. It’s a layer that is sandwiched between the PCB (printed circuit board) and sits directly underneath your switches. If keypresses on your mechanical keyboard feel “mushy”, it’s probably because it doesn’t utilize a switch plate. Switch plates reinforce the PCB and add rigidity and structural durability. Some common switch plate materials are plastic, aluminum, and steel. All of them provide different acoustics, responsiveness, and keypress feel.
After the switch plate comes the PCB itself. What we’re talking about here is not the material, but the performance capabilities of the keyboard’s electronics, which can vary wildly. Do you really want to put all that effort into building your ultimate keyboard, only to take Ls because the finished keyboard has an anemic polling rate? Specs like polling rate, whether the board supports SOCD handling, anti-ghosting, key rollover, all of this is handled by the PCB and other internals. If you want a keyboard that’s built just for your specific needs, then you definitely need to make sure that the internals are capable of performing at the right level.
Now we’re on to additional modules. Certain DIY keyboard kits like the MAKR 75 will allow you to add additional functionality to your board. Give your new keyboard the power of versatile wireless connectivity so you can easily show off your new build. Add an LCD screen, or a rotary dial for media controls. Maybe in the future we’ll start seeing keyboard hydraulics...
Finally, we come to the frame and the form factor. If you’ve ever seen those grey, boxy looking keyboards and wondered what brand they were, you were probably looking at a DIY build. The rising popularity of DIY builds has finally led to an expanded number of keyboard aesthetics for DIY keyboards. For example, the MAKR 75 features a premium 100% aluminum frame that is elegantly chamfered. That’s right, not just the top plate or bottom plate, we’re talking a full aluminum frame.
You’ll also find a wider range of support these days for the different form factors. DIY kits are readily available in everything from 60% to full size to even just the tenkey pad by itself.
That should cover the majority of all the different customizable characteristics that can be changed on a keyboard, each of which might be enough to motivate someone to want to embrace the DIY keyboard life. If any of these qualities seem like something that would affect your satisfaction with a keyboard, maybe you should try looking into starting up a DIY build yourself. Though, we do have to warn you, the journey endgame isn’t always a short one…
JOIN OUR OFFICIAL CORSAIR COMMUNITIES
Join our official CORSAIR Communities! Whether you're new or old to PC Building, have questions about our products, or want to chat the latest PC, tech, and gaming trends, our community is the place for you.