HOW TO
How to Remove the Air Ducts on the CORSAIR AIR 5400
The AIR 5400 includes airflow ducts on both the top and bottom fan arrays to help guide air vertically through the chassis. The airflow ducts are removable to make building in the case easier, and removing them might also be necessary if you plan to mount a radiator to one of the fan arrays, though we would advise against that as it’s really not necessary.
Both ducts are held in place by a small plastic clip in the middle of their leading edge that needs to be pulled away from the chassis to free the duct, so removal only takes seconds and is tool-free. This procedure is outlined in the Quick Start Guide for this case.

Each airflow duct has a clip on the front edge. You must open the front panel to access these.
Removing the Top Airflow Duct
To remove this duct gently grab ahold of the plastic clip in the middle of the front-facing portion of the duct and use a tiny bit of force to pull it away from the chassis. The duct should fall away from the case quite easily.
Removing the Bottom Airflow Duct
Before you remove this duct, you will need to raise the Anti-Sag Stabilization Arm as the case comes with it in the lowest position. To do that, use a screwdriver to loosen the tension on the Arm and then simply raise it to the top of the channel.
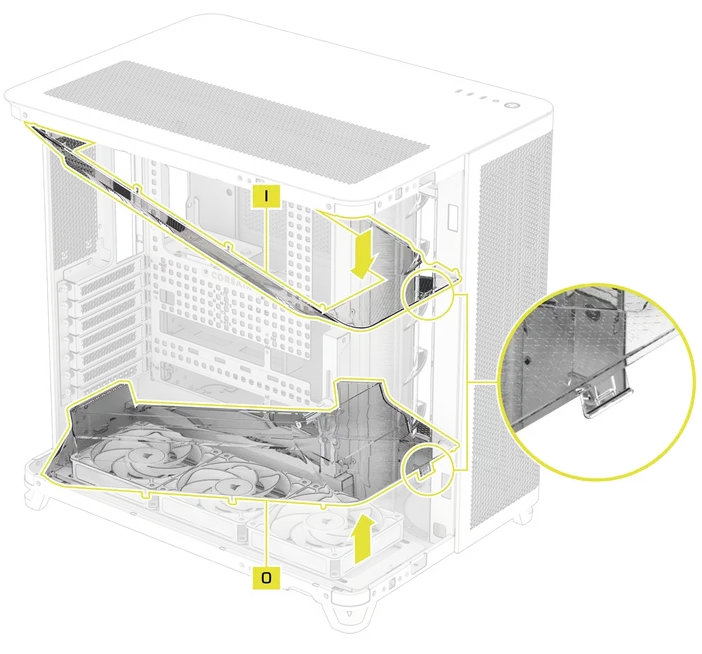
With the Stabilization Arm out of the way, you can now focus on the airflow duct, which is removed the same method employed on the top duct; by gently pulling on the plastic clip in the middle of front of the shroud. Once pressure is applied to the tab, it should lift up and away from the case with ease. Alternatively, you can watch the YouTube video below which shows how to remove the ducts.
Reattaching the Airflow Ducts
Both ducts snap back in place by setting them into the chassis and gently locking them into place with the small plastic clip on the leading edge of the duct.
PRODUKTY V ČLÁNKU
JOIN OUR OFFICIAL CORSAIR COMMUNITIES
Join our official CORSAIR Communities! Whether you're new or old to PC Building, have questions about our products, or want to chat about the latest PC, tech, and gaming trends, our community is the place for you.