HOW TO
How to install the Hydro X Series XG5 RGB 5090 ASTRAL GPU Water Block
If you're reading this article because you got an ASUS 5090 Astral GPU, then congratulations. The 5090 is a monster number cruncher, and unsurprisingly, it generates a lot of heat.
This is where custom cooling really shines because, unlike an air cooler, water cooling loops are not limited to the heatsink size of the GPU in question. Instead the heat dissipating surfaces can be functionally increased via adding more radiators.
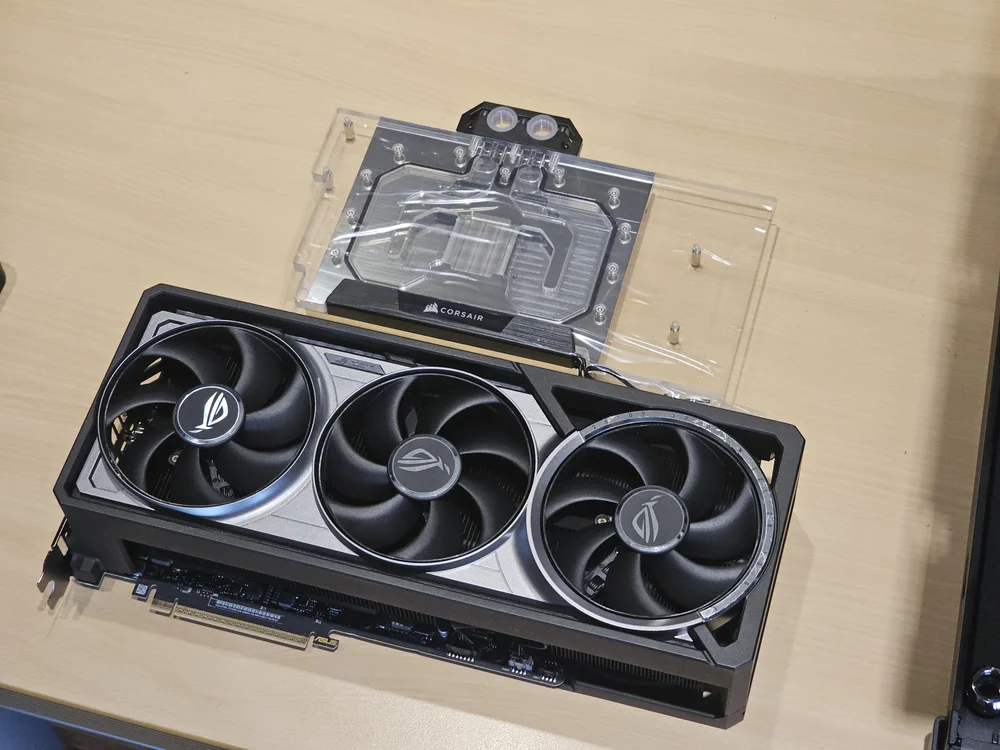
Luckily for you, we've created the Hydro X Series XG5 RGB 5090 ASTRAL GPU Water Block, specifically designed for the ASUS 5090 Astral
In this guide we will be removing the cooler of the RTX 5090 Astral card from ASUS, so follow this step-by-step guide to get yours installed, too.
Pro Tip: Take Photos During This Process and Organise your Screws
You can take pictures as you disassemble, and make sure to keep the screws in an organized way. We do this because once we're done disassembling the cooler, it is hugely helpful to assemble it again (without the PCB obviously).
This will make storing the stock cooler easier, and it if you ever need to reinstall it, you won't have to go searching for the screws.
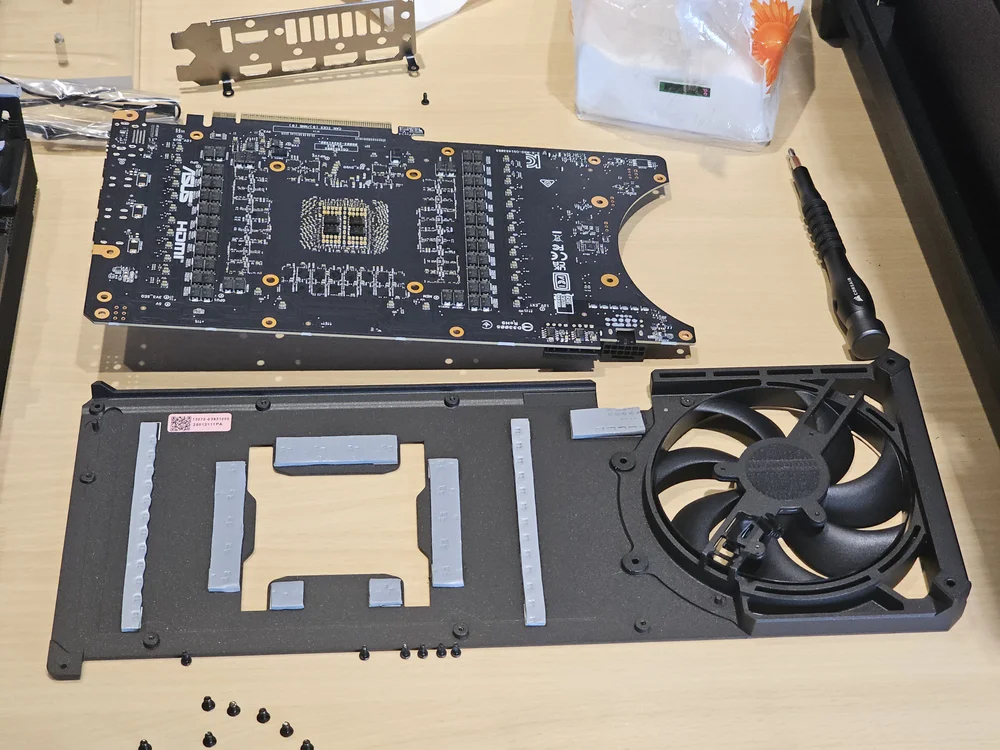
Removing the Stock Cooler
By far the hardest part of installing a GPU water block is taking the stock cooler off the graphics card, and if you are nervous about this, we understand. Taking a screwdriver to a multi thousand dollar graphics card can be a bit scary. In this guide we will mark the screws you need to take off in each step with a red circle.
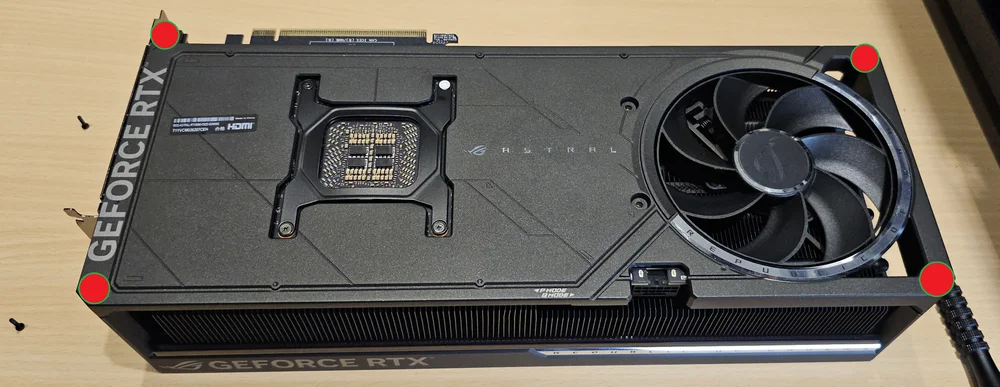
Step 1 - Remove 4 screws from the back cover
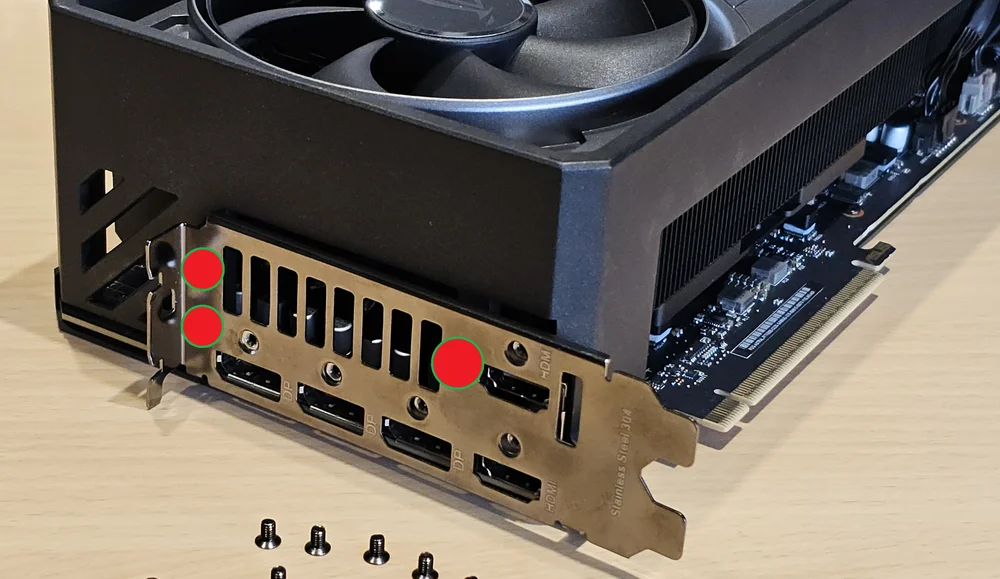
Step 2 - Remove 3 screws from the PCI-e bracket (leave the rest in)
Step 3 - Remove the shroud. (Be careful with the wires going from the shroud to the PCB)
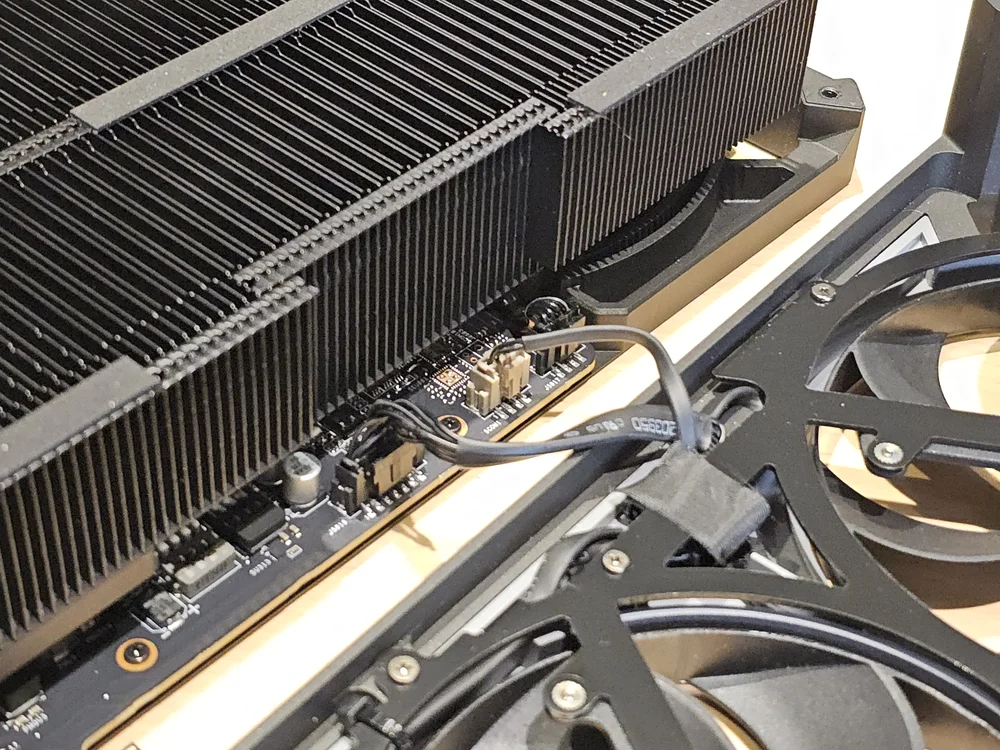
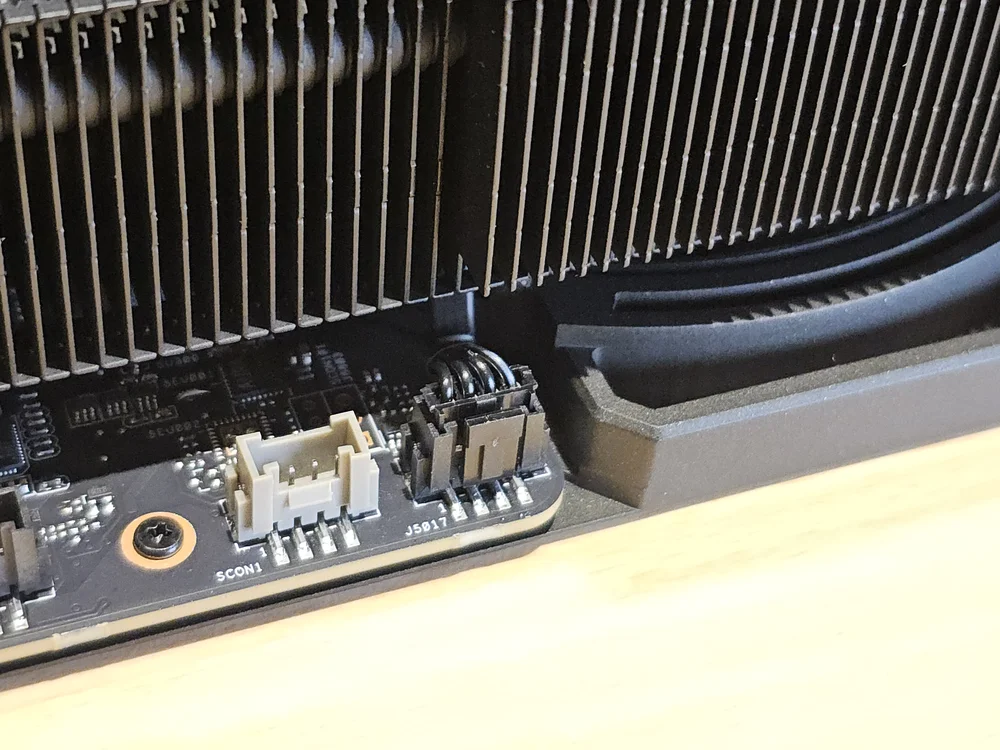
Step 4 - Disconnect these two cables. (Be careful, they are fragile)
Step 5 - Disconnect the last fan wire
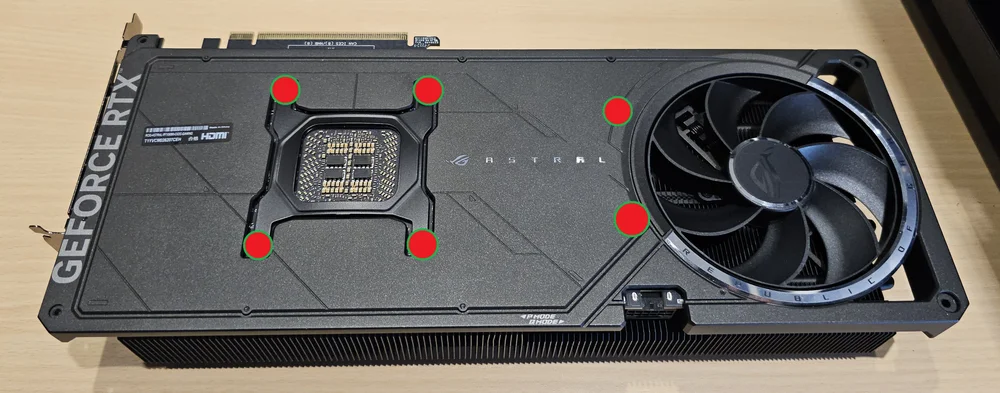
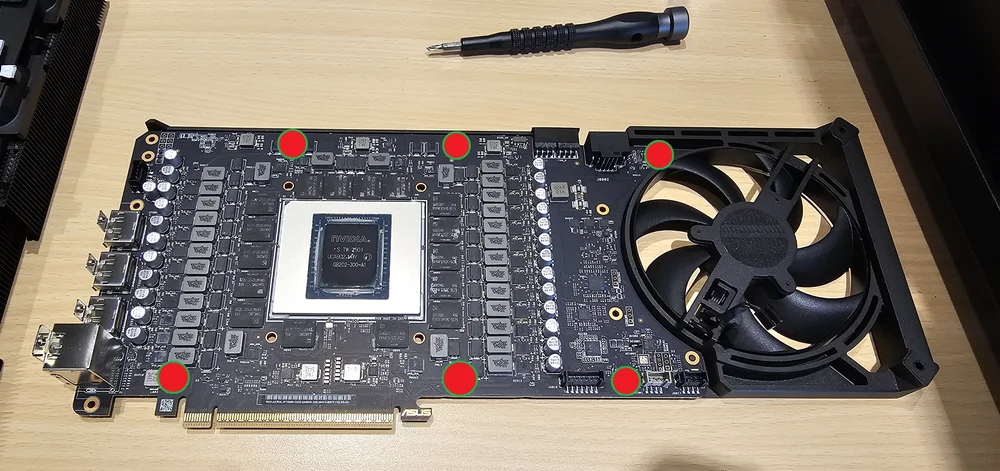
Step 6 - Remove 6 screws from the top
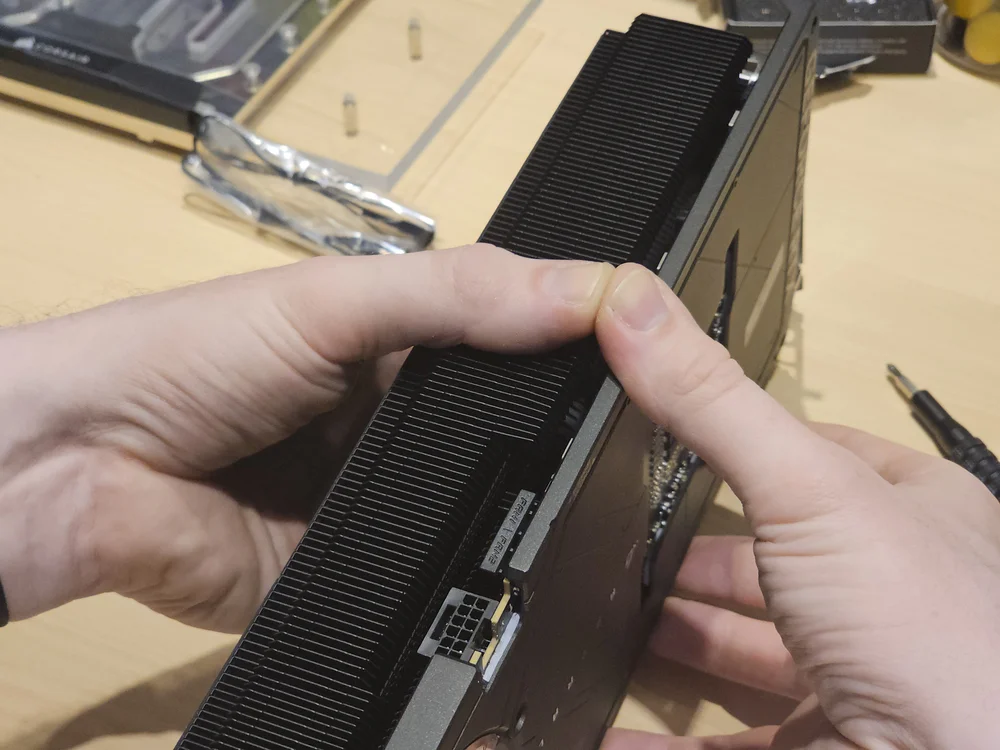
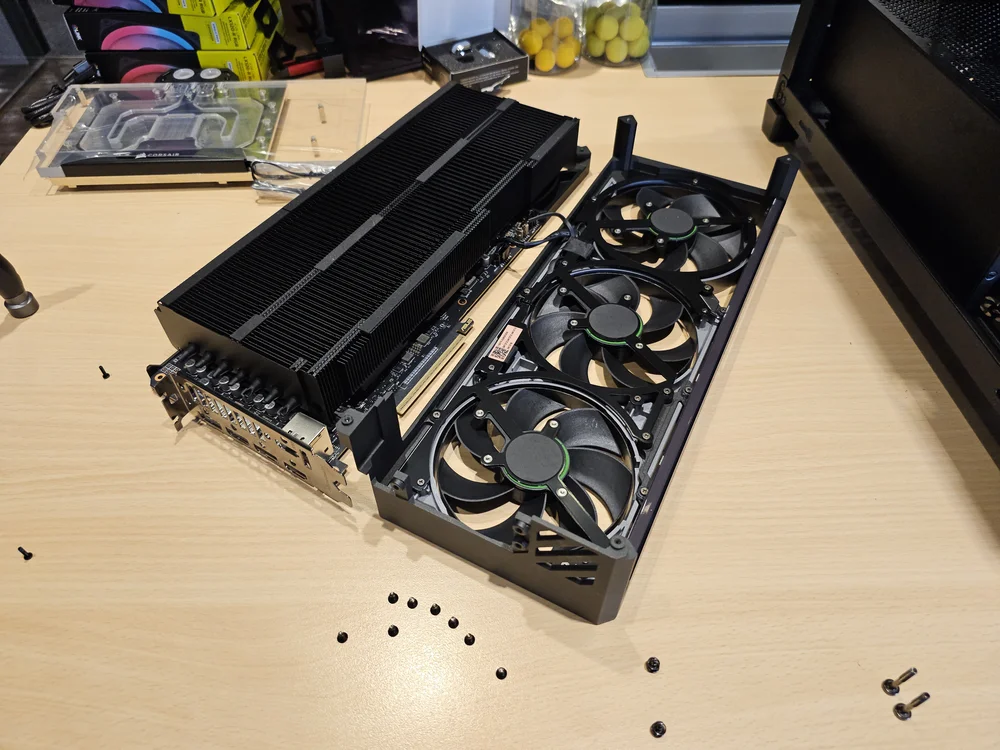
Step 7 - "Pry" the cooler and PCB from each other.
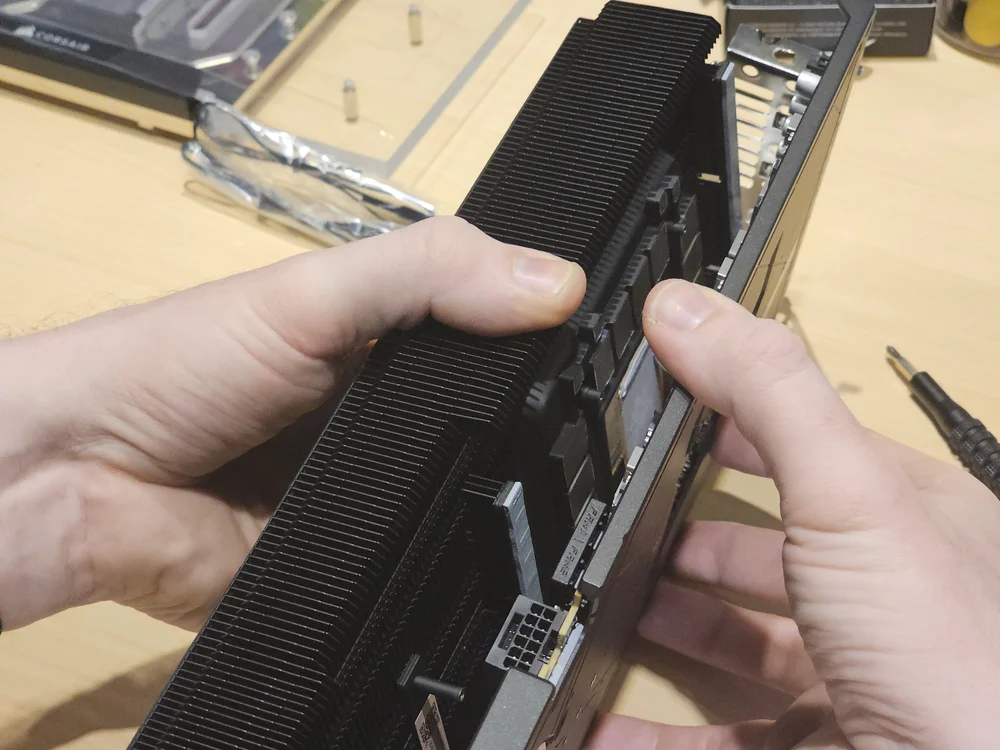
We find this easiest by using our thumbs as leverage (MAKE SURE all screws in the steps above have been removed, as you might otherwise damage your PCB)
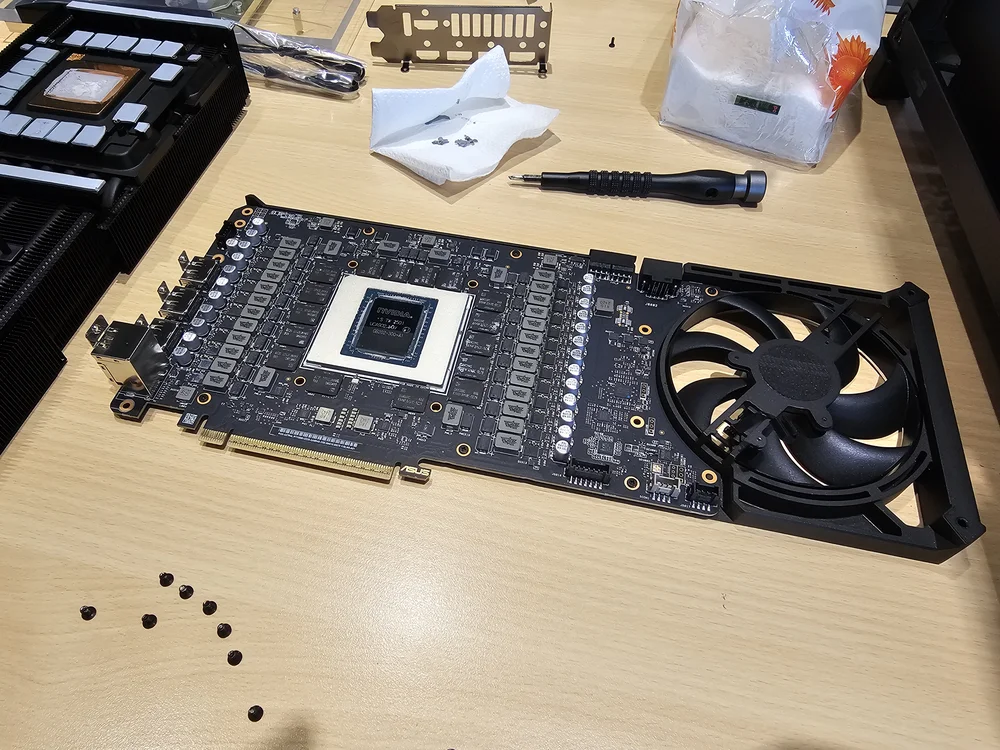
Step 8 - Remove any remaining thermal paste from the Die (the shiny square front and center)
If any thermal pads have stuck to the PCB side (the grey pads) then you want to move those to their place on the stock cooler (again, this will make reassembly much easier) you can use isopropyl alcohol to clean the die, but it comes off easily enough with a paper towel.
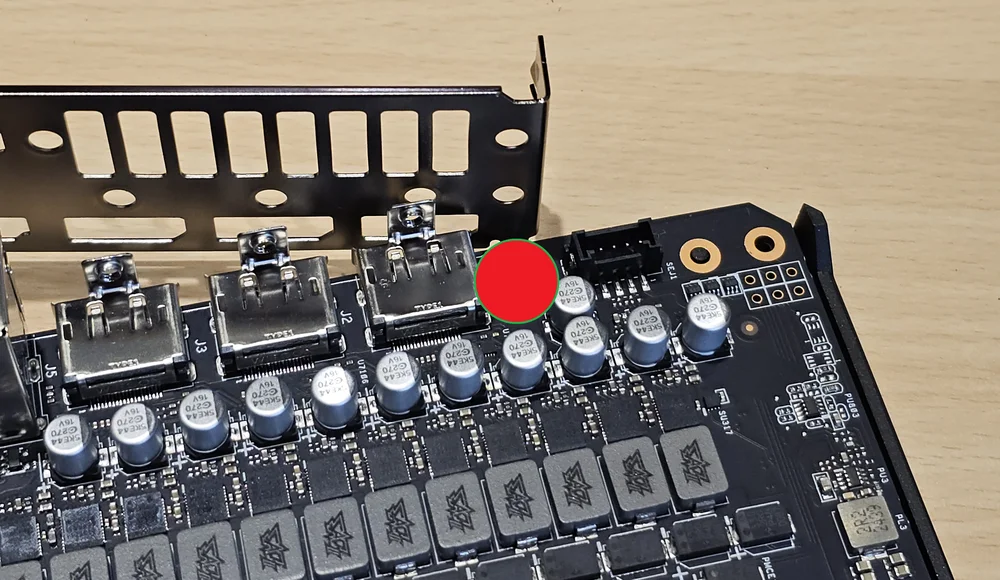
Step 9 - Remove the single screw holding the IO bracket to the backplate.
At this point you will notice that we have unscrewed the entire IO bracket, but if you have followed the previous steps, yours will still be screwed firmly into the display ports which is fine - leave it like that.
Step 10 - Remove the 6 small screws holding the backplate in place
Step 11 - You can now remove the backplate.
Again, make sure all thermal pads are in their original location on the backplate and that none are left on the PCB.
At this point, you should reassemble the stock cooler. It's the exact same process in reverse, just without the PCB in the middle.
Installing the water block
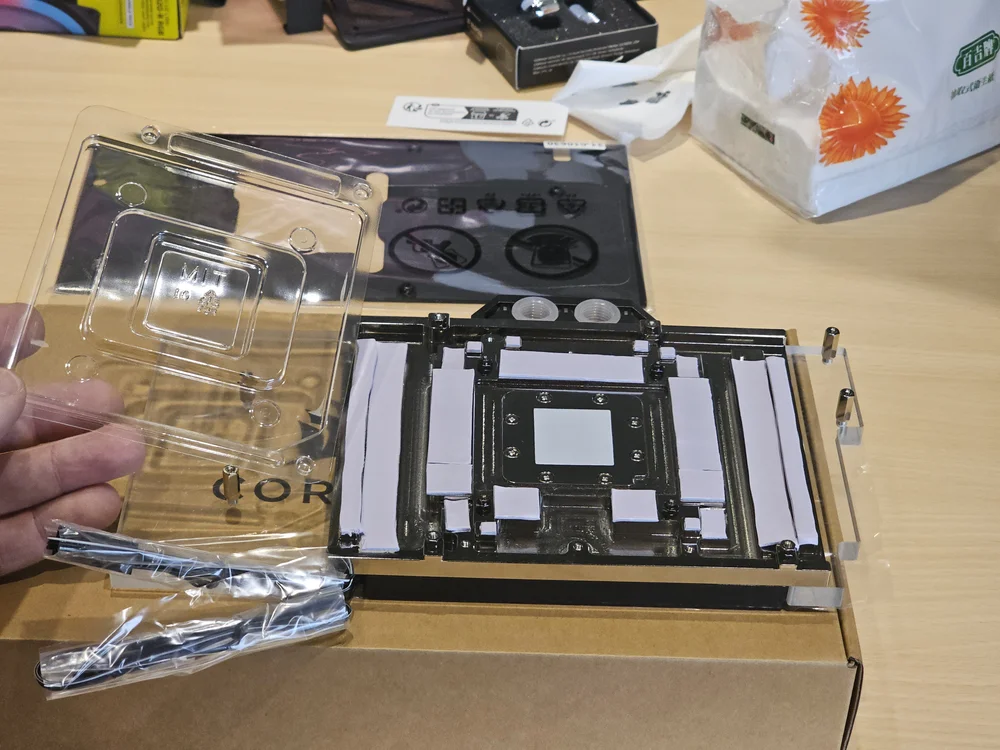
Step 12 - Lay the water block on the box like shown above and remove the protective plastic. You need to elevate the water block above the surface like this as the IO bracket will hang over the edge.
(Note that all Hydro X Series GPU Water Blocks come with pre-installed thermal pads and thermal paste. There is no need to replace these.)

Step 13 - Carefully lay the PCB on top of the water block while making sure the screw holes align with the posts on the water block
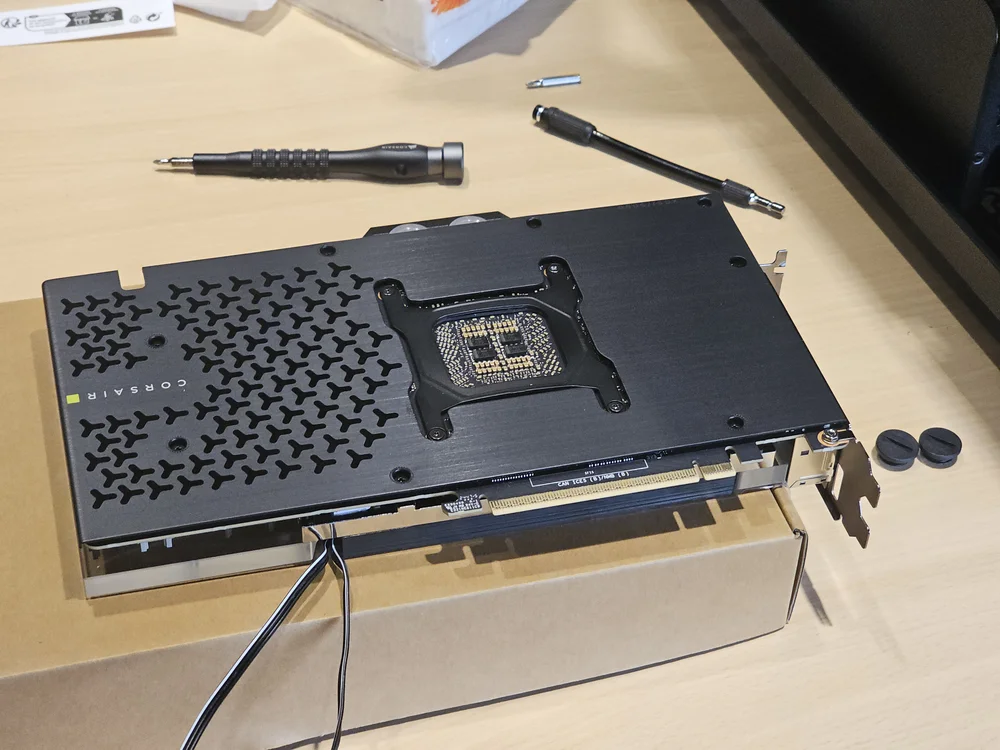
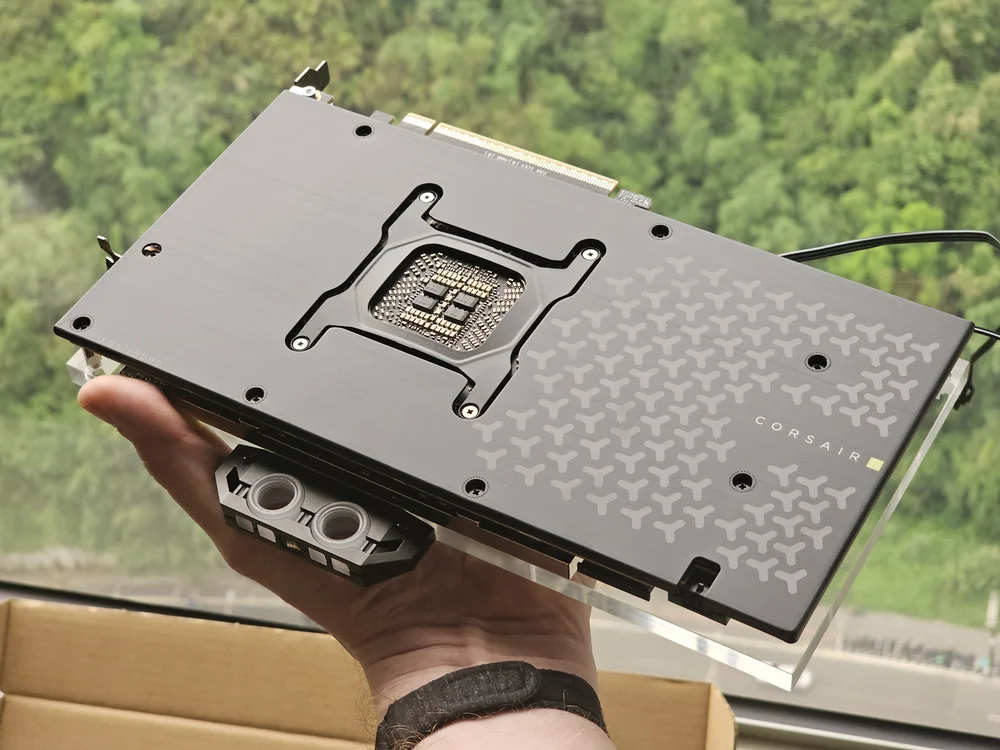
Step 14 - Put the backplate, and the tension bracket (the black H-shaped piece in the center) from the stock cooler onto the PCB and secure it using with the included screws
Please note that the screws on the tension bracket are not included in the box, and the original screws (which should be stuck on the bracket) must be used. Be careful not to cross thread these while installing.
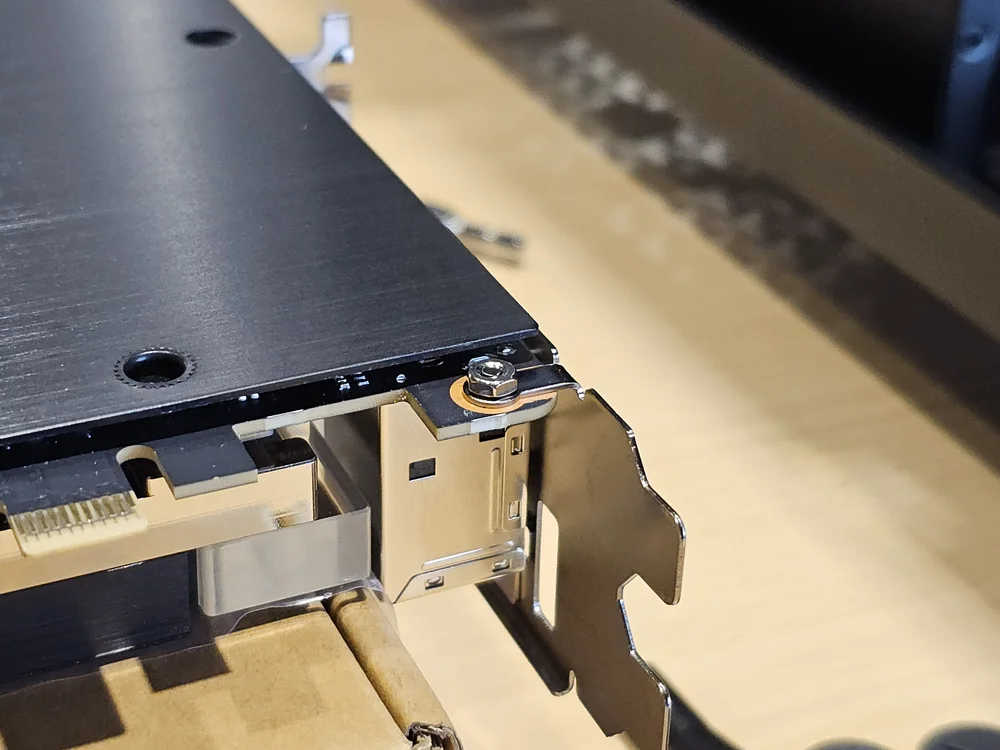
Step 15 - Secure the IO bracket with one of the included screws and the included nut.
Using the XG5 RGB 5090 ASTRAL GPU Water Block
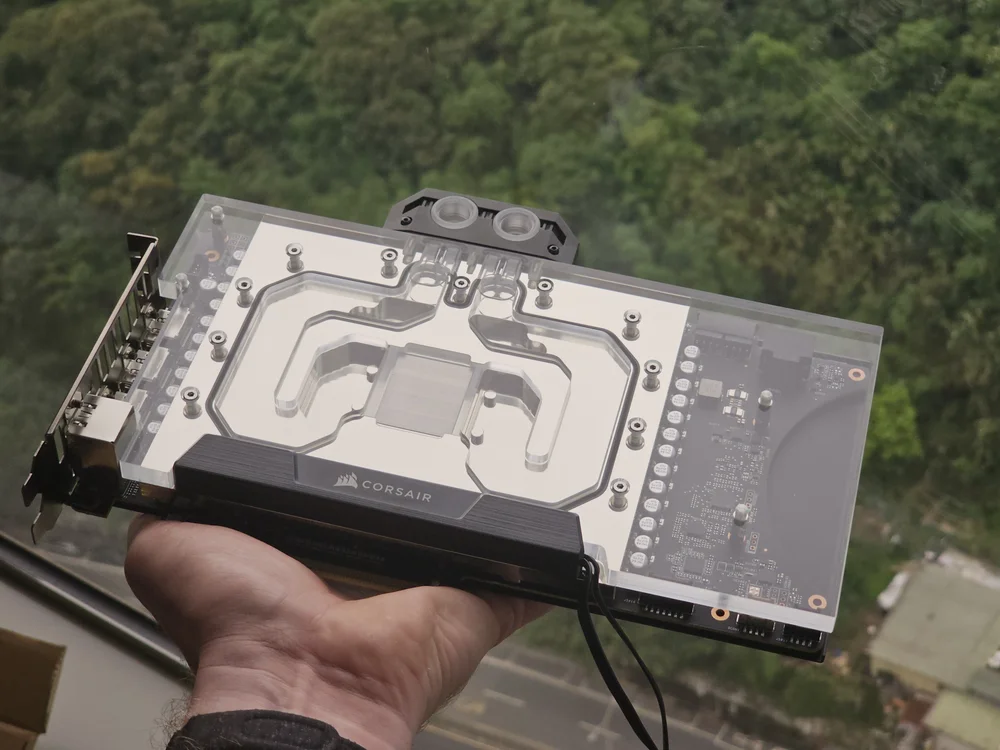
Congratulations You now have one of the coolest, and fastest graphics cards on the planet. This can now be installed into your water cooled system.
Note that there is no dedicated inlet or outlet on this water block. So you can plumb it into the loop in any direction you like.
PRODUKTY V ČLÁNKU
JOIN OUR OFFICIAL CORSAIR COMMUNITIES
Join our official CORSAIR Communities! Whether you're new or old to PC Building, have questions about our products, or want to chat about the latest PC, tech, and gaming trends, our community is the place for you.