MANUAL | QUICK START GUIDE
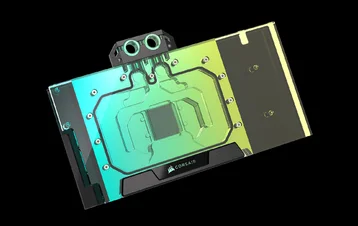
CORSAIR XG5 RGB 5090 ASTRAL
GPU WATER BLOCK
BEFORE YOU START
Please download the latest version of iCUE from www.corsair.com/downloads.
Learn more about the CORSAIR iCUE LINK System Hub.
Learn more about the CORSAIR COMMANDER DUO.
PACKAGE CONTENTS
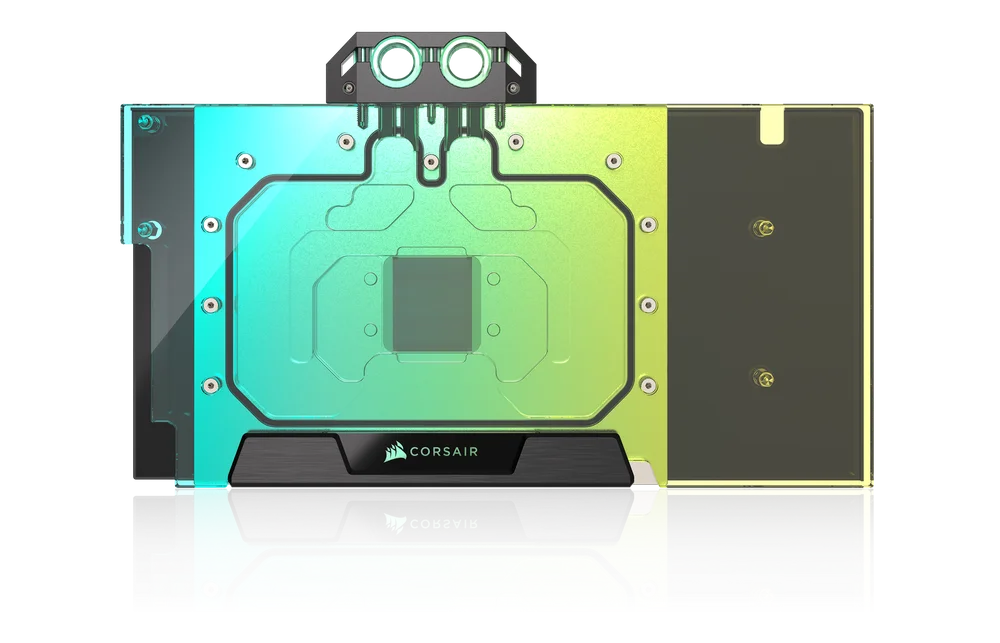
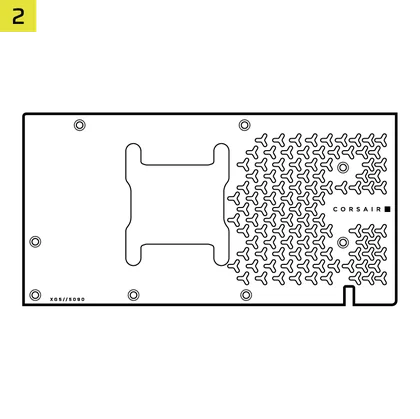
1x XG5 RGB Water Block with Pre-installed Thermal Material
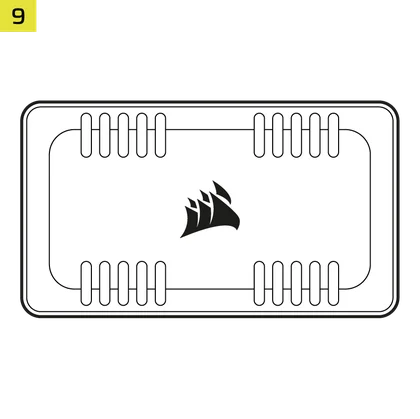
1x XG5 RGB Water Block Backplate

2x CORSAIR G1/4" Plugs

9x M2.5x5mm Screws

1x ARGB Motherboard Adapter Cable

1x iCUE LINK GPU RGB Adapter

1x Plug Tool

1x M2.5 Hex Nut
OPTIONAL CONTROLLERS AND SOFTWARE (NOT INCLUDED)
CORSAIR COMMANDER DUO
iCUE LINK System Hub
iCUE version 5 or Higher
Microsoft Windows 11 or Higher

REMOVAL OF THE ORIGINAL HEAT-SINK FAN ASSEMBLY
- Unscrew all fasteners attaching the original heatsink fan assembly to the graphics card circuit board. This typically includes:
– Heatsink with fan
– Backplate and/or front plate
– I/O bracket reinforcement - Disconnect all cables linking the heatsink fan assembly to the graphics card PCB, including fan and LED connections.
- Remove any thermal compound and pads from the GPU and PCB. Use isopropyl alcohol if necessary to ensure a clean surface.

WATER BLOCK INSTALLATION
- Remove the TIM protective cover and place the XG5 RGB Water Block on a suitable smooth surface, e.g. packaging box, with aesthetic cover and acrylic glass facing down. Place it so that the front of the water block slightly overhangs the box. This is to prevent the graphics cards' protruding I/O ports from interfering with installation.
- Align the holes and carefully place the bare graphics card onto the XG5 RGB Water Block with pre-installed thermal material.
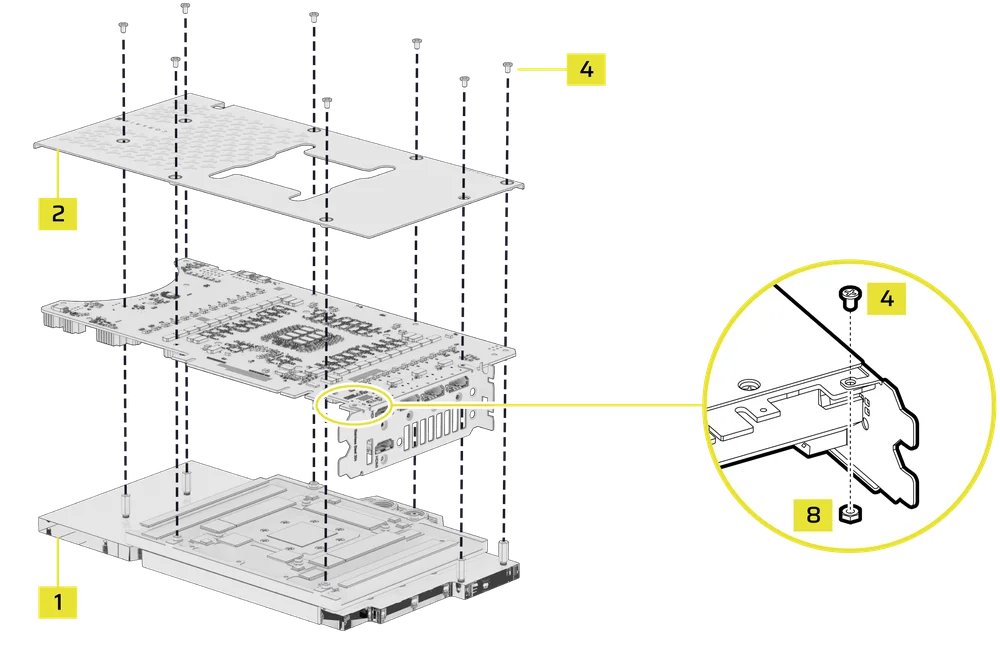
- Align the holes and carefully place the enclosed XG5 RGB backplate onto the graphics card and water block assembly.
- Secure the XG5 RGB Water Block assembly by fastening the enclosed M2.5x5 Screws (4) using a Phillips-head screwdriver.
- Some graphics cards, notably NVIDIA® GeForce RTX™ models, also require you to fasten the I/O bracket to the circuit board after the installation of an aftermarket cooler. Secure this bracket by using the enclosed M2.5x5 Screws (4) and a M2.5 Hex Nuts (8).
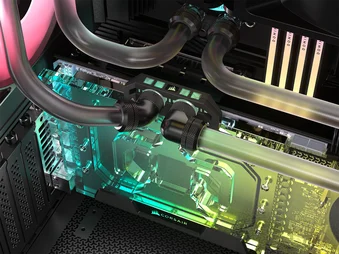
FITTING AND TUBING INSTALLATION
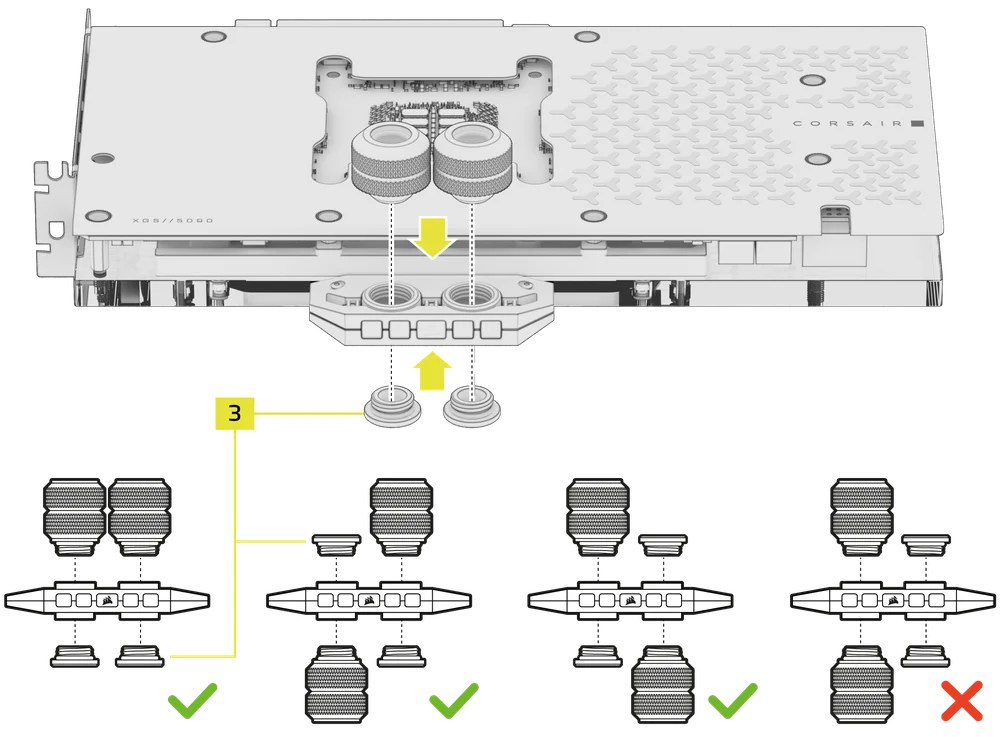
- Install the two appropriate CORSAIR XF G1/4" BSPP threaded-type fittings (not included) into the water block ports and tighten them by hand. Do not use any tools to tighten (i.e. pliers). Use one port as inlet and the other as the outlet. Do not use one side for both inlet and outlet, as this will result in fluid bypassing the water block.
- Close the remaining two open (unused) ports with the included CORSAIR G1/4" Plugs (3) and tighten them using the included plug tool (7). Avoid using a screwdriver as it may result in damage to the surface of the plugs.
- Install appropriate tubing for your CORSAIR XF compression-fitting type and secure it using the locking ring to finalize the adding of the water block to the water-cooling loop. Use the appropriate securing method when using fittings other than compression fittings.
- Always leak test the system before powering on your PC.
CONNECTING RGB ILLUMINATION
A) CONNECTING RGB ILLUMINATION USING INTEGRATED CORSAIR RGB CONNECTOR
Connect the XG5 RGB Water Block directly or daisy chain it with other CORSAIR Hydro X Series products with addressable RGB lighting.
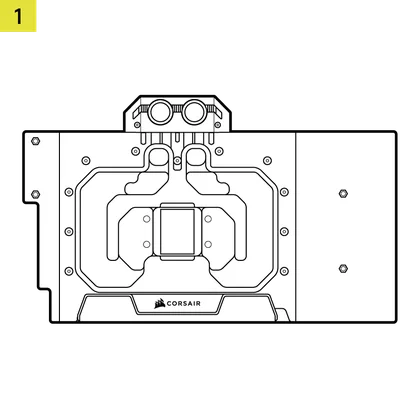
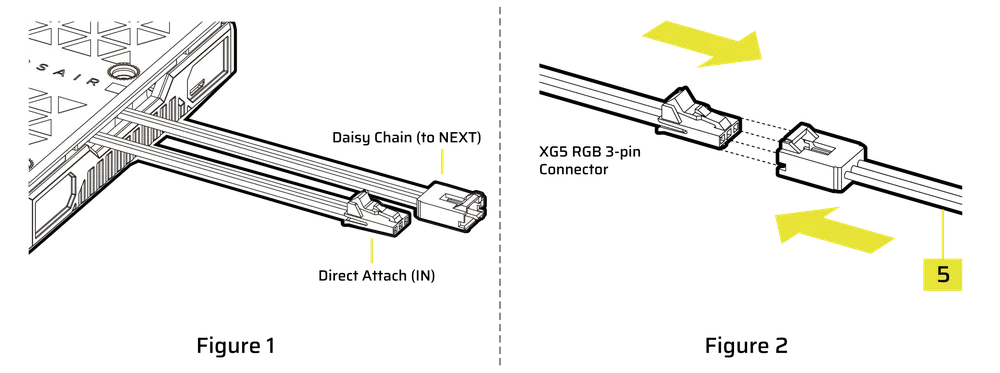
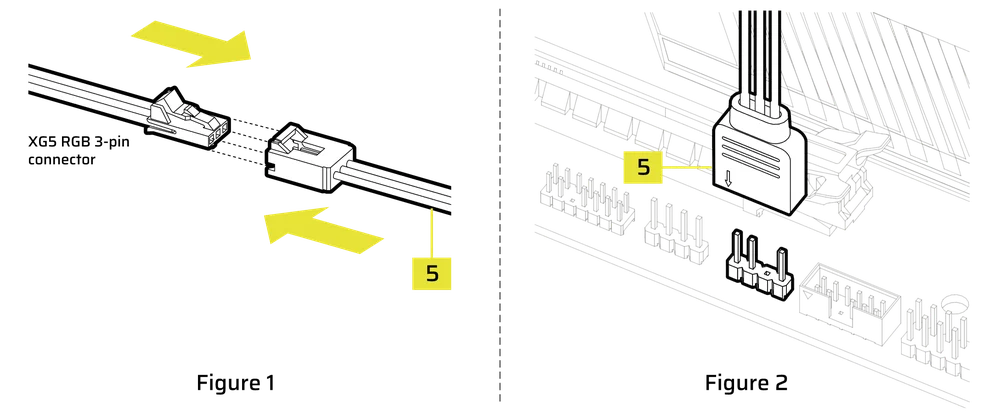
- Identify the correct RGB connector on the water block (Figure 1).
- Connect the 3-pin RGB connector from your CORSAIR GPU water block into the ARGB Motherboard Adapter Cable (5) male connector (Figure 2).
- Plug the 3-pin female connector of the ARGB Motherboard Adapter Cable (5) into the CORSAIR COMMANDER DUO (9).
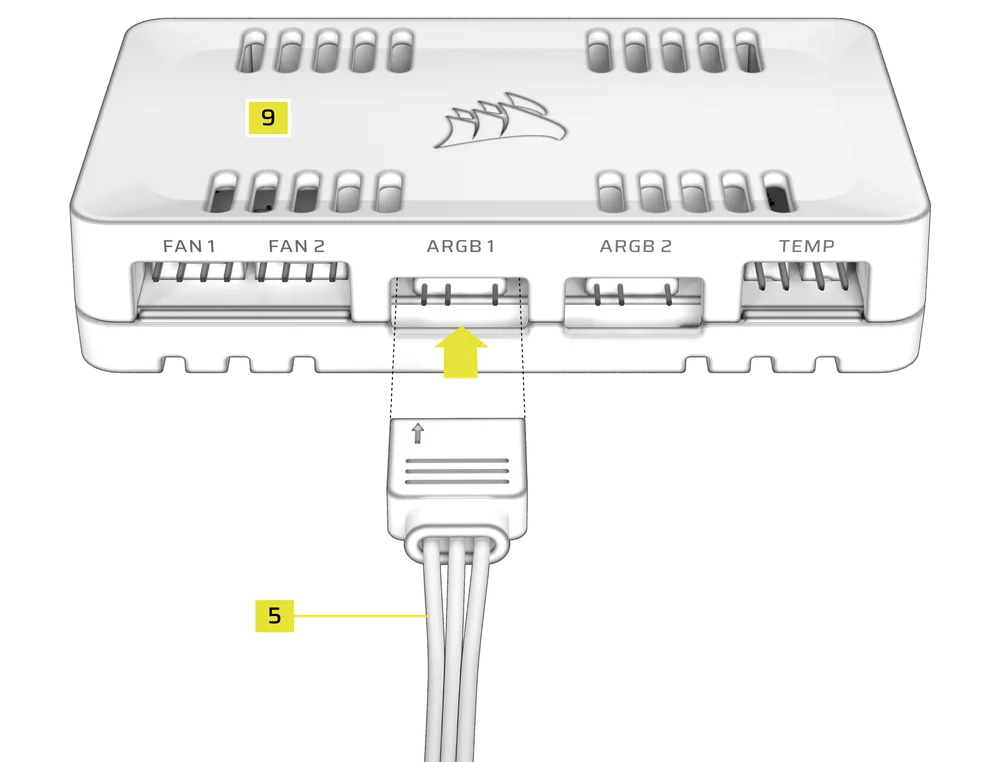
Refer to the COMMANDER DUO Quickstart Guide for usage instructions.
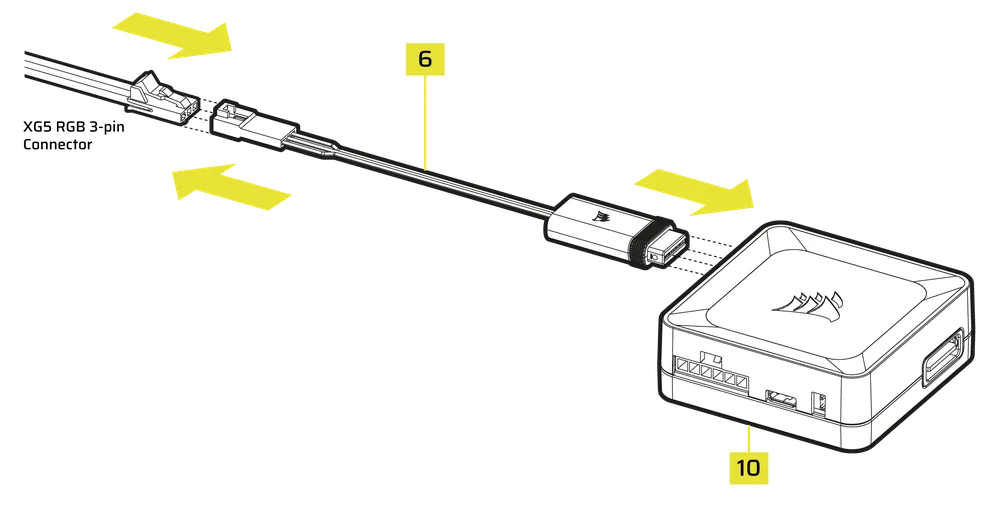
B) CONNECTING RGB ILLUMINATION USING iCUE LINK ADAPTER
- Plug the 3-pin RGB connector from your CORSAIR GPU water block into the corresponding 3-pin connector on the iCUE LINK RGB LED Adapter (6). (Note: This adapter is not compatible with non-CORSAIR GPU water blocks, as they lack the necessary 3-pin RGB connectors.)
- Insert the iCUE LINK connector from the iCUE LINK GPU RGB Adapter (6) into an available port on your iCUE LINK System Hub (10). Alternatively, connect it anywhere along your existing iCUE LINK setup, either directly or via a 4-way Signal Splitter.
C) CONNECTING RGB ILLUMINATION USING AN ARGB ADAPTER
- Connect the 3-pin RGB male connector from your CORSAIR GPU water block into the ARGB Motherboard Adapter Cable (5) female connector (Figure 1).
- Connect the ARGB Motherboard Adapter Cable (5) female connector into the Digital RGB header on the motherboard. Make sure the arrow on the ARGB Motherboard Adapter Cable (5) is plugged into +5V on the motherboard (Figure 2).
Please refer to your motherboard’s ARGB software instructions for lighting control.
SOFTWARE SETUP
1. INSTALL AND UPDATE iCUE
- Download and install the latest version of iCUE from www.corsair.com/downloads
- After installing iCUE, launch the software. Depending on your connection type, the COMMANDER DUO or the iCUE LINK GPU RGB will be shown in the iCUE interface. If the COMMANDER DUO is set to LINK Mode, iCUE will also list all connected devices.
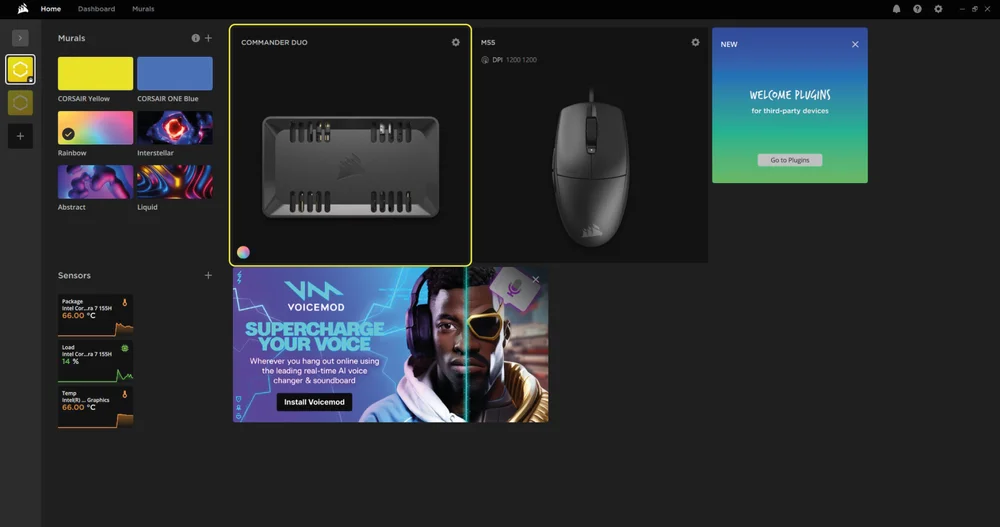
COMMANDER DUO tile shown in iCUE

iCUE LINK GPU RGB tile shown in iCUE
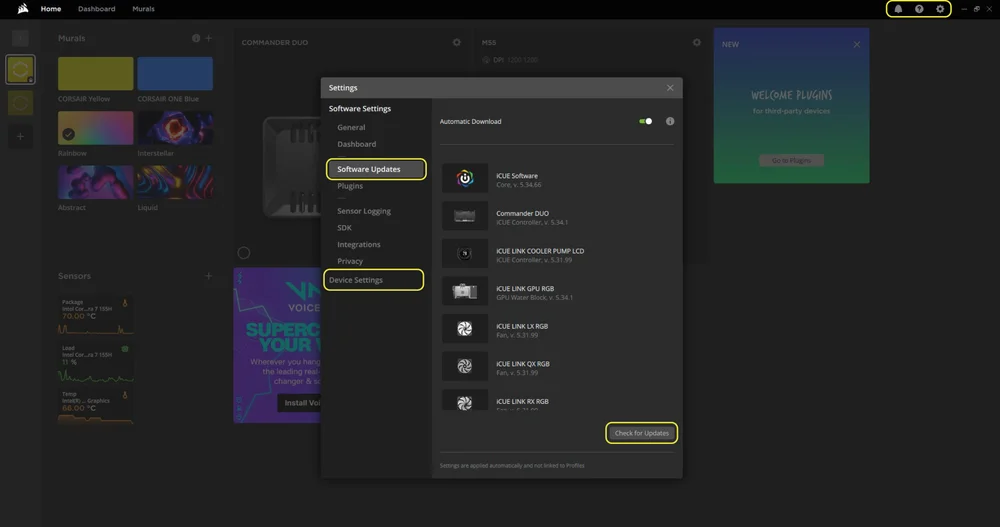
2. CHECK FOR UPDATES
If any connected devices require a firmware update, a notification will appear in the top right corner. Click the settings icon (cog wheel in the top right corner) to check for software updates manually. To update the firmware, click “Device Settings” from the same menu.
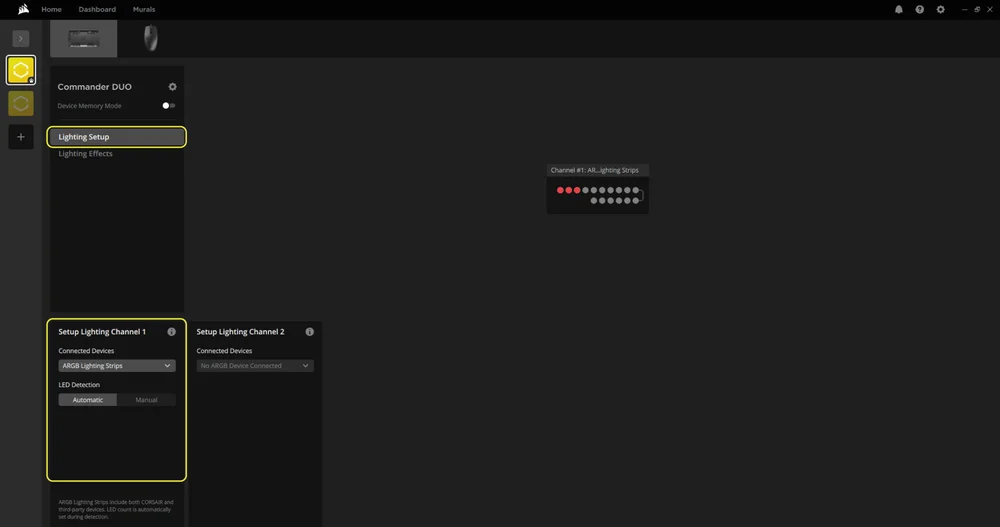
3. LIGHTING SETUP
The Lighting Setup page shows devices connected to the COMMANDER DUO's ARGB headers. Each header (channel) displays one device icon.
- Select "Lighting Setup" in the main menu on the left.
- Use the dropdown menu in the bottom panel to choose the connected device type. XG5 RGB defaults to ARGB Lighting Strips.
- LED Detection defaults to Automatic. You can switch to Manual and enter the LED count if needed.
4. LIGHTING EFFECTS
Choose which lighting effect will be displayed when the iCUE software is running:
- Select "Lighting Effects" in the main menu on the left.
- Select the desired lighting effect.
- Click the "+" icon in the "Lighting Layers" panel to add additional lighting effects.
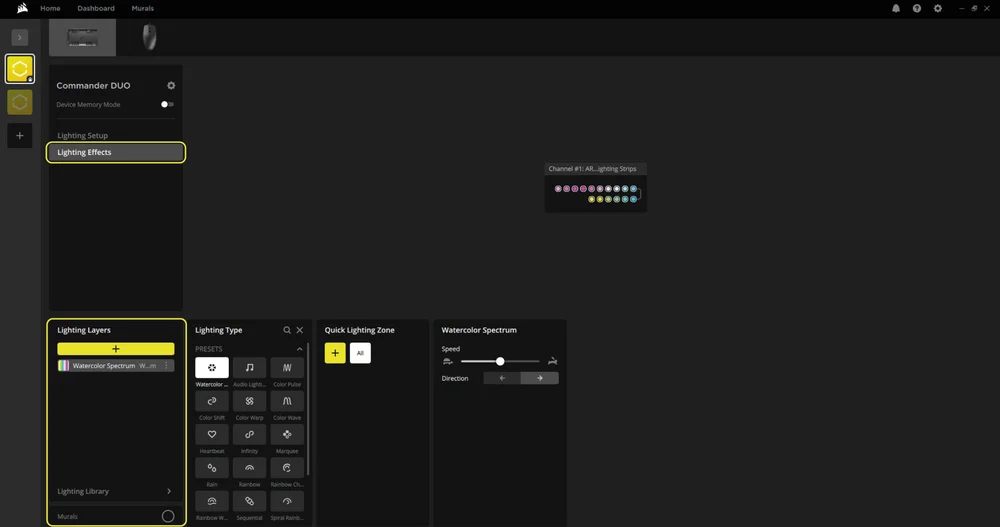
Lighting Effects page for the XG5 RGB when connected to COMMANDER DUO
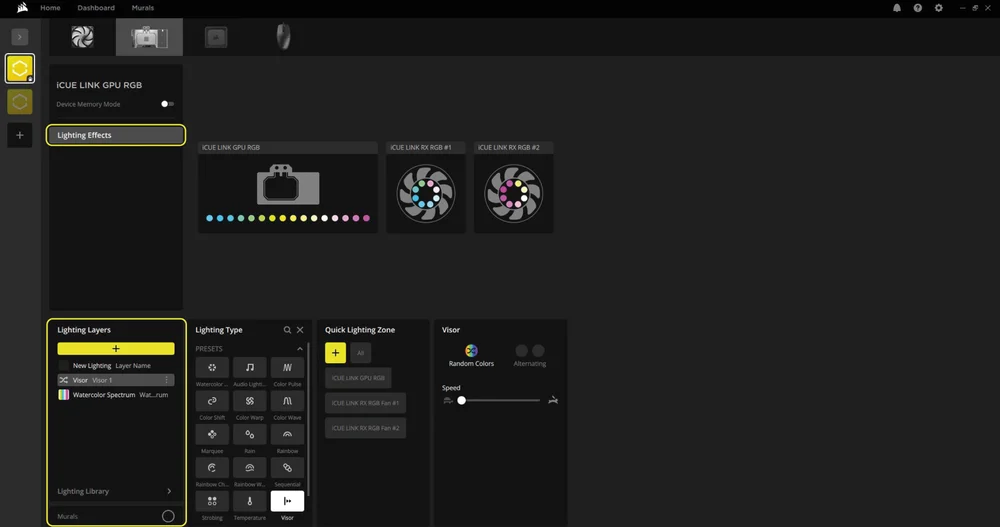
Lighting Effects settings for XG5 RGB when connect to iCUE LINK System Hub
5. DEVICE MEMORY MODE
Choose which lighting effect will be displayed when iCUE software is not running - usually during computer startup:
- Select "Lighting Effects" in the main menu on the left.
- Toggle the Device Memory Mode by clicking on the button.
- Select the desired lighting effect by clicking on one of the available options in the "Lighting Type" panel and click on the save icon.
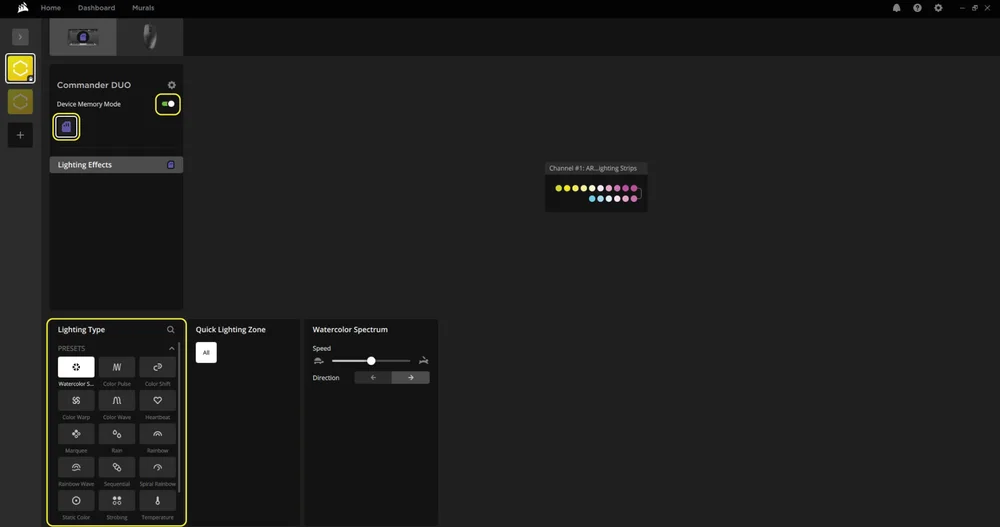
Device Memory Mode for the XG5 RGB when connected to COMMANDER DUO

Device Memory Mode settings page for XG5 RGB when connect to iCUE LINK System Hub
FREQUENTLY ASKED QUESTIONS
Is the XG5 RGB Water Block compatible with my graphics card?
The support varies from model to model. Please consult the GPU compatibility checker for an up-to-date list of supported models prior to installation.
Can I use the XG7 RGB Water Block as a standalone part?
No, this is a water block for your graphics card which requires a complete custom water-cooling system, including standalone pump and radiator. For more information, please visit www.corsair.com.
Can I use the XG5 RGB Water Block with aluminium water-cooling equipment?
No, you cannot. The cold plate is made from nickel-plated copper and should not be mixed with aluminium in a custom cooling system.
Is the flow orientation important?
No. The XG5 RGB performs well with flow in either direction.
Can I reuse the pre-applied thermal paste on XG5 RGB Water Block for re-installation?
Re-installation of the XG5 RGB water block will require you to clean off the pre-applied thermal paste and apply a new layer of thermal paste. We recommend using CORSAIR XTM70, sold separately. However, the thermal pads should be reused.
Can I connect the RGB header directly to my motherboard?
Yes you can, using the included ARGB ADAPTER CABLE. See the section: CONNECTING RGB ILLUMINATION USING AN ARGB ADAPTER.
How many RGB devices can I daisy-chain to a single channel on a CORSAIR controller?
If you are connecting to a COMMANDER DUO, please note that each ARGB header supports up to 50 LEDs. For example, you can connect up to three XG5 GPU water blocks on the same header. If you are connecting to an iCUE LINK System Hub, please note that each port supports up to 12 iCUE LINK devices. For best results, we recommend connecting CORSAIR ARGB fans and Hydro X GPU water blocks to different ARGB headers on the COMMANDER DUO.
WARRANTY

CORSAIR HYDRO X Series products (CPU and GPU blocks, Pumps and Radiators) have a 3-year warranty.
LEGAL
© 2025 CORSAIR MEMORY, Inc. All rights reserved. CORSAIR, the sails logo, and HYDRO X SERIES are registered trademarks of CORSAIR in the United States and/or other countries. All other trademarks are the property of their respective owners. Products may vary slightly from those pictured.
RELATED CONTENT