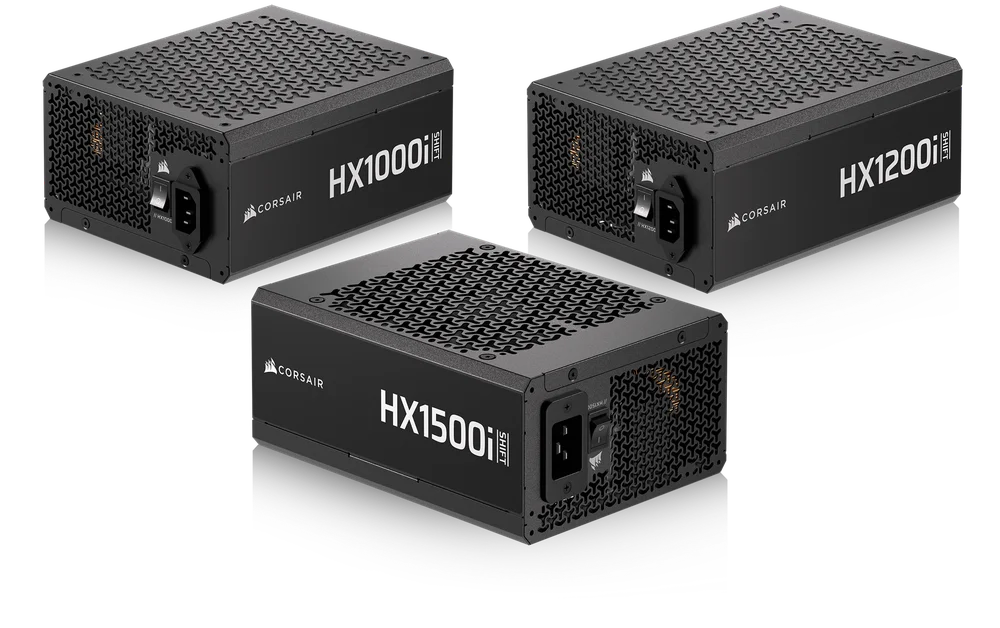
MANUAL | QUICK START GUIDE
CORSAIR HXi SHIFT SERIES
HIGH PERFORMANCE ATX POWER SUPPLIES WITH BUILT-IN iCUE LINK SYSTEM HUB
SAFETY AND PROTECTION
OVER-VOLTAGE PROTECTION (OVP)
Over-voltage protection for the 12V, 5V, and 3.3V DC outputs is required to comply with the ATX specification. OVP shuts down the PSU in the event that the DC outputs exceed a set level, determined by the PSU manufacturer.
OVER-CURRENT PROTECTION (OCP)
OCP is featured on the 3.3V, 5V, and 12V rails. OCP ensures that the output of the DC voltage rails remains within safe operating limits.
OVER-TEMPERATURE PROTECTION (OTP)
OTP ensures that the PSU will shut down when the internal temperature reaches a set point. This is usually as a result of internal current overloading or a fan failure.
SHORT-CIRCUIT PROTECTION (SCP)
A short-circuit is defined as any output impedance of less than 0.1 ohms. Amongst other things, SCP ensures that the PSU shuts down should the 3.3V, 5V, and 12V rails short to any other rail, or to ground. It also ensures that no damage should occur to the unit, or your PC’s components in the event of a short.
OVER-POWER PROTECTION (OPP)
Over-power protection shuts off the PSU when the power drawn is between 115% and 135% of the rated power.
INCLUDED CABLES
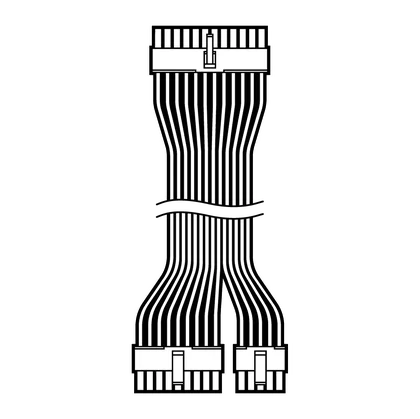
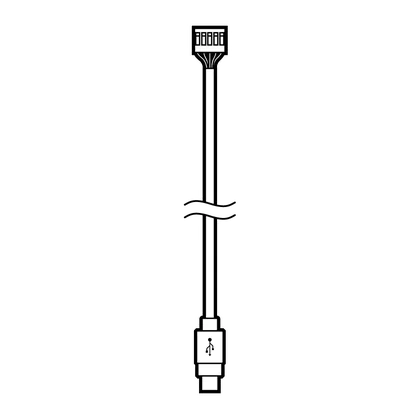
1x ATX Motherboard (24-pin) Cable
610mm (± 10mm)
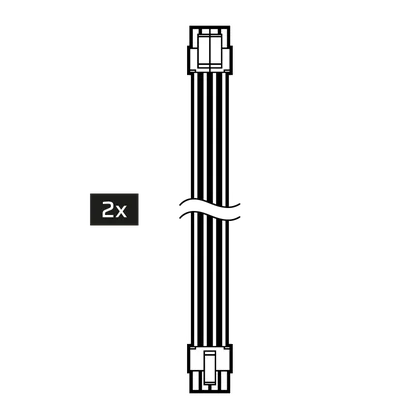
2x ATX12V / EPS12V (4+4-pin) Cable
650mm (± 10mm)
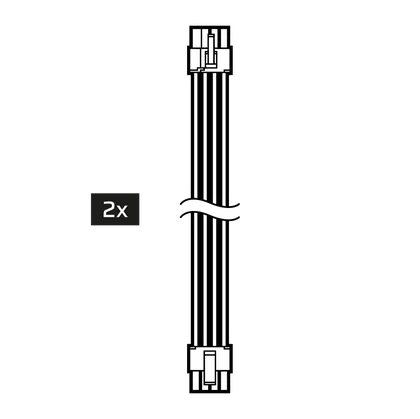
2x 8-pin PCIe (6+2-pin) Cable
650mm (± 10mm)
1x 90° 12V-2x6 to 2x 8-pin PCIe
(6+2-pin) Cable
(2x with HX1500i SHIFT)
650mm (± 10mm)

1x 90° 12V-2x6 to 600W 12V-2x6
(12+4-pin) Cable
(2x with HX1500i SHIFT)
650mm (± 10mm)
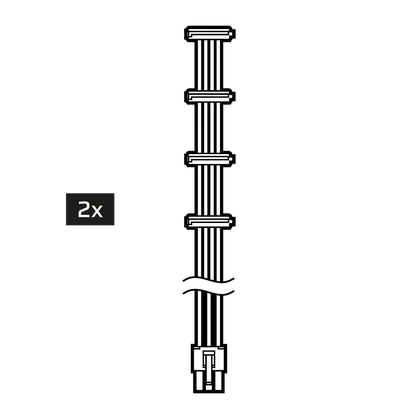
2x 4 SATA Cable
(3x with HX1500i SHIFT)
800mm (± 10mm)
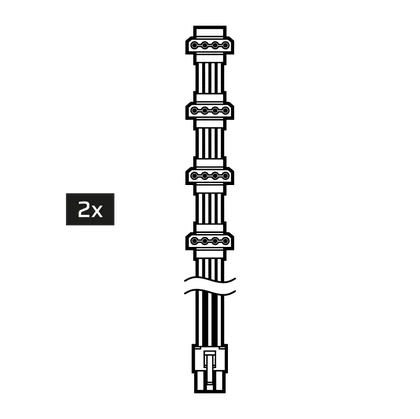
2x 4 PATA Cable
750mm (± 10mm)
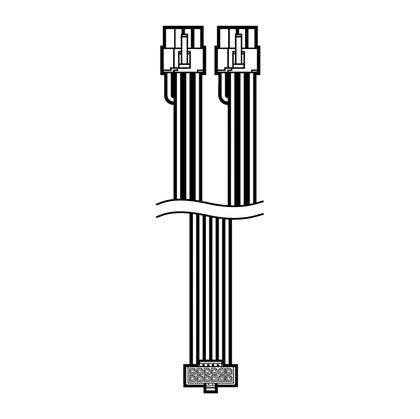
1x USB (Type-C to USB 10-pin header) Cable
525mm (± 25mm)
1x iCUE LINK to 90° iCUE LINK Cable
200mm (± 25mm)
1x iCUE LINK to iCUE LINK cable
600mm (± 25mm)

HX1000i SHIFT
|
Height |
86mm |
|
Width |
150mm |
|
Length |
180mm |
| CORSAIR HX1000i SHIFT POWER TABLE | MAX LOAD | MAX OUTPUT | |||
| MODEL | RPS0195 | +3.3V | 25A | 150W | |
| PART NO. | 75-005795 | +5V | 25A | ||
| AC INPUT RATING |
100V–240V a.c. |
+12V | 83.3A | 1000W | |
| INPUT CURRENT |
13A–6.5A |
+5Vsb | 3A | 15W | |
| FREQUENCY | 47Hz–63Hz | ||||
| TOTAL POWER: 1000W | |||||
HX1000i SHIFT EFFICIENCY

HX1000i SHIFT FAN NOISE CURVE

HX1200i SHIFT
|
Height |
86mm |
|
Width |
150mm |
|
Length |
200mm |
| CORSAIR HX1200i SHIFT POWER TABLE | MAX LOAD | MAX OUTPUT | |||
| MODEL | RPS0194 | +3.3V | 25A | 150W | |
| PART NO. | 75-005790 | +5V | 25A | ||
| AC INPUT RATING |
100V–240V a.c. |
+12V | 100A | 1200W | |
| INPUT CURRENT |
15A–7.5A |
+5Vsb | 3A | 15W | |
| FREQUENCY | 47Hz–63Hz | ||||
| TOTAL POWER: 1200W | |||||
HX1200i SHIFT EFFICIENCY

HX1200i SHIFT FAN NOISE CURVE

HX1500i SHIFT
|
Height |
86mm |
|
Width |
150mm |
|
Length |
200mm |
| CORSAIR HX1500i SHIFT POWER TABLE | MAX LOAD | MAX OUTPUT | |||
| MODEL | RPS0196 | +3.3V | 25A | 150W | |
| PART NO. | 75-005797 | 75-005796 | +5V | 25A | |
| AC INPUT RATING |
100V–240V a.c. |
200V–240V a.c. |
+12V | 125A | 1500W |
| INPUT CURRENT |
15A–9A |
10A |
+5Vsb | 3.5A | 17.5W |
| FREQUENCY | 47Hz–63Hz | ||||
| TOTAL POWER: 1500W (115V - 240V a.c.) / 1200W (100V - 115V a.c.) | |||||
HX1500i SHIFT EFFICIENCY

HX1500i SHIFT FAN NOISE CURVE

INSTALLING YOUR NEW HXi SHIFT SERIES POWER SUPPLY
STEP 1: REMOVING YOUR EXISTING POWER SUPPLY
If you are building a new system, skip to Step 2.
- Disconnect the AC power cord from your wall outlet or UPS and from the existing power supply.
- Disconnect all the power cables from your video card, motherboard and all other peripherals.
- Follow the directions in your chassis manual and uninstall your existing PSU.
- Proceed to Step 2.
STEP 2: INSTALLING THE NEW POWER SUPPLY
- Make sure the power supply’s AC power cable is not connected.
- Follow the directions in your chassis manual and install the power supply with the screws provided.
- Connect the 24-pin (ATX12V) cable to the motherboard.
- Connect the 4+4-pin +12V (EPS12V) cable to the motherboard's EPS socket:

Connect the 8-pin end to the PSU.
If your motherboard has an 8-pin EPS socket, connect the 4+4-pin EPS12V cable directly to your motherboard.

If your motherboard has a 4-pin EPS socket, detach the 4-pin from the 4+4-pin EPS12V cable, and then plug this 4-pin cable directly to your motherboard.
Some motherboards will require a mix of 8+4 pins, use as many EPS12V cables as necessary and do not mistake them for PCIe cables.
- Connect the peripheral cables to any peripherals requiring a 4-pin connector.


Connect the 6-pin end to the PSU.
Connect the 4-pin end to the device.
- Connect the SATA cables to your SATA SSD or hard drives.
Connect the 6-pin end to the PSU.
Connect the SATA connector to the device.
- Connect the PCIe cables to the power connector of your PCIe devices:
Connect the 8-pin end to the PSU.
Connect the 8-pin (6+2-pin) connector to your device. If your device uses a 6-pin connector, detach the 2-pin segment from the 6+2 connector and connect only the 6-pin portion.
GPUs with 8-pin or 6-pin power sockets
- Connect the 12V-2x6 to dual 8-pin PCIe cable to your GPU:

Connect the 90° 12V-2x6-pin end to the PSU.
Connect the 8-pin (6+2-pin) connector to your GPU. If your GPU uses a 6-pin connector, detach the 2-pin segment from the 6+2 connector and connect only the 6-pin portion.
GPUs with 12-pin (2x6-pin) power sockets
- Connect the 90° 12V-2x6 to 600W 12V-2x6 (12+4-pin) cable to your GPU:
Connect the 90° 12V-2x6-pin end to the PSU.
Connect the straight 12V-2x6-pin end to the GPU.
INSTALLING iCUE LINK DEVICES
The HXi SHIFT Series power supplies include a built-in iCUE LINK System Hub, so you can connect iCUE LINK devices directly to the power supply without needing a System Hub. You can connect any compatible device directly to the HXi SHIFT power supply using either iCUE LINK port.
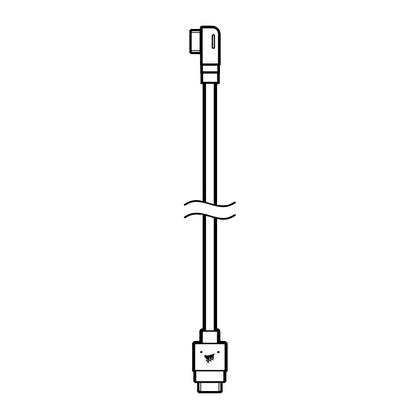
- If you are using an iCUE LINK CPU Cooler, connect the 2-pin, 1-wire tach cable (1) to your HXi SHIFT Power Supply. Connect the 3-pin connector into the CPU_FAN header on the motherboard.
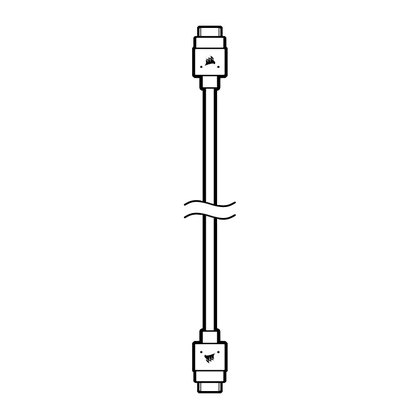
- Connect your iCUE LINK devices to the HXi SHIFT Power Supply using the provided iCUE LINK cables (2). Use either of the two iCUE LINK ports for this connection.
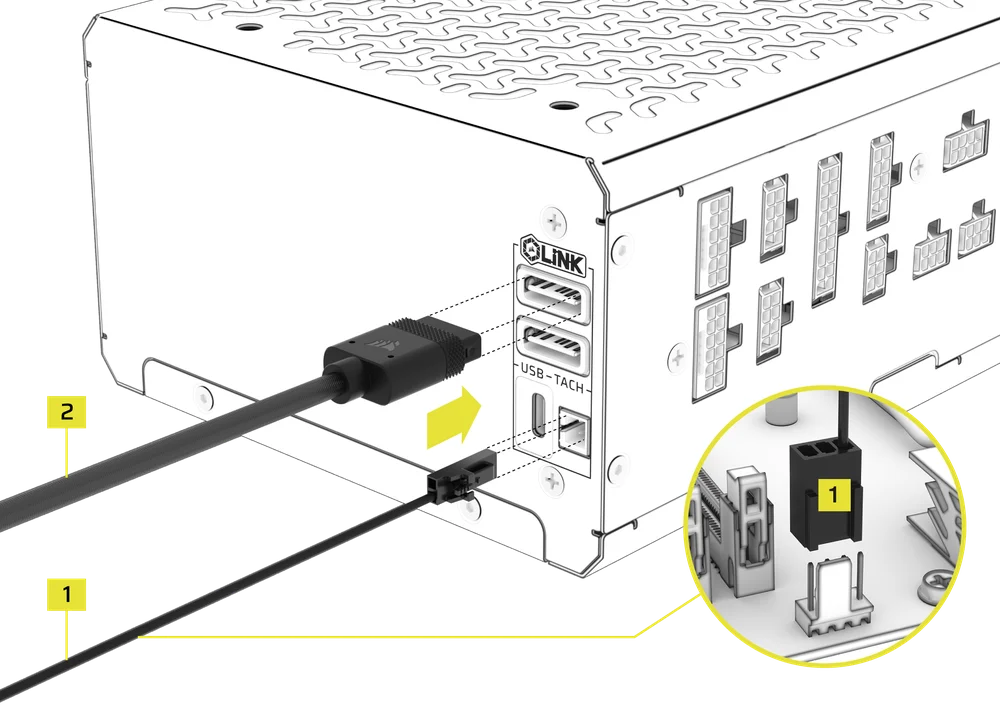
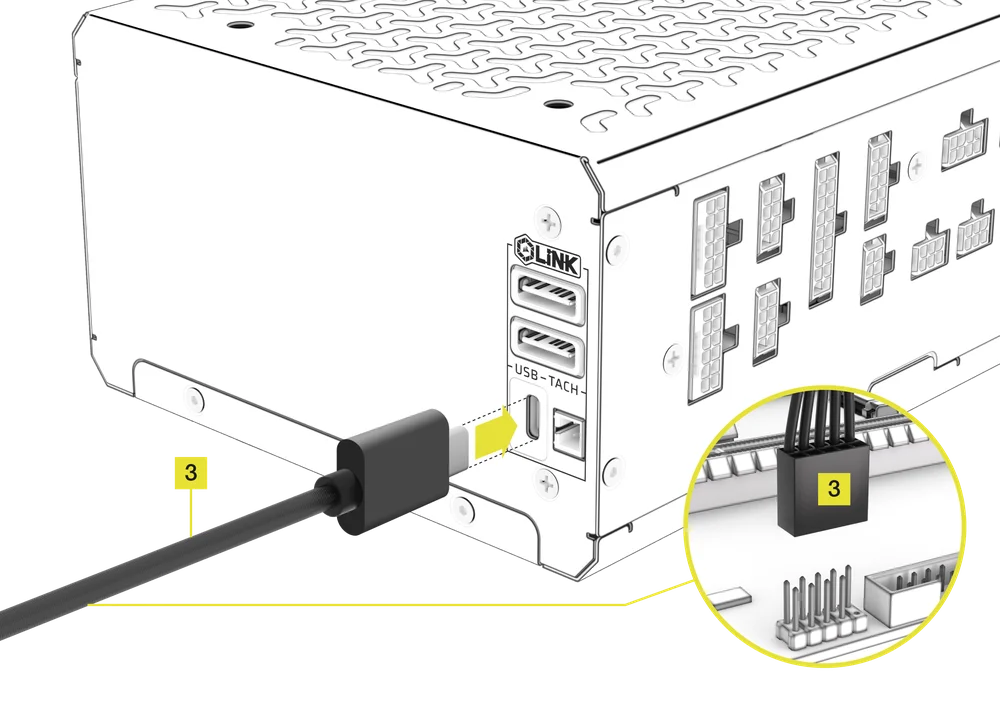
- Connect the included USB (Type-C to USB 10-pin header) Cable (3) to the power supply and the motherboard.
CONNECTING TO POWER
- Connect the AC power cord to the PSU and turn it on by pushing the switch to the ON position (marked with “I”).
iCUE SETUP
The HXi SHIFT power supply boasts a range of connectivity options for any system. Users can take advantage of CORSAIR’s robust iCUE software to monitor power settings, toggle between single to multi-rail overcurrent protection (OCP) on-the-fly, or create custom fan profiles.
1. INSTALL iCUE SOFTWARE
- Download and install the latest version of iCUE from www.corsair.com/downloads
2. UPDATE iCUE SOFTWARE
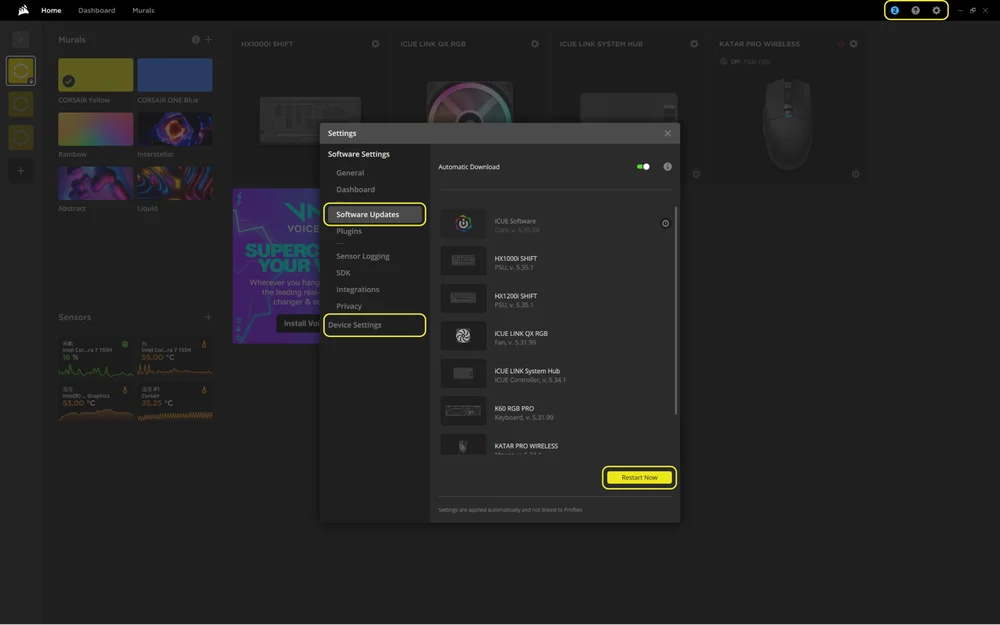
- Once iCUE is installed, run the software. The HXi SHIFT PSU thumbnail will appear in the iCUE interface.
- If any of the connected devices need a firmware update, you will be prompted to perform an update via a notification in the top right corner. You can also click the settings (cog wheel icon in the top right corner) and check for software and firmware updates manually.
- Click the “Restart Now” button to complete the update process.
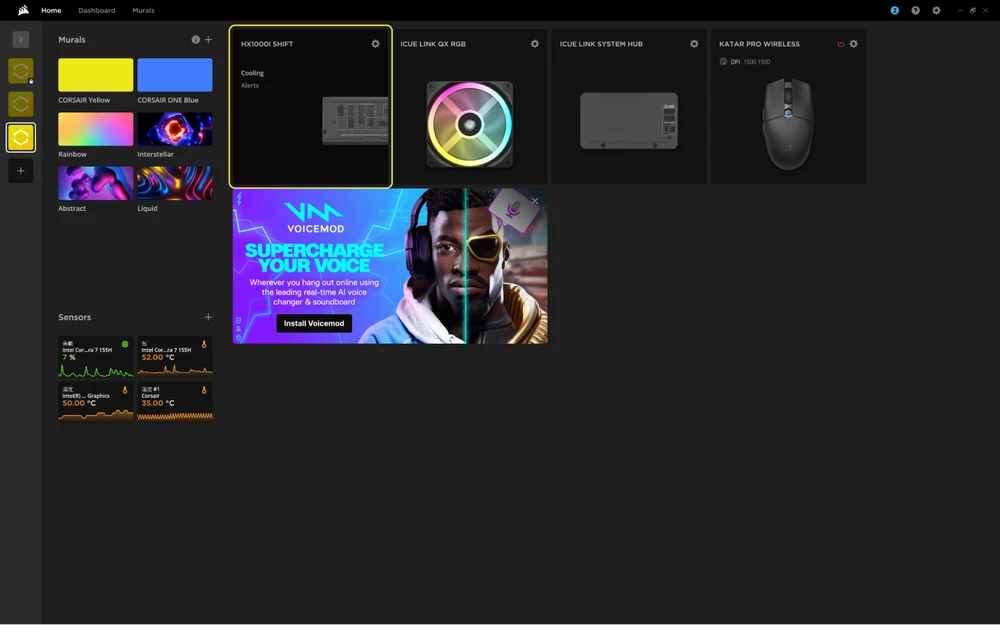
- From the Home screen, click on the HXi SHIFT PSU thumbnail.
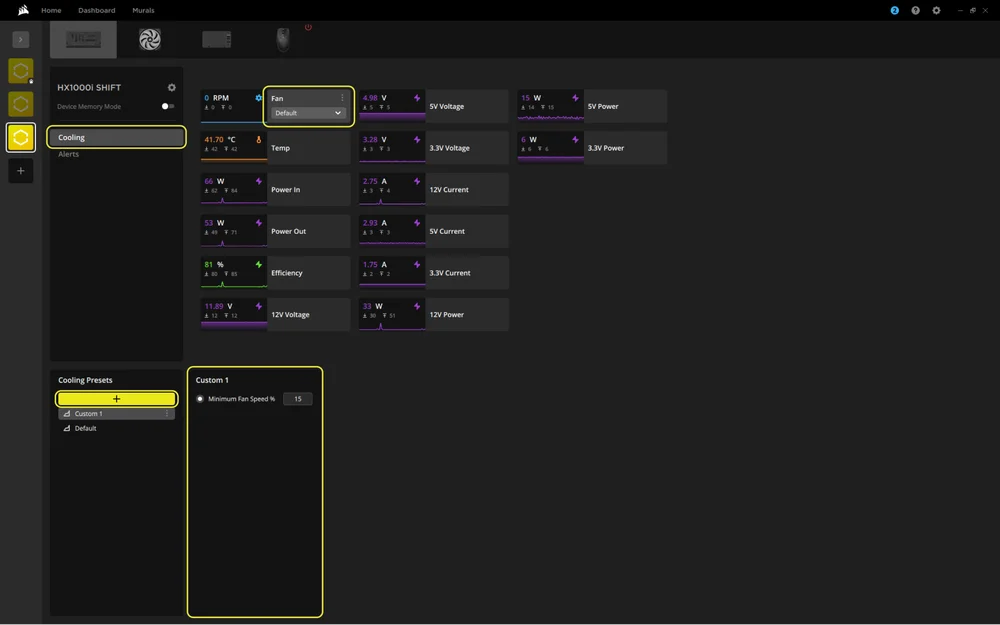
3. COOLING SETUP
By default, the HXi SHIFT runs in Zero RPM Mode, meaning the cooling fan will remain off under low to moderate loads. If you prefer additional cooling, you can manually set a custom fan speed that will override Zero RPM Mode's settings, so when the load increases, the fan will turn on at the speed you set instead of the default. This allows you to set a fan speed percentage, which will activate the fan immediately at that level.
- Select the HXi SHIFT PSU tile in the top bar.
- Select "Cooling".
- Create a custom cooling preset by clicking the "+" button in the "Cooling Presets" panel.
- Set a minimum fan speed.
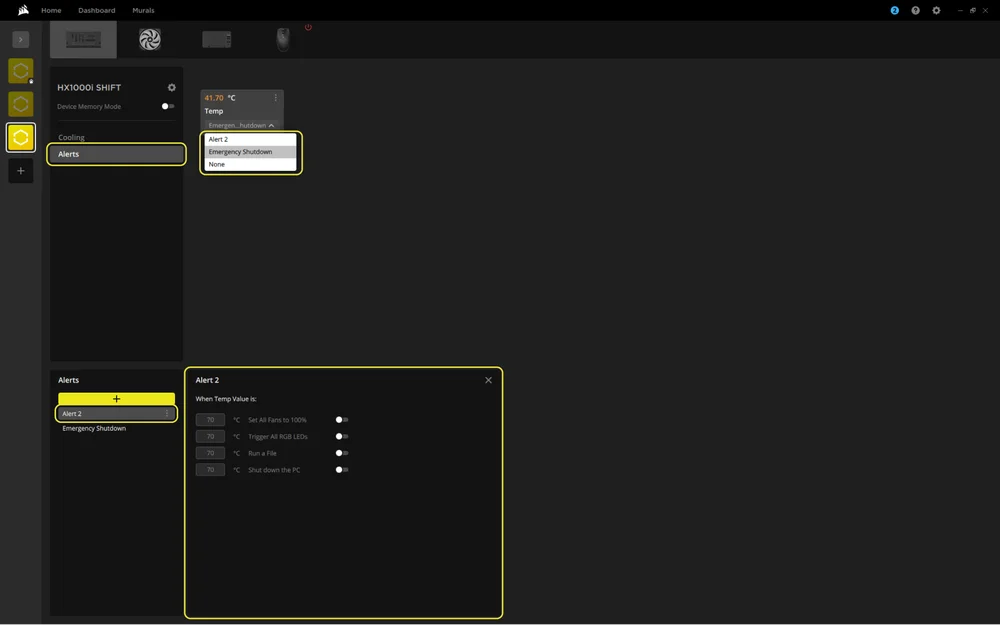
4. ALERTS
Create custom profiles to trigger alerts and automated behaviors at specific temperatures.
- Select the HXi SHIFT PSU tile in the top bar.
- Select "Alerts".
- Create a custom alert preset by clicking the "+" button in the "Alerts" panel.
- Set the the temperature values for triggering a specific alert action.
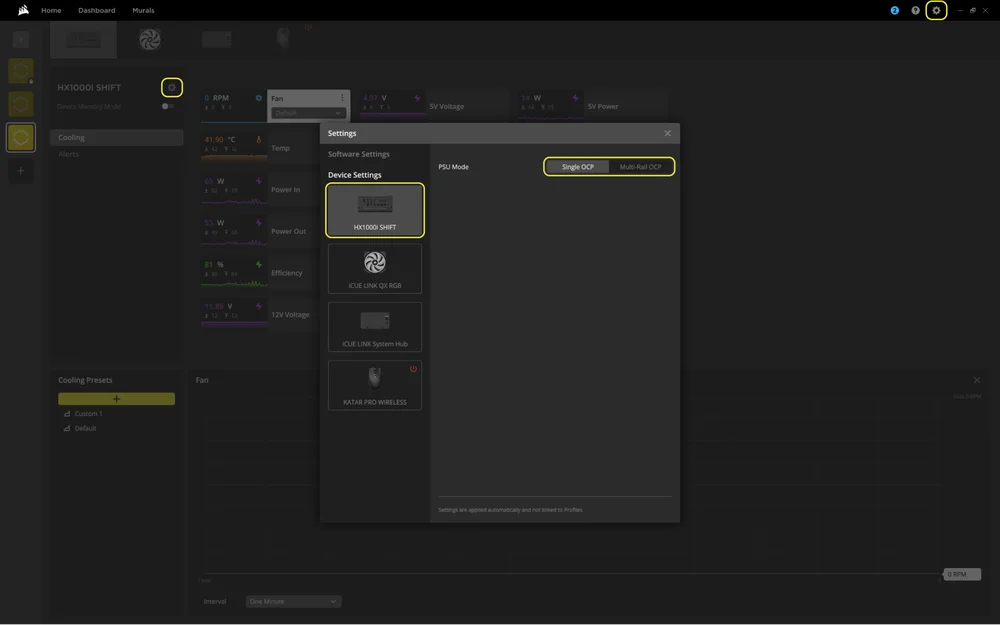
5. OVER-CURRENT PROTECTION (OCP) SETTING
HXi SHIFT power supplies use Multi‑Rail protection by default. For more flexibility with high-power components, overclocking, or stress-testing, you can switch to Single‑Rail OCP.
- Click either of the two "cog" icons to access the "Settings window".
- Select the HXi SHIFT PSU tile.
- Toggle between Single Rail OCP and Multi-Rail OCP under PSU Mode.
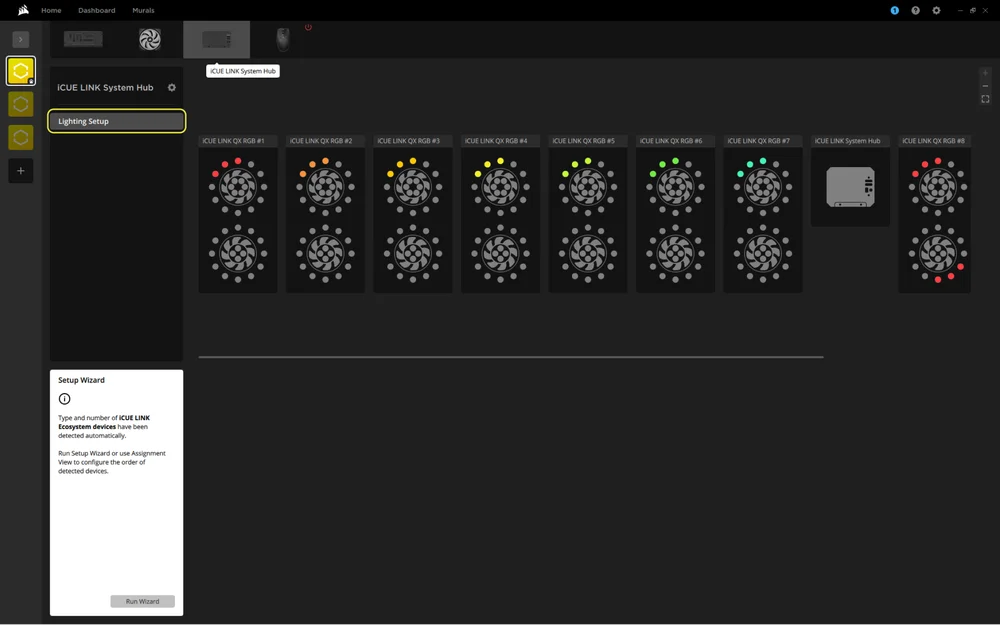
6. iCUE LINK SYSTEM HUB SETTINGS
- From the Home screen, click on the iCUE LINK System Hub thumbnail.

The Lighting Setup page within iCUE LINK System Hub will show all connected iCUE LINK devices and let you reorder them to match their physical placement in your system.
- Select "Lighting Setup".
- Reorder the connected iCUE LINK devices to suit your preference.
WARRANTY

CORSAIR HXi SHIFT Series PSUs have a 10-year warranty.
LEGAL
© 2025 CORSAIR MEMORY, Inc. All rights reserved. CORSAIR and the sails logo are registered trademarks of CORSAIR in the United States and/or other countries. All other trademarks are the property of their respective owners. Product may vary slightly from those pictured.
RELATED CONTENT


