HOW TO
How to Take a Screenshot of the BIOS
If you’re like us, you’ve probably been using your phone to take photos of your BIOS, and the results are usually not great. The interaction between a phone’s camera and a PC monitor can produce ugly moiré patterns that make it hard to see what is on the screen, there's usually unwanted reflections, and you can’t just hit Print Screen either.
Even if you could tap Print Screen in the BIOS, the OS hasn’t been loaded yet so there is no local storage device that could save a screenshot. Despite these difficulties, there is a somewhat hidden solution to this problem, and it is possible to take screenshots of a modern BIOS. All you need is a USB storage device and the instructions below.
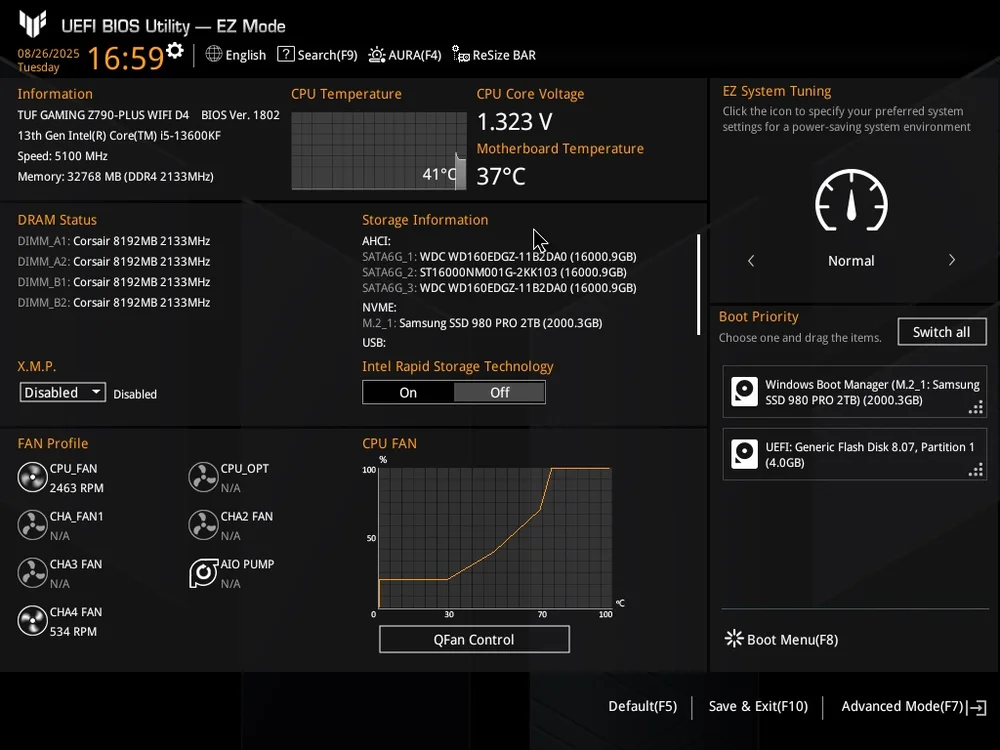
A screenshot taken of a BIOS using the steps below.
Prep Your Storage Device
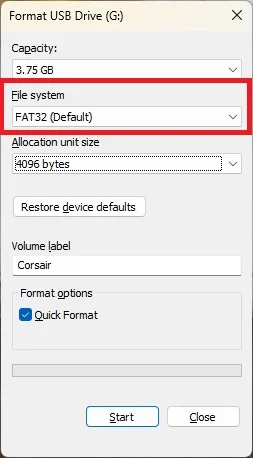
To take a screenshot while in the BIOS you are going to need a USB storage device. Any device will do but you will need to format it in Disk Manager as FAT32 as that is the file system that works with this task. Note that FAT32 has a file size limitation of 4GB because it is a really old file system, but that won’t be an issue for this task as each BIOS screenshot will be around 3MB in size, so you can store a lot of them.
Insert the USB stick into your PC’s USB port and open Windows Explorer, then right-click the drive and select “format.” Make sure the formatting option is set to FAT32 and format the drive. Once it’s formatted leave it plugged into the USB port.
Go Into the BIOS
Reboot your PC and mash the Delete key once it restarts to enter the BIOS. Once you are in the BIOS you should be able to tap the F12 key to take a screenshot. Note that if you tap F12 and nothing happens, tap F11 as the correct key for this varies from system to system, but the vast majority of motherboards use F12.
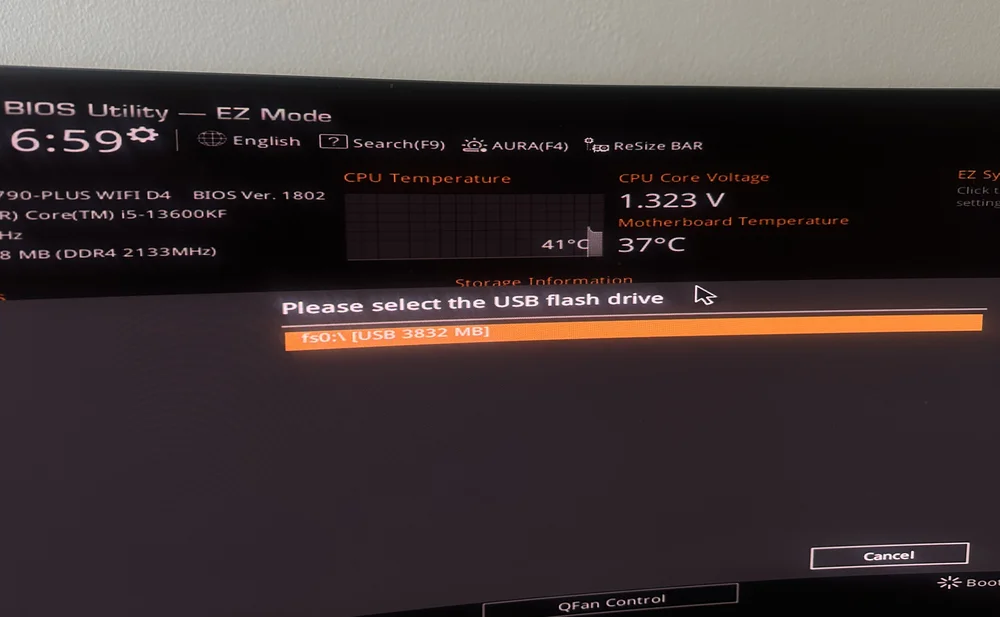
When you do tap F12 (or F11), you should see a dialogue box appear asking you to confirm the storage device used for saving the screenshot.
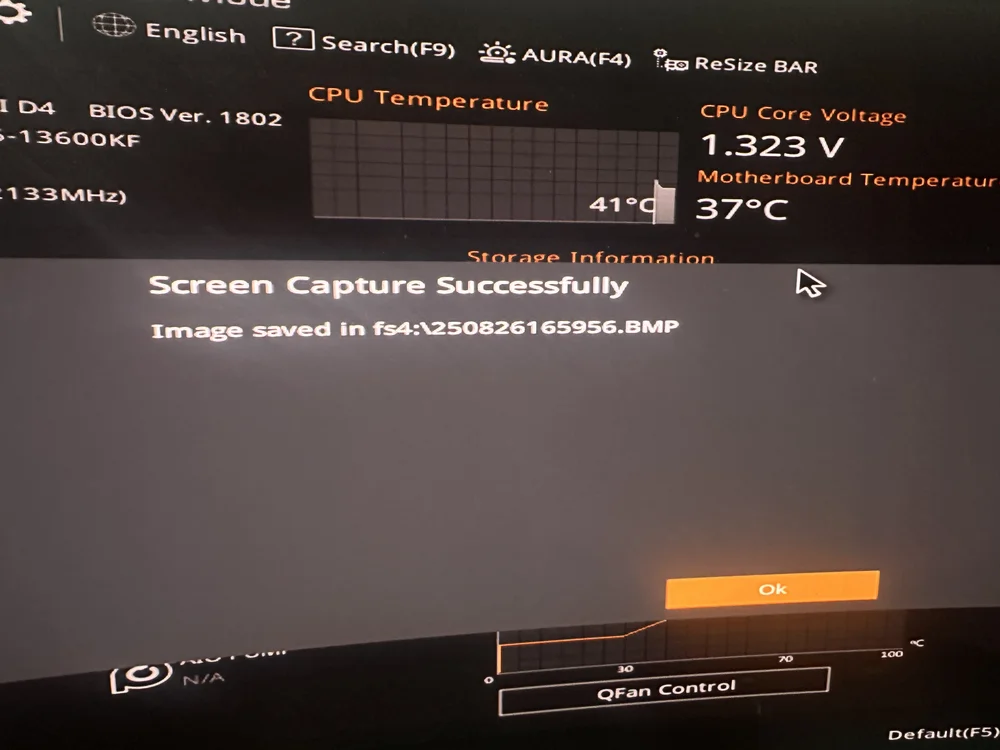
Once that is confirmed, you should see another dialogue box confirming the file was saved. Voila, you now have a crisp and sharp screenshot of your BIOS saved as a .bmp file on the attached USB drive.
TOOTED ARTIKLIS
JOIN OUR OFFICIAL CORSAIR COMMUNITIES
Join our official CORSAIR Communities! Whether you're new or old to PC Building, have questions about our products, or want to chat the latest PC, tech, and gaming trends, our community is the place for you.