HOW TO
How to Change Boot Order in BIOS
When you turn a PC on, the boot order, sometimes called boot priority, dictates the order of devices that the computer will try to boot from. ("boot" in this instance meaning the process of loading into the operating system.) If it can't boot from the first one in the list, it will try the next, and if it can't boot from that, then it will try the third option and so on and so forth.
Typically, you don't need to manually assign the boot order, as it sorts itself out during the process of installing the operating system, however, changing the boot order of your PC is still a useful skill to have.
Luckily, it's a straightforward process. Here's how to change the boot order in the BIOS.

How to Change Boot Order in BIOS: A Step-by-Step Guide
- First, enter your system's BIOS by pressing the “DEL” key while the PC is booting.
- The BIOS will probably be in "EZ Mode", but you'll need to go into "Advanced Mode" for this.
NOTE: We used an MSI motherboard for this guide, but the process will be very similar regardless of brand, it's just that the specific location and name of each setting might be a little different.

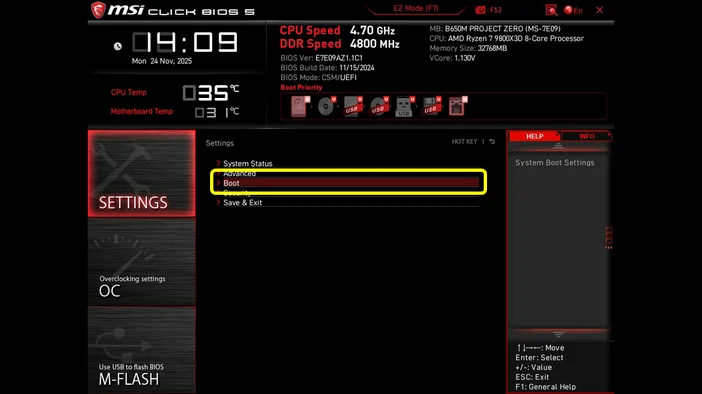
- Once you are in the “Advanced” mode, you will see different options. You want to select the “SETTINGS” option.

- Then select “Boot”. This is where you will see all the available drives connected to your PC.
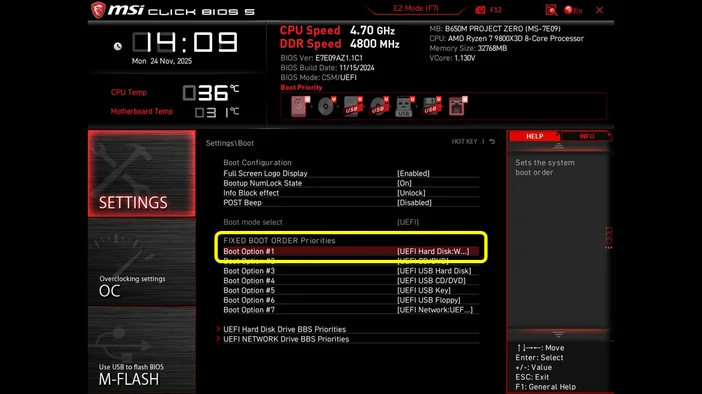
- Select the “Boot Option #1”. This section lets you choose which drive to boot from first.
If you want to boot into Windows, install a fresh OS from a USB drive, or run a diagnostic tool for troubleshooting, you will need to select the device with that on right here.
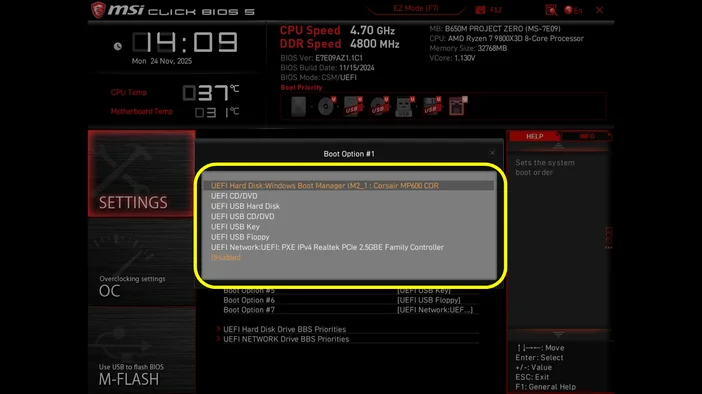
As shown in the image below, a CORSAIR MP600 drive is connected to the PC. If you have other storage drives or USB drives connected to the motherboard, you will see them in this section.
- The drive that contains the operating system should always be the first boot device.
- Once you select the drive, you’ll return to the “SETTINGS” screen.
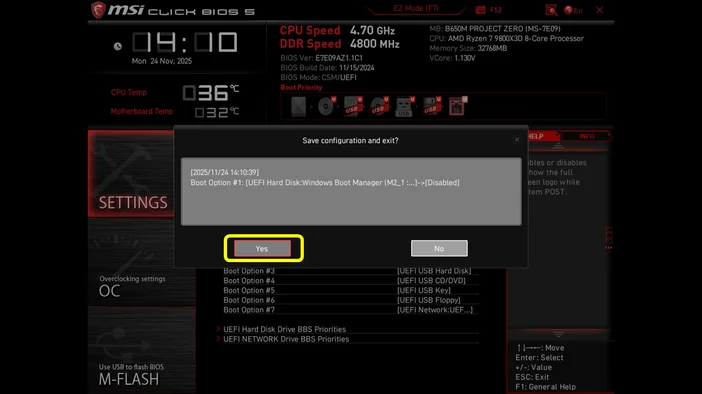
- Now, save the changes you made by either pressing the “F10” key or clicking the “x” (close page) button on the screen to exit the BIOS and let your PC boot from the drive you chose.
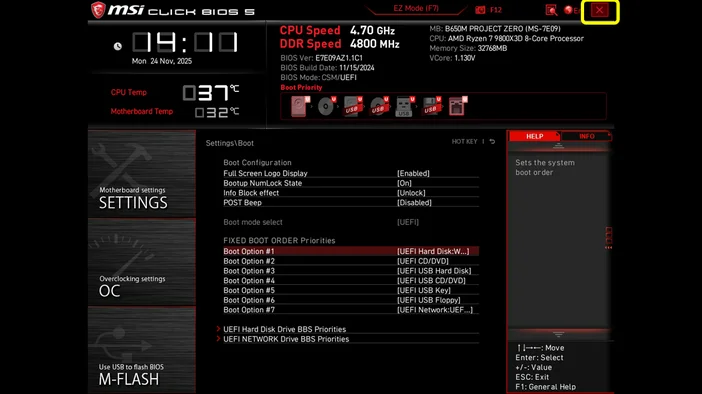
- After pressing “F10” or “x” (close page), you will be prompted to confirm whether you want to save the configuration and exit BIOS. Select “Yes” to finish the process.
And just like that, you’ve successfully changed the boot drive priority in your BIOS. Knowing how to do this is not only simple but also very useful in many situations. It lets you choose the device your computer boots from, which is important for installing software, repairing systems, or using special programs.
A CIKKBEN SZEREPLŐ TERMÉKEK
JOIN OUR OFFICIAL CORSAIR COMMUNITIES
Join our official CORSAIR Communities! Whether you're new or old to PC Building, have questions about our products, or want to chat the latest PC, tech, and gaming trends, our community is the place for you.