- LIETU SPECIFIKĀCIJAS
- PĀRĪKAS KOMPLEKTA SATURS
- CASE EXPANDED VIEWS
- PANEĻA UZSTĀDĪŠANA / NOŅEMŠANA
- Mātesplates uzstādīšana
- PRIEKŠĒJO I/O KABEĻU INSTALĀCIJA
- MAGNĒTISKĀS STRĪPAS UZSTĀDĪŠANA
- VENTILATORA UZSTĀDĪŠANA
- HYDRO X PĀRBAUDĪTA Dzesēšanas atbalsts
- RADIATORU UZSTĀDĪŠANA
- UZGLABĀŠANAS IERĪČU UN KONTROLIERU INSTALĀCIJA
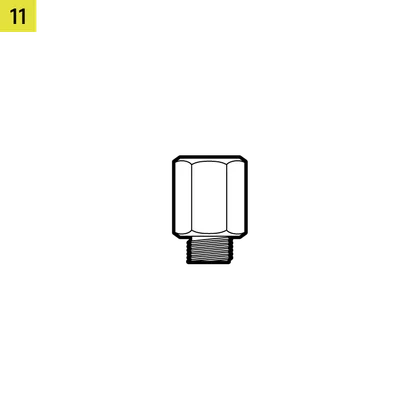
- STRĀVAS PADEVES IERĪCĒŠANA
- GRAFIKAS KARTES INSTALĀCIJA
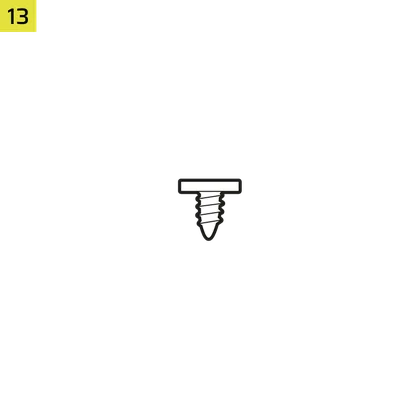
- SAVIENOJOT SAVUS FANI
- APKOPE
- GARANTIJAS PAZIŅOJUMS
- PRODUCT CHANGES
- AVAILABLE ACCESORIES
- SPARE PARTS LISTING
- LEGAL
- SAISTĪTAIS SATURS
ROKASGRĀMATA | ĀTRAS SĀKŠANAS CEĻVEDIS
CORSAIR FRAME 4000 sērija
MODULAR MID-TOWER CASE
Angļu versija ir pieejama šeit - English
Ja jums ir kādas citas problēmas, lūdzu, sazinieties klientu atbalsts
LIETU SPECIFIKĀCIJAS
|
PCI slota konfigurācija |
7 horizontāli / 3 vertikāli |
|
Mātesplates savietojamība |
Mini-ITX, Micro-ATX, ATX, E-ATX (305 mm x 277 mm) |
|
HDD |
|
|
SSD diski |
|
|
Pieejamās krāsas |
|
|
Kreisās puses paneļa materiāls |
Rūdīts stikls |
|
Priekšējā paneļa materiāls |
|
|
Aizmugurējā kabeļu telpa |
37 mm |
|
Putekļu filtri |
Front, Side, Bottom |
|
Priekšējā I/O |
Standard FPIO (FRAME 4000D, FRAME 4000D WOOD, FRAME 4000X):
ELITE FPIO (FRAME 4000D LCD, FRAME 4000D Vault SERIES):
|
1. Ventilatoru atrašanās vietas
NOTE: No fans are included with the FRAME 4000D or FRAME 4000D Vault Series.
| FRAME 4000D RS/RS ARGB | ||||||
|
Priekšā |
Augšā |
Aizmugure |
Sānu |
PSU apvalks | Bottom | |
|
3x 120 mm 2x 140 mm 2x 200 mm |
3x 120 mm 2x 140 mm
|
1x 120 mm 1x 140 mm
|
3x 120 mm 2x 140 mm
|
2x 120 mm |
None |
|
|
FRAME 4000D LCD, FRAME 4000D WOOD, FRAME 4000X |
||||||
|
Front |
Top |
Rear |
Side |
PSU Shroud | Bottom | |
|
3x 120mm 2x 140mm 2x 200mm |
3x 120mm 2x 140mm
|
1x 120mm 1x 140mm
|
3x 120mm 2x 140mm
|
2x 120mm |
1x 120mm |
|
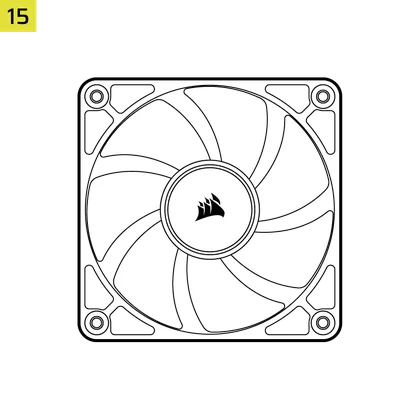
2. IEKĻAUTIE VENTILATORI UN KONTROLIERI
|
RĀMIS 4000D |
RĀMIS 4000D RS | RĀMIS 4000D RS ARGB |
FRAME 4000D WOOD, FRAME 4000X |
FRAME 4000 LCD
|
|
|
Neviens |
3x RS120 (Pre-installed) |
3x RS120 ARGB (Pre-installed) |
4x RS120 (Pre-installed) |
4x RS120 ARGB (Pre-installed) |
|
NOTE: Fans and lighting controllers are not included. ARGB lighting can be controlled through your motherboard or with a separate fan controller.
3. RADIATORA SADERĪBA
|
Priekšā |
Augšā |
Aizmugure |
Sānu |
PSU apvalks |
|
240 mm 280 mm 360 mm |
240 mm 280 mm 360 mm |
120 mm 140 mm |
240 mm 280 mm 360 mm |
Neviens |
4. Korpusa izmēri
| Izmēri |
487 mm x 239 mm x 486 mm |
|
Maksimālais GPU garums |
430 mm |
|
Maksimālais CPU dzesētāja augstums |
170 mm |
|
Maksimālais PSU garums |
220 mm |
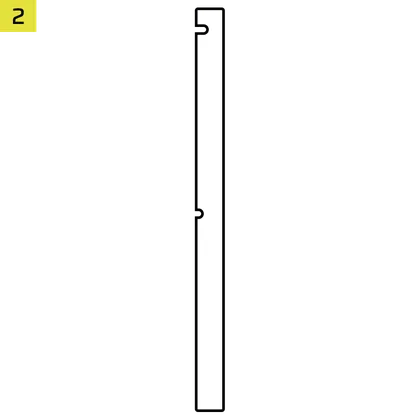
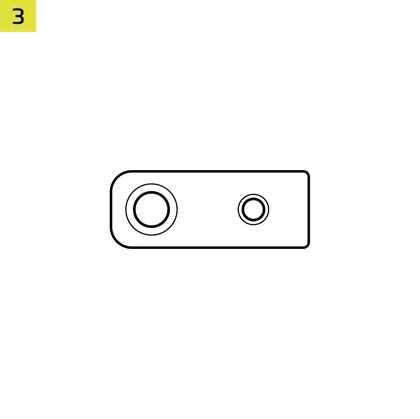
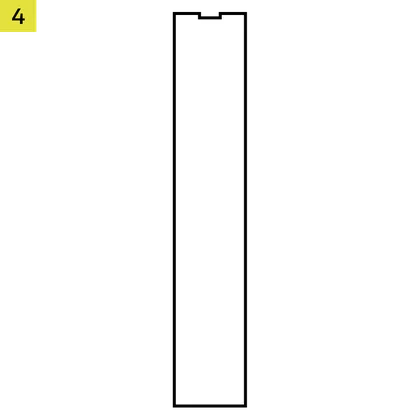
PĀRĪKAS KOMPLEKTA SATURS
1x sānu ventilatora montāžas kronšteins
1x apgrieztais savienotājs ar magnētisko sloksni
12x InfiniRail Fan Mounts
(Pre-Installed on Select Cases)
1x Solid Side Insert
(Select Models)

1x GPU Anti-sag Stabilization Arm Mini Mount
1x GPU Anti-sag Stabilization Arm Rubber Spacer
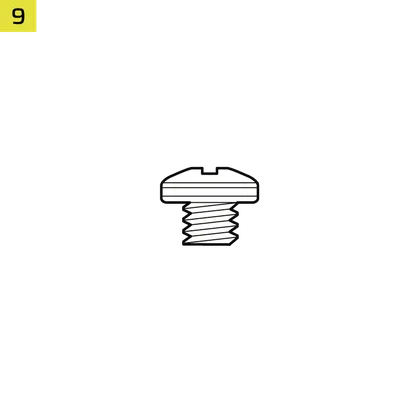
12-28x Self-Tapping Fan Screws
(Qty varies by model)
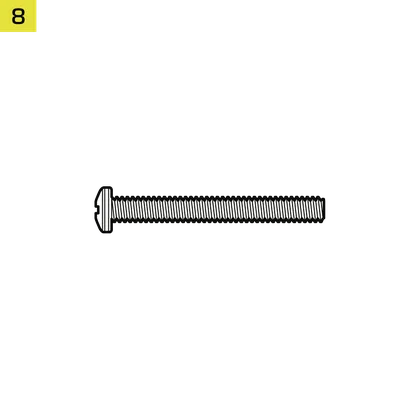
8-12x Long Fan Screws (6-32 UNC; 30mm)
(Qty varies by model)
18x pamatplates/cietā diska skrūves (6-32 UNC; 6 mm)

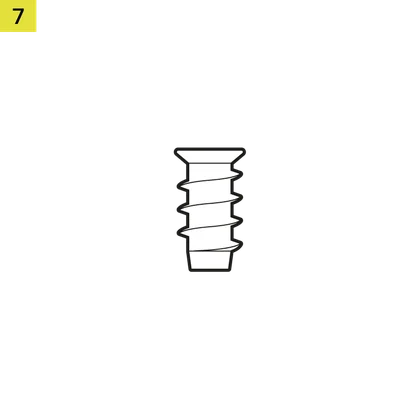
8-16x SSD Screws (M3 x 0.5; 5mm)
(Qty varies by model)
1x rezerves pamatplates atbalsts

2x vertikāli stiprinājumi
InfiniRail Fan Mount Lock Screws
(Pre-Installed on Select Models)
1x priekšējais I/O adaptera kabelis
3x or 4x RS120 / RS 120 ARGB Fans
(Pre-Installed on Select Models)
12x QuikTurn® Fan Screws
(Select Models)

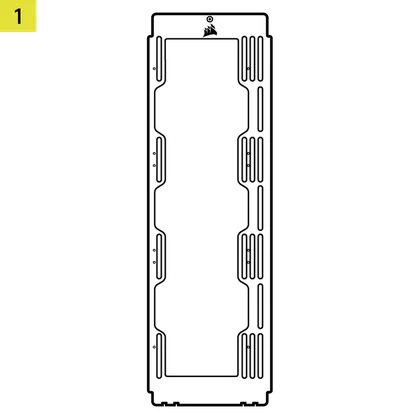
CASE EXPANDED VIEWS
FRAME 4000D RS/RS ARGB
| A. Trīs ceturtdaļu sānu stikla panelis | H. Sānu ventilatora filtrs |
| B. PCI plāksne | I. Priekšējais panelis |
| C. Standarta tērauda pamatplates paplāte | J. Priekšējais ventilatora filtrs |
| D. Augšējais panelis | K. PSU ventilatora filtrs |
| E. Piedziņas / kontroliera plāksne | L. PSU apvalks |
| F. Cable Shroud with GPU Anti-sag Stabilization Arm | M. Caurspīdīgs sānu ieliktnis |
| G. Tērauda sānu panelis | N. Četrdaļveida sieta sānu panelis |
FRAME 4000D LCD
| B. PCI Plate | J. Front Fan Filter |
| C. Standard Steel Motherboard Tray | K. PSU Fan Filter |
| D. Top Panel | O. Front Panel I/O |
| E. Drive / Controller Plate | P. Compact PSU Shroud |
| F. Cable Shroud with GPU Anti-sag Stabilization Arm | Q. Two-Thirds Side Glass Panel |
| G. Steel Side Panel | R. LCD Screen Mounting Bracket |
| H. Side Fan Filter | S. XENEON EDGE LCD Touchscreen |
| I. Front Panel |
FRAME 4000X
| B. PCI Plate | J. Front Fan Filter |
| C. Standard Steel Motherboard Tray | K. PSU Fan Filter |
| D. Top Panel | O. Front Panel I/O |
| E. Drive / Controller Plate | P. Compact PSU Shroud |
| F. Cable Shroud with GPU Anti-sag Stabilization Arm | T. RGB FLOW Front Panel |
| G. Steel Side Panel | U. Full Tempeed Side Glass Panel |
| H. Side Fan Filter |
FRAME 4000D WOOD
| B. PCI Plate | J. Front Fan Filter |
| C. Standard Steel Motherboard Tray | K. PSU Fan Filter |
| D. Top Panel | O. Front Panel I/O |
| E. Drive / Controller Plate | P. Compact PSU Shroud |
| F. Cable Shroud with GPU Anti-sag Stabilization Arm | U. Full Tempered Glass Side Panel |
| G. Steel Side Panel | V. Wood Front Panel |
| H. Side Fan Filter |
FRAME 4000D Vault Series
| B. PCI Plate | I. Front Panel |
| C. Standard Steel Motherboard Tray | J. Front Fan Filter |
| D. Top Panel | K. PSU Fan Filter |
| E. Drive / Controller Plate | O. Front Panel I/O |
| F. Cable Shroud with GPU Anti-sag Stabilization Arm | P. Compact PSU Shroud |
| G. Steel Side Panel | U. Full Tempered Side Glass Panel |
| H. Side Fan Filter |
PANEĻA UZSTĀDĪŠANA / NOŅEMŠANA
BRĪDINĀJUMS: Šis produkts satur rūdītu stiklu. Rūpējieties par to.
- Lai novērstu bojājumus vai traumas, neuzstādiet un neuzglabājiet korpusu uz cietām virsmām, piemēram, keramikas vai porcelāna flīzēm, akmens, mūra vai betona.
- CORSAIR stingri iesaka noņemt visus rūdīta stikla sānu paneļus, pirms novietojat korpusu vai sākat montāžu uz cietas virsmas.
- Ja gatavo konstrukciju ir jānovieto uz cietas virsmas, paceliet vai izolējiet korpusu, lai samazinātu nejauša kontakta, bojājumu vai personisku traumu risku.
Aizvietotāji paneļi ir pieejami vietnē www.corsair.com. Ja nepieciešama palīdzība, sazinieties ar help.corsair.com.
1. SĀNU PANEĻU NOŅEMŠANA
NOTE: This case is available with different left side panel designs (full glass or split glass/steel). Depending on your model, you may have one or multiple panels to remove. The removal method is the same for all variants.
- To remove the left side panel(s), loosen the thumbscrews at the rear of the case, then swing the panel(s) outward from the back and lift them off the front mounting tabs.
NOTE: On models equipped with the Quarter Mesh Side Panel (N), two optional inserts are included to customize the look and function of your build. A Translucent Side Insert (M) comes pre-installed, allowing RGB lighting to shine through while partially concealing cables. Alternatively, you can install the Solid Side Insert (4) for full coverage, or leave the panel open for maximum airflow. Inserts slide under the long edges of the panel for quick installation and removal.
- Lai noņemtu tērauda sānu paneli (G), atskrūvējiet paneli korpusa aizmugurē un pagrieziet paneli no tapām uz priekšu.
TIP: For removal or use of accessory side panels, please reference these Quick Start Guides for more in-depth information:
2. PRIEKŠĒJĀ PANEĻA NOŅEMŠANA
- Pull the Front Panel outward. It's secured by two ball snaps at the top and bottom.
3. VIRSĒJĀ PANEĻA NOŅEMŠANA
- Atskrūvējiet divas fiksējošās skrūves aizmugurē un velciet gumijoto siksnu, lai noņemtu augšējo paneli (D).
WARNING: The rubber pull-grip on the Top Panel (D) is designed to assist in removing the top panel from the case.
Šī nav rokturi, lai paceltu korpusu vai sistēmu. Ja pacelsiet korpusu, turot to aiz šīs rokturi, varat nopietni sabojāt datoru, korpusu un sevi.
4.1 STANDARD PSU SHROUD REMOVAL (FRAME 4000D, FRAME 4000D RS / RS ARGB)
- FRAME 4000D
- FRAME 4000D RS
- FRAME 4000D RS ARGB
The PSU Shroud (L) is held in with a screw in the front of the case along the side and two screws in the rear panel of the case.
- Remove these three screws and the shroud will lift out.
4.2 COMPACT PSU SHROUD REMOVAL
- FRAME 4000D LCD
- FRAME 4000X
- FRAME 4000D WOOD
- FRAME 4000D Vault Series
The Compact PSU Shroud (P) is held in with a screw in the front of the case along the side and two screws in the rear panel of the case.
- Remove the three screws.
- Slide the Compact PSU Shroud (P) forward to release the clips located at its bottom front and the shroud will lift out.
5. KABEĻA APVALKS VAI SĀNU VENTILATORA TURĒTĀJA NOŅEMŠANA
- Unscrew the screw at the top and tip the Side Fan Mounting Bracket (1) or Cable Shroud (F) out of the side. Repeat this in reverse to reinstall the part of your choice.
NOTE: The side mount has two positions for mounting. If using a radiator or 200mm fans, we recommend using the position closest to the motherboard.
6. PAMATPLATNES TRAUKA NOŅEMŠANA
Standarta tērauda pamatplates paplāte (C) tiek fiksēta ar 4 skrūvēm paplātes aizmugurē.
- Unscrew these four screws.
- Tilt the tray outward and lift it out.
7. PRIEKŠPANEĻA I/O NOŅEMŠANA
The Front Panel I/O (O) is held in with two screws on the bottom of the case.
- To remove it, simply unscrew these two screws, and the entire Front Panel I/O (O) assembly can be lifted out.
- To reinstall the Front Panel I/O (O) or to install a new one, place the assembly back in position and secure it with the same two screws.
Mātesplates uzstādīšana
PAMATPLATES UZSTĀDĪŠANA
The FRAME 4000 supports mITX, mATX, ATX, and E-ATX motherboards, including ASUS BTF, MSI Project Zero, and GIGABYTE Project Stealth with reversed connections.
- Saskaņojiet pamatplati ar atbalsta elementiem un nostipriniet to ar piegādātajiem pamatplates skrūvēm (9).
PIEZĪME: Pirms uzstādīšanas pārliecinieties, ka jūsu pamatplates I/O aizsargs ir savā vietā, ja nepieciešams.
PADOMS: Ja iepriekš uzstādītie atbalsta stieņi nesakrīt ar atvērumiem jūsu pamatplatē, noņemiet neizmantotos stieņus un pārvietojiet tos tā, lai tie sakristu ar atvērtām montāžas vietām jūsu pamatplatē.
OPTIONAL MOTHERBOARD TRAY CONFIGURATIONS
The FRAME 4000 Series includes a standard motherboard tray, with additional tray options available (sold separately) to customize your build:
| a. FRAME Standard Steel Motherboard Tray | c. FRAME ELITE Motherboard Tray |
| b. FRAME RapidRoute 2.0 Motherboard Tray |
NOTE: FRAME ELITE motherboard tray (CNC Aluminum) is designed for use with NVMe SSDs. You will lose the HDD/SSD tray that installs on the back of the steel motherboard tray that is included with FRAME 4000 Series cases. Text for SPY & GPU on the ELITE MB Tray is to assist in assembling as a standalone test bench. Ignore text during use with FRAME 4000 Series.
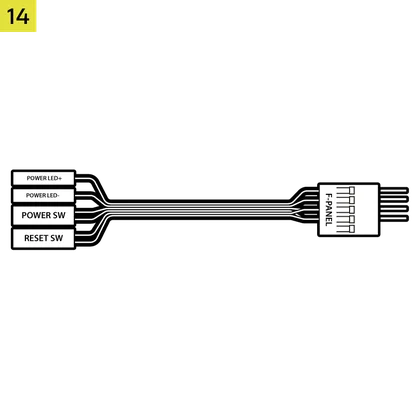
PRIEKŠĒJO I/O KABEĻU INSTALĀCIJA
1. STANDARTA INTEL MĀTESPLATNES
- Pievienojiet FPANEL spraudni priekšējā paneļa I/O savienotājam uz jūsu pamatplatē, saskaņojot to ar atslēgas izkārtojumu. Dažās pamatplatēs šis savienotājs bieži ir marķēts ar JFP1.
PADOMS: Ja jūsu datora neieslēdzas vai rodas problēmas, izmantojot FPANEL spraudni, mēģiniet izmantot komplektā iekļauto priekšējā I/O adaptera kabeli (14), lai nodrošinātu pareizu savienojumu ar pamatplates savienotāju.
PIEZĪME: Šajā gadījumā nav iekļauts HDD LED vai atiestatīšanas slēdzis, tāpēc, lai gan šie savienotāji ir redzami priekšējā I/O adaptera kabelī (14), tie nedarbojas un ir apzināti atstāti neaizpildīti.
2. AMD vai nestandarta Intel pamatplates
- Izmantojiet komplektā iekļauto augšā uzstādāmo priekšējo I/O adapteri (14), lai savienotu FPANEL spraudni ar atsevišķiem priekšējā paneļa I/O savienotāju tapām.
3. FRONT PANEL 5V ARGB CONNECTION (FRAME 4000X only)
- Run the +5V ARGB cable through the passthrough filter and into your case.
- Plug the +5V ARGB cable into your motherboard for easy ARGB control or use a COMMANDER DUO for full iCUE synchronization.
NOTE: For standard FRAME 4000D configurations without the passthrough hole in the front panel I/O, you must use the front fan filter included with the front panel and route the ARGB cable through the bottom right edge to pass it into the chassis. This wire is able to be split in half for easier routing during installation.
4. FRONT I/O EXPLANATION
- RĀMIS 4000D
- RĀMIS 4000D RS
- RĀMIS 4000D RS ARGB
- FRAME 4000X
| a.Ieslēgšanas pogas + LED | c.2x USB 3.2 Gen 1 Type-A (5 Gbps) |
| b.Austiņu/mikrofona kombinētais savienotājs | d.1x USB 3.2 Gen 2x2 Type-C (20 Gbps) |
- RĀMIS 4000D LCD RS ARGB
- RĀMIS 4000D VAULT SĒRIJA
| a.Ieslēgšanas pogas + LED | c. 2x USB 3.2 Gen 1 Type-C (5 Gbps) |
| b.Austiņu/mikrofona kombinētais savienotājs | d.1x USB 3.2 Gen 2x2 Type-C (20 Gbps) |
5. FRONT I/O CONNECTIONS
| a. HD Audio (Headphone, Microphone) | d. USB 3.2 Type-E (20 Gbps) |
| b. FPANEL (Power LED, Power Button) | e. +5V ARGB (FRAME 4000X only)* |
| c. USB 3.0 |
6. SWAPPING FRONT PANEL BUTTON POWER KEY SWITCH
The power button of the ELITE Front Panel I/O used in the FRAME 4000D LCD case utilizes a standard MX-Style key switch. This key switch is removable and replaceable to customize the look and feel of your power button.
- Simply pop off the plastic bezel on the front panel I/O and extract the key switch. Replace with a switch of your choice.
MAGNĒTISKĀS STRĪPAS UZSTĀDĪŠANA
FRAME 4000 ietilpst reversā savienotāja magnētiskā sloksne (2), kas ir paredzēta, lai nosegtu redzamo malu reversā savienotāja atvērumiem pamatplates paplātē.
- Saskaņojiet apgriezto savienotāju magnētisko sloksni (2) ar atbalsta elementiem un pielāgojiet no vienas puses uz otru, lai aizvērtu spraugu uz mātesplates.
1. PAMATPLATNE AR APGRIESTO SAVIENOTĀJU
Ja uzstādat pamatplati ar apgrieztiem savienotājiem, apgriezto savienotāju magnētisko sloksni (2) var izmantot, lai aizpildītu spraugu ap 24-pin ATX portu, nodrošinot tīrāku un gludāku izskatu.
2. MĀTESPLATNES AR STANDARTA SAVIENOTĀJIEM
Uzstādot standarta pamatplati, varat ievietot magnētisko sloksni (2) aiz pamatplates, saskaņojot to ar skrūvju caurumiem pamatplates paplātē, lai nosegtu apgriezto savienotāju un paslēptu vadus, kas stiepjas gar pamatplates paplāti, nodrošinot tīrāku izskatu.
TIP: The magnetic strip features cut-out slots, allowing you to install it simultaneously with a GPU anti-sag stabilization arm mini mount.
VENTILATORA UZSTĀDĪŠANA
| FRAME 4000D RS/RS ARGB | ||||||
|
Front |
Top |
Rear |
Side |
PSU Shroud | Bottom | |
|
3x 120mm 2x 140mm 2x 200mm |
3x 120mm 2x 140mm
|
1x 120mm 1x 140mm
|
3x 120mm 2x 140mm
|
2x 120mm |
None |
|
|
FRAME 4000D LCD, FRAME 4000D WOOD, FRAME 4000X |
||||||
|
Front |
Top |
Rear |
Side |
PSU Shroud | Bottom | |
|
3x 120mm 2x 140mm 2x 200mm |
3x 120mm 2x 140mm
|
1x 120mm 1x 140mm
|
3x 120mm 2x 140mm
|
2x 120mm |
1x 120mm |
|
USING THE INFINIRAIL™ FAN MOUNTING SYSTEM
CORSAIR's InfiniRail™ is an innovative fan and radiator mounting system designed to offer exceptional flexibility and ease of use in PC case builds. Unlike traditional cases with fixed mounting points, InfiniRail utilizes adjustable steel rails that allow users to slide and position fans and radiators precisely where needed.
FRAME 4000 ir aprīkots ar divām šādām InfiniRail sistēmām: vienu augšā un vienu priekšā.
NOTE: Determine the size and placement of your fans before configuring the rails. You do not have to fully remove the InfiniRail Phillips head screws.
Sliežu regulēšana korpusa priekšpusē
- Loosen the Phillips head screw on both ends of the InfiniRails.
- Pielāgojiet abas priekšējās sliedes ventilatoriem atbilstoši marķējumiem uz korpusa.
NOTE: If using 200mm fans in front, you may need to remove the PSU shroud depending on your version of FRAME 4000 Series.
Sliežu regulēšana korpusa augšdaļā
- Loosen the Phillips head screw on both ends of the InfiniRail.
- Pielāgojiet ventilatoru augšējo sliedi atbilstoši marķējumiem uz korpusa.
SVARĪGI: skrūves ar nestandarta galvas formu nav paredzētas noņemšanai.
2. VENTILATORU UZSTĀDĪŠANA PRIEKŠĀ
120 mm vai 140 mm ventilatoru uzstādīšana
Lai uzstādītu 120 mm vai 140 mm ventilatorus, izmantojot priekšējo InfiniRail ventilatoru uzstādīšanas sistēmu, ir jāuzstāda InfiniRail ventilatoru stiprinājumi (3). Izmantojiet četrus stiprinājumus katram ventilatoram, divus uz katras sliedes puses.
PIEZĪME: Dažos gadījumos InfiniRail ventilatoru stiprinājumi var būt iepriekš uzstādīti.
- Pievienojiet InfiniRail ventilatoru stiprinājumus (3) sliedēm, vispirms nostiprinot katra stiprinājuma iekšējo malu, pēc tam ievietojot ārējo malu vietā.
- Pavelciet stiprinājumus pa sliedēm, lai tos saskaņotu ar ventilatora stiprinājuma punktiem.
- Saskaņojiet ventilatorus ar stiprinājuma tapām uz stiprinājumiem un nostipriniet tos, ieskrūvējot pašvītņojošās ventilatoru skrūves (7).
- Kad izvietojums ir izlīdzināts, varat nostiprināt uzstādījumu ar InfiniRail ventilatora stiprinājuma skrūvēm (13).
200 mm ventilatoru uzstādīšana
200 mm ventilatori tiek piestiprināti tieši pie InfiniRail stiprinājumiem bez plastmasas ventilatoru stiprinājumiem. Noņemiet stiprinājumus, ja tie jau ir iepriekš uzstādīti uz jūsu korpusa.
- Saskaņojiet ventilatorus ar InfiniRails montāžas spraugām un nostipriniet tos, ieskrūvējot pašvītņojošās ventilatoru skrūves (7) ventilatora rāmī.
PIEZĪME: Lai uzstādītu atsevišķus 200 mm ventilatorus, var būt nepieciešams noņemt barošanas bloka apvalku.
NOTE: When installing 200 mm front fans, the side fan bracket or cable cover must be mounted in the secondary position (towards the motherboard tray) to provide sufficient clearance.
3. VENTILATORU UZSTĀDĪŠANA UZ VIRSMA
- Saskaņojiet ventilatorus ar InfiniRail ventilatoru montāžas spraugām un nostipriniet tos, ieskrūvējot pašvītņojošās ventilatoru skrūves (7) ventilatora rāmī.
4. VENTILATORU UZSTĀDĪŠANA SĀNOS
Lai uzstādītu ventilatorus sānos, pārliecinieties, ka ir uzstādīts sānu ventilatora stiprinājuma kronšteins (1).
- Saskaņojiet ventilatorus ar ventilatoru montāžas spraugām un nostipriniet tos, ieskrūvējot pašvītņojošās ventilatoru skrūves (7) ventilatora rāmī.
PADOMS: Izmantojiet punktus, kas atzīmēti uz sānu ventilatora stiprinājuma kronšteina (1), lai tos izmantotu kā centrēšanas vadlīnijas.
5. VENTILATORU UZSTĀDĪŠANA UZ PSU APVALKA
- Align your fans to the fan mounting holes on the PSU Shroud.
- Nostipriniet ventilatorus ar garajām ventilatora skrūvēm (8).
6. VENTILATORU UZSTĀDĪŠANA AIZSARGĀ
- Saskaņojiet ventilatoru ar ventilatora montāžas caurumiem.
- Nostipriniet ventilatoru, ieskrūvējot pašvītņojošās ventilatora skrūves (7).
7. INSTALLING FANS IN THE BOTTOM
- Align your fans to the fan mounting holes.
- Secure the fans with Long Fan Screws (8).
NOTE: Not all FRAME 4000 Series variants can install a bottom fan. Refer to the fan location table for your particular case.
HYDRO X PĀRBAUDĪTA Dzesēšanas atbalsts
The FRAME 4000 has fill / drain ports pre-punched in the top and bottom panels for a Hydro X open loop liquid cooling setup.
- Noņemiet portu vākus, uzmanīgi tos atceļot ar plakanu skrūvgriezi.
RADIATORU UZSTĀDĪŠANA
FRAME 4000 piedāvā vairākas vietas, kur uzstādīt radiatoru šķidruma dzesēšanai, priekšējā un augšējā vietā ir regulējams InfiniRail ventilatora stiprinājums. Sīkāku informāciju par InfiniRail ventilatora stiprinājuma sistēmas lietošanu skatiet sadaļā Ventilatora uzstādīšana.
PADOMS: Lai nodrošinātu optimālu trokšņu līmeni, siltuma vadītspēju un uzticamību, izmantojot AIO, pārliecinieties, ka radiators ir uzstādīts augstāk nekā sūknis.
|
Priekšā |
Augšā |
Aizmugure |
Sānu |
PSU apvalks |
|
240 mm 280 mm 360 mm |
240 mm 280 mm 360 mm |
120 mm 140 mm |
240 mm 280 mm 360 mm |
Neviens |
Augšējā uzstādīšana nodrošina optimālu trokšņu līmeni, bet atkarībā no jūsu uzstādīšanas preferencēm var izmantot arī citus stiprinājumus. Papildu padomus par lietošanu un labāko praksi skatiet dzesētāja lietošanas rokasgrāmatā.
1. OPTIMAL RADIATOR MOUNTING CONFIGURATION
PIEZĪME: Lai izvietotu radiatoru pa vidu, var būt nepieciešams noņemt vienu radiatora stiprinājuma skrūvi. Izmantojot vienpadsmit skrūves, joprojām ir pietiekami daudz stiprinājuma punktu, lai droši uzstādītu radiatoru un ventilatorus.
UZGLABĀŠANAS IERĪČU UN KONTROLIERU INSTALĀCIJA
FRAME 4000 Series cases include up to two Combination Drive Plates - with each capable of mounting one HDD or two SSDs.
1. KOMBINĒTĀS PIEVADPLĀKSNES NOŅEMŠANA
- Atskrūvējiet skrūvi, kas nostiprina kombinēto disku plāksni (E), un noņemiet plāksni.
2. SSD uzstādīšana uz kombinētā diska plāksnes
- Uzstādiet SSD disku(-us) uz kombinētā diska plāksnes (E), piestiprinot to pie plāksnes apakšdaļas ar komplektā iekļautajām SSD skrūvēm (10).
3. HDD uzstādīšana uz kombinētā diska plāksnes
- Uzstādiet HDD uz kombinētā diska plāksnes (E), piestiprinot to pie plāksnes apakšas ar komplektā iekļautajām HDD skrūvēm (9).
Kombinētā diska plāksne (E) kalpo arī kā iCUE LINK sistēmas koncentratora kontroliera uzstādīšanas vieta, ja tāds tiek izmantots.
4. KOMBINĒTĀS PIEVADPLĀKSNES NOSTIPRINĀŠANA
Ievietojiet kombinēto disku plāksni (E) atpakaļ tās paredzētajā vietā korpusā, pēc tam nostipriniet to, pagriežot skrūvi pulksteņrādītāja virzienā.
STRĀVAS PADEVES IERĪCĒŠANA
1. STANDARTA PSU INSTALĀCIJA
- Uzstādiet barošanas bloku ar ventilatoru vērstu uz leju.
- Nostipriniet barošanas bloku pie korpusa ar divām fiksētajām skrūvēm, kas atrodas korpusa aizmugurē.
- Papildu drošībai nostipriniet barošanas bloku, izmantojot divas pamatplates skrūves (9) aizmugurējā paneļa stūros.
2. CORSAIR SHIFT BAROJUMU INSTALĀCIJA
FRAME 4000 ir pilnībā saderīgs ar visiem SHIFT barošanas avotiem un tiek uzstādīts tāpat kā standarta ATX barošanas avots.
GRAFIKAS KARTES INSTALĀCIJA
Iekļautais PCI kronšteins ļauj FRAME 4000 atbalstīt gan horizontālas, gan vertikālas GPU montāžas konfigurācijas.
PADOMS: Lai atvieglotu montāžu, GPU uzstādiet kā pēdējo posmu.
1. GPU uzstādīšana standarta orientācijā
- Atskrūvējiet PCIe slota vāciņus un noņemiet tos.
- Ievietojiet karti PCIe slotā, līdz tā ar klikšķi ievietojas PCIe slotā ar fiksēšanas mehānismu.
- Saskaņojiet kronšteinu ar PCIe slotiem un nostipriniet karti korpusā.
2. GPU ANTI-SAG STABILIZĀCIJAS ROKAS LIETOŠANA
GPU Anti-sag stabilizācijas rokturis atbalsta jūsu grafisko karti, novēršot tās lieci vai sagumu zem tās dzesētāja svara. Tas ne tikai palīdz aizsargāt jūsu grafisko karti un PCIe slotu, bet arī veicina tīrāku, profesionālāku izskatu.
- Noregulējiet GPU Anti-Sag Arm, atslābinot priekšējo skrūvi un pabīdot to uz augšu vai uz leju.
PIEZĪME: Ja jūsu GPU ventilators vai citas detaļas saskaras ar gumijas roku, izmantojiet komplektā iekļauto pretiekaisuma stabilizācijas rokas gumijas starplikas (6) no piederumu kastes, lai nodrošinātu atstarpi no jebkurām kustīgām detaļām.
- Pievienojiet pašlīmējošo pretiekaisuma stabilizācijas rokas gumijas starplikas (6) pie GPU pretiekaisuma rokas.
PADOMS: Ja izlemjat nomainīt kabeļa apvalku (F) pret sānu ventilatora stiprinājuma kronšteinu (1), varat pārvietot GPU pretnolaišanās stabilizācijas roku uz pretnolaišanās stabilizācijas rokas mini stiprinājumu (5) un saglabāt pretnolaišanās funkcionalitāti.
3. GPU uzstādīšana vertikālā orientācijā
FRAME 4000 atbalsta vertikālu GPU uzstādīšanu ar iekļauto PCI plati (B) un PCIe risera karti (pārdodas atsevišķi).
- Noņemiet PCI plāksni (B), izskrūvējot trīs skrūves korpusa aizmugurē.
PIEZĪME: PCI plāksnes skrūves ir fiksētas un nav nepieciešams tās pilnībā izņemt.
- Pagrieziet PCI plāksni (B) par 90 grādiem pretēji pulksteņa rādītāja virzienam, lai PCIe slota vāka skrūves būtu vērstas uz augšu.
- Atkārtoti piestipriniet PCI plāksni (B) un nostipriniet skrūves.
- Install the Vertical Mount Standoffs (12) from the accessory box to the top of the PSU shroud. There are two locations for standoffs, so choose the location that best suits the size of your GPU in relation to how far it is from the side panel.
- Mount the PCIe Riser Card (sold separately) to the Vertical Mount Standoffs (12) using two of the included Motherboard Screws (9).
- Ievietojiet GPU PCI kronšteinā, stingri ievietojot to riser kartē, līdz dzirdat klikšķi, pēc tam nostipriniet to ar skrūvēm.
SAVIENOJOT SAVUS FANI
1. CONNECTING AND CONTROLLING RS FANS
- FRAME 4000D RS
- FRAME 4000D WOOD RS
- FRAME 4000X
Lūdzu, apmeklējiet CORSAIR RS sērijas ātrās uzsākšanas rokasgrāmatu, lai saņemtu norādījumus par ventilatora uzstādīšanu.
2. CONNECTING AND CONTROLLING RS ARGB FANS
- FRAME 4000D RS ARGB
- FRAME 4000D LCD RS ARGB
Lūdzu, apmeklējiet CORSAIR RS ARGB sērijas ātrās uzsākšanas rokasgrāmatu, lai saņemtu norādījumus par ventilatora uzstādīšanu.
APKOPE
1. KORPUSA FILTRU TĪRĪŠANA
FRAME 4000 ir aprīkots ar trim noņemamiem putekļu filtriem. Apakšā atrodas barošanas filtrs, sānos – magnētiskais filtrs, bet priekšā – plastmasas/neilona filtrs.
- Lai noņemtu priekšējo ventilatora filtru (J), nolieciet plastmasas filtra rāmi uz korpusa augšdaļu, velkot no apakšas.
- Lai noņemtu magnētisko sānu ventilatora filtru (H), velciet pa vidu, lai izliektu rāmi, pēc tam atvienojiet galus no fiksācijas punktiem un paceliet filtru.
- Lai noņemtu PSU ventilatora filtru (K), velciet to prom no korpusa.
PIEZĪME: Filtrus var tīrīt ar saspiestu gaisu vai ūdeni. Ja filtrus skalo, pirms atkārtotas uzstādīšanas pārliecinieties, ka tie ir pilnībā nožāvēti.
2. KABEĻU PĀRVALDĪBAS PADOMI
FRAME 4000 ietver arī citas dažādas kabeļu pārvaldības funkcijas, piemēram:
- Maināmas iekšējās/ārējās velcro lentes somas aizmugurē.
- Vairākas pozīcijas āķu un cilpu siksnām, lai pielāgotos standarta vai apgrieztiem savienotājiem mātesplatēs.
- Rāvējslēdzēju punkti ir stratēģiski izvietoti, lai novadītu strāvas kabeļus uz konkrētām ierīcēm.
- iCUE LINK kabelis tiek piestiprināts augšējā panelī, lai droši noturētu LINK kabeļus bez pastāvīgas piestiprināšanas.
- Supports most reverse connector motherboards (MSI, ASUS, GIGABYTE) that feature connectors on the rear of the board for a build with no visible motherboard cables.
- Īpaša vieta jūsu iCUE LINK sistēmas koncentratoram.
- Ja nevēlaties tērēt daudz laika kabeļu sakārtošanai un nevēlaties, lai kabeļi būtu redzami caur apakšējo tīkla ceturtdaļas paneli, nomainiet caurspīdīgo ieliktni pret krāsā saskaņotu necaurspīdīgu ieliktni, kas iekļauta piederumu kastē.
GARANTIJAS PAZIŅOJUMS

CORSAIR FRAME 4000 sērijas korpusiem ir 2 gadu garantija.
PRODUCT CHANGES
|
January 2025 |
Initial Release |
|
March 2026 |
Thicker steel side panels 200mm fan compatibility PSU shroud cut Various case rigidity improvements |
AVAILABLE ACCESORIES
CC-8900917 FRAME 4000 3D-Y Airflow Front Panel - Black
CC-8900918 FRAME 4000 3D-Y Airflow Front Panel - White
CC-8901149 FRAME 4000 RGB FLOW Front Panel - Black
CC-8901150 FRAME 4000 RGB FLOW Front Panel - White
CC-8901151 FRAME 4000 Series WOOD Front Panel - Black/Walnut
CC-8901152 FRAME 4000 Series WOOD Front Panel - White/Oak
CC-8901153-WW FRAME 4000 Series ELITE WOOD Front Panel - Black/Walnut
CC-8901154-WW FRAME 4000 Series ELITE WOOD Front Panel - White/Oak
CC-8901155 FRAME 4000 Series Flat Glass Front Panel - Black
CC-8901156 FRAME 4000 Series Flat Glass Front Panel - White
CC-8901157 FRAME 4000 Series Pixel Glass Front Panel - Black
CC-8901158 FRAME 4000 Series Pixel Glass Front Panel - White
CC-8901208 FRAME 4000 Glass + Mesh Side Panels - Black
CC-8901209 FRAME 4000 Glass + Mesh Side Panels - White
CC-8901147 FRAME 4000 Full Tempered Glass Side Panel - Black
CC-8901148 FRAME 4000 Full Tempered Glass Side Panel - White
CC-8901048-WW FRAME 4000 Series LCD Mounting Kit - Black
CC-8901049-WW FRAME 4000 Series LCD Mounting Kit - White
CC-8901142-WW FRAME 4000 Series Cold Air Intake Kit - Black
CC-8901143-WW FRAME 4000 Series Cold Air Intake Kit - White
CC-8901171 FRAME 4000 Series - Flat Steel Panel - Black
CC-8901172 FRAME 4000 Series - Flat Steel Panel - White
CC-8900966 FRAME Standard Steel Motherboard Tray - Black
CC-8900967 FRAME Standard Steel Motherboard Tray - White
CC-8901022 FRAME RapidRoute 2.0 Motherboard Tray - Black
CC-8901023 FRAME RapidRoute 2.0 Motherboard Tray - White
CC-8901146-WW FRAME ELITE Motherboard Tray - Meteorite Aluminum
CC-8900937 FRAME 4000 Full Length PSU Shroud - Black
CC-8900938 FRAME 4000 Full Length PSU Shroud - White
CC-8901161 FRAME 4000/4500 Compact PSU Shroud - Black
CC-8901162 FRAME 4000/4500 Compact PSU Shroud - White
CC-8900919 FRAME 4000 Standard FPIO - Black (2xA; 1xC)
CC-8900920 FRAME 4000 Standard FPIO - White (2xA; 1xC)
CC-8901159-WW FRAME 4000 Series ELITE Front Panel I/O - Black (3xC + ARGB Cherry MX Style PWR Button)
CC-8901160-WW FRAME 4000 Series ELITE Front Panel I/O - White (3xC + ARGB Cherry MX Style PWR Button)
SPARE PARTS LISTING
|
CC-8900917 |
FRAME 4000D 3D-Y Airflow Front Panel, Black |
|
CC-8900918 |
FRAME 4000D 3D-Y Airflow Front Panel, White |
|
CC-8900919 |
FRAME 4000D Replacement Front I/O, Black |
|
CC-8900920 |
FRAME 4000D Replacement Front I/O, White |
|
CC-8900921 |
FRAME 4000D Replacement Front Bezel Assembly, Black |
|
CC-8900922 |
FRAME 4000D Replacement Front Bezel Assembly, White |
|
CC-8900923 |
FRAME 4000D Replacement Top Panel, Black |
|
CC-8900924 |
FRAME 4000D Replacement Top Panel, White |
|
CC-8900925 |
FRAME 4000D Replacement Three-Quarter Side Glass, Black |
|
CC-8900926 |
FRAME 4000D Replacement Three-Quarter Side Glass, Black |
|
CC-8900927 |
FRAME 4000D Replacement Y-Mesh Quarter Panel, Black |
|
CC-8900928 |
FRAME 4000D Replacement Y-Mesh Quarter Panel, White |
|
CC-8900929 |
FRAME 4000D Accessory Box, Black |
|
CC-8900930 |
FRAME 4000D Accessory Box, White |
|
CC-8900931 |
FRAME 4000D Replacement PCI Bracket, Black |
|
CC-8900932 |
FRAME 4000D Replacement PCI Bracket, White |
|
CC-8900933 |
FRAME 4000D Replacement Top InfiniRail, Black |
|
CC-8900934 |
FRAME 4000D Replacement Top InfiniRail, White |
|
CC-8900935 |
FRAME 4000D Replacement Front InfiniRail (Single), Black |
|
CC-8900936 |
FRAME 4000D Replacement Front InfiniRail (Single), White |
|
CC-8900937 |
FRAME 4000D Replacement PSU Shroud, Black |
|
CC-8900938 |
FRAME 4000D Replacement PSU Shroud, White |
|
CC-8900939 |
FRAME 4000D Replacement Drive/Controller Plate, Black |
|
CC-8900940 |
FRAME 4000D Replacement Drive/Controller Plate, White |
|
CC-8900941 |
FRAME 4000D Replacement Cable Cover, Black |
|
CC-8900942 |
FRAME 4000D Replacement Cable Cover, White |
|
CC-8900943 |
FRAME 4000D Replacement InfiniRail Fan Mounts (12pcs), Black |
|
CC-8900944 |
FRAME 4000D Replacement InfiniRail Fan Mounts (12pcs), White |
|
CC-8900945 |
FRAME 4000D Replacement Strap Kit, Black |
|
CC-8900946 |
FRAME 4000D Replacement Strap Kit, White |
|
CC-8900947 |
FRAME 4000D Replacement PSU Filter, Black |
|
CC-8900948 |
FRAME 4000D Replacement PSU Filter, White |
|
CC-8900949 |
FRAME 4000D Replacement Front Filter, Black |
|
CC-8900950 |
FRAME 4000D Replacement Front Filter, White |
|
CC-8900951 |
FRAME 4000D Replacement Side Filter, Black |
|
CC-8900952 |
FRAME 4000D Replacement Side Filter, White |
|
CC-8900953 |
FRAME Series GPU Anti-Sag Assembly, Black |
|
CC-8900954 |
FRAME Series GPU Anti-Sag Assembly, White |
LEGAL
©2026 CORSAIR MEMORY, Inc. All rights reserved. CORSAIR and the sails logo are registered trademarks of CORSAIR in the United States and/or other countries. All other trademarks are the property of their respective owners. Product may vary slightly from those pictured.
SAISTĪTAIS SATURS


