MANUÁL | PRÍRUČKA RÝCHLYM ŠTARTOM
SABRE v3 PRO PureVector MG ERGO
V tejto príručke
CHARGING THE MOUSE
Connect the USB CHARGING / DATA CABLE (K) to an available USB 2.0 or 3.X port on your PC and to the USB CHARGING / DATA PORT (G) on the mouse. The MULTI-PURPOSE INDICATOR LED (F) will indicate charging status (see Mouse Status and Indications).
GETTING TO KNOW YOUR MOUSE
- LEFT MOUSE BUTTON
- RIGHT MOUSE BUTTON
- MIDDLE CLICK / SCROLL WHEEL
- FORWARD BUTTON
- BACK BUTTON
- MULTI-PURPOSE INDICATOR LED
- USB CHARGING / DATA PORT
- DPI / PAIRING BUTTON
- POWER / WIRELESS MODE SWITCH (OFF / 2.4GHZ / BT)
- USB WIRELESS RECEIVER
- USB CHARGING / DATA CABLE
*The USB CHARGING / DATA CABLE (K) connects either the USB WIRELESS RECEIVER (J) or the mouse - not both at the same time.
*The DPI / PAIRING BUTTON (H) is located on the bottom of the mouse.
SETTING UP 2.4GHz SLIPSTREAM WIRELESS
- Connect the USB CHARGING / DATA CABLE (K) to an available USB 2.0 or 3.X port on your PC, then plug the other end into the USB WIRELESS RECEIVER (J).
- Place the receiver near your mouse for the best wireless performance.
- Power on your mouse by switching the POWER / WIRELESS MODE SWITCH (I) to 2.4GHz.
- When successfully connected, the MULTI-PURPOSE INDICATOR LED (F) shows solid green for 2 seconds and then turns off.
CONNECTING VIA BLUETOOTH
- Slide the POWER / WIRELESS MODE SWITCH (I) to BT. The first time you do this, the mouse enters pairing mode automatically and the MULTI-PURPOSE INDICATOR LED (F) blinks blue for up to 3 minutes.
- On your PC, phone or tablet, open the Bluetooth menu and select SABRE3MGEG. When successfully connected, the MULTI-PURPOSE INDICATOR LED (F) shows solid blue for 2 seconds and then turns off.
- To pair with a different device, slide the switch to BT and press and hold the DPI / PAIRING BUTTON (H) for 2 seconds. The MULTI-PURPOSE INDICATOR LED (F) blinks blue again - repeat the step above.
*Once paired, sliding the switch back to BT shows solid blue for 2 seconds, then the LED turns off.
USING WIRED MODE
To use the mouse in wired mode, disconnect the USB CHARGING / DATA CABLE (K) from the USB WIRELESS RECEIVER (J) and plug it into the USB CHARGING / DATA PORT (G) on the mouse. The mouse switches to wired mode automatically and charges at the same time.
CHANGING DPI
- Press the DPI / PAIRING BUTTON (H) on the bottom of the mouse to cycle through the DPI stages. The MULTI-PURPOSE INDICATOR LED (F) flashes the corresponding color 3 times, then turns off. After Stage 5, the mouse returns to Stage 1.
*Advanced configurations are available via CORSAIR WEB HUB.
*DPI cannot be changed while the mouse is disconnected from 2.4GHz SLIPSTREAM WIRELESS or Bluetooth.
MOUSE STATUS AND INDICATIONS
Wireless connection, DPI stages and battery status are communicated through the MULTI-PURPOSE INDICATOR LED.
|
DPI STAGE |
LED LIGHTS |
|
STAGE 1 - 400 |
Flash Red × 3 |
|
STAGE 2 - 800 |
Flash Blue × 3 |
|
STAGE 3 - 1200 (default) |
Flash Green × 3 |
|
STAGE 4 - 1600 |
Flash Yellow × 3 |
|
STAGE 5 – 2000 |
Flash Purple × 3 |
|
DPI SHIFT STAGE – 400 *Available only if configured on CORSAIR WEB HUB |
No LED indication |
|
BATTERY STATUS |
LED LIGHTS |
|
Charging, below 30% |
Breathing Red |
|
Charging, 30%–90% |
Breathing Green |
|
Charging, above 90% |
Solid Green |
|
Battery low (below 20%), in use |
Blinking Red while moving |
|
Battery low, mouse idle |
Blinking Red × 10, then off |
|
CONNECTION MODE |
STATUS |
LED LIGHTS |
|
2.4GHz
|
Pairing / Re-pairing |
Blinking Yellow |
|
Paired / Connected |
Solid Yellow 2s, then off |
|
|
Switched back to 2.4GHz (already paired) |
Solid Green 2s, then off |
|
|
Receiver disconnected / out of range |
6 × Green blinks on each interaction |
|
|
Reconnected |
Solid Green 2s, then off |
|
|
Bluetooth |
Pairing / Re-pairing |
Blinking Blue |
|
Paired / Connected / Switched back to BT (already paired) |
Solid Blue 2s, then off |
|
|
Disconnected / removed from host |
6 x Blue blinks on each interaction |
|
|
Reconnected |
Solid Blue 2s, then off |
STEP-BY-STEP MOUSE SETUP GUIDE
Step 1 – Connect Your Mouse
A. Connect the USB CHARGING / DATA CABLE to your PC and to the USB WIRELESS RECEIVER.
B. Slide the POWER / WIRELESS MODE SWITCH to 2.4GHz.
*To use Bluetooth instead, slide the switch to BT and follow "CONNECTING VIA BLUETOOTH."
*To use the mouse in wired mode instead, move the cable from the receiver to the mouse. The mouse switches to wired mode automatically and charges at the same time.
Step 2 – Open CORSAIR WEB HUB and Select the Mouse
A. Go to https://www.corsair.com/web-hub/index.html.
B. Click [Add Device].
C. In the HID device dialog, choose:
- CORSAIR SABRE v3 PRO WIRELESS USB Receiver (wireless mode), or
- CORSAIR SABRE v3 PRO PureVector MG ERGO Gaming Mouse (wired mode).
Step 3 – Set DPI Levels
A. Click [DPI] in the left sidebar.
B. The mouse ships with 5 DPI stages: 400 / 800 / 1200 (default) / 1600 / 2000.
C. Use the slider or type a value to adjust each stage, and use the toggle to enable or disable individual stages.
D. Click [Reset to Default] to restore the factory DPI stages
E. Optional: Use PureVector calibration by Aimlabs to optimize your DPI performance. Click [Open AimLabs] or get it on Steam. After calibration, all other DPI stages will be disabled.
*For the full PureVector calibration walkthrough, see STEP-BY-STEP PUREVECTOR GUIDE.
*The DPI / PAIRING BUTTON cycles through the enabled DPI stages. Sniper (DPI Shift) is only available if assigned to a button.
Recommended starting DPI:
- Desktop/general: 1200–1600 DPI
- FPS games: 800–1200 DPI
- MOBA/MMO: 1600–2000 DPI
Step 4 – Remap Buttons (Assignments)
A. Click [Assignments] in the left sidebar.
B. Click the button on the virtual mouse you want to change. Five buttons are programmable: Left Click, Right Click, Middle Click, Forward, and Back. The power/wireless switch is not programmable.
C. Choose the Assignment Type from the left list:
- Keyboard Keys (Basic Keys / Functional Keys / System Keys)
- Mouse Buttons.
- Media and Volume
- Macro (record multiple keystrokes)
- Text
D. You can also drag a key from the list directly onto the virtual mouse.
E. Confirm the assignment and test it. Click [Reset to Default] to restore the original layout.
Step 5 – Device setting
A. Click Device Setting at bottom left.
B. Adjust the following:
- a. Battery – Shows wireless connectivity and battery status.
- b. USB Wired Polling Rate – 125 Hz / 250 Hz / 500 Hz / 1,000 Hz (default) / 2,000 Hz / 4,000 Hz / 8,000 Hz.
- c. SLIPSTREAM WIRELESS Polling Rate – 125 Hz / 250 Hz / 500 Hz / 1,000 Hz (default) / 2,000 Hz / 4,000 Hz / 8,000 Hz. Higher polling rates improve response time but use additional system processing power. Changing the polling rate may briefly disconnect your device.
- d. Bluetooth Polling Rate - Fixed at 1,000 Hz on BLE 6.0 and above, or 250 Hz below BLE 6.0. Not user-adjustable.
- e. Brightness – Adjust the brightness of the MULTI-PURPOSE INDICATOR LED.
- f. Sleep Time – Switches the device to a low-power state after a set period of inactivity. Default 3 min, adjustable 1-999 min.
- g. Angle Snapping – Enables smoother mouse movement for drawing straight lines
- h. Lift Height – Allows you to adjust vertical height at which the mouse sensor stops sending a signal to your computer when you lift the mouse.
- i. Surface Selection – Optimize performance for your surface: Default / MM Glass / MM PRO / MM / MM350 PRO / MM200.
- j. Motion Sync – Makes cursor movements feel smoother and more accurate by keeping them in sync with your system. On / Off.
- k. Ripple Control – Reduces tiny unwanted cursor jitters, especially at high DPI. On / Off.
- l. Reset to Factory Settings – Restore all device settings to default values.
- m. Click [Save] to apply your changes.
Step 6 – Update firmware
A. Connect one device to your PC:
– Mouse: connect the mouse to your PC with the USB CHARGING / DATA CABLE.
– Receiver: connect the USB WIRELESS RECEIVER to your PC with the USB CHARGING / DATA CABLE.
B. Go to CORSAIR WEB HUB, click [Add Device], and select the connected device — CORSAIR SABRE v3 PRO PureVector MG ERGO Gaming Mouse or CORSAIR SABRE v3 PRO WIRELESS USB Receiver.
C. Click Device Settings at the bottom left to open the DEVICE SETTINGS panel.
D. At the top of the panel, next to Firmware, click [Check for Updates].
E. If the latest firmware is already installed, the page displays "The latest firmware version is installed." Otherwise, follow the on-screen instructions to complete the update.
F. Disconnect the device, then repeat steps A–E for the other one.
*Do not unplug the device or close the browser during the update process.
Manual firmware update (optional)
Use this only if you need to install a specific firmware file provided by CORSAIR Support.
A. In the CORSAIR FIRMWARE UPDATE UTILITY, click the three-dot menu at the top right of the device card and select [Manual Update].
B. The MANUAL FIRMWARE UPDATE window shows the current firmware version of the device.
C. Drag and drop the firmware file into the window, or click the upload area to select the file (zip).
D. Click [Update] and wait for the update to complete.
Step 7 – Pair wireless receiver
Manual re-pairing of the USB WIRELESS RECEIVER is only available through the CORSAIR FIRMWARE UPDATE UTILITY.
A. Connect the USB WIRELESS RECEIVER to your PC with the USB CHARGING / DATA CABLE and switch the mouse on (2.4GHz).
B. Go to the CORSAIR FIRMWARE UPDATE UTILITY. (In CORSAIR WEB HUB you can also reach it from Device Settings → Pair Wireless Receiver → [Go].)
C. Click [Add Device] and authorize CORSAIR SABRE v3 PRO WIRELESS USB Receiver.
D. On the receiver card, click the three-dot menu at the top right and select [Pair].
E. On the mouse, press and hold the LEFT MOUSE BUTTON (A), RIGHT MOUSE BUTTON (B) and MIDDLE CLICK / SCROLL WHEEL (C) together for 2 seconds. The MULTI-PURPOSE INDICATOR LED (F) blinks yellow for about 20 seconds.
F. Move the mouse close to the receiver. The LED shows solid yellow for 2 seconds and then turns off - pairing is complete.
Step 8 – Pair a Bluetooth device
A. Slide the POWER / WIRELESS MODE SWITCH to BT.
B. Press and hold the DPI / PAIRING BUTTON for 2 seconds. The MULTI-PURPOSE INDICATOR LED blinks blue.
C. On your PC, phone or tablet, open the Bluetooth menu and select SABRE3MGEG.
D. The LED shows solid blue for 2 seconds and then turns off - pairing is complete.
*Bluetooth pairing does not require the CORSAIR FIRMWARE UPDATE UTILITY.
STEP-BY-STEP PureVector GUIDE
PureVector calibration by Aimlabs analyzes your aim and applies calibrated directional sensitivity to your mouse. The calibration is applied per DPI stage and is saved to the onboard memory of the mouse, so your profile travels with you - no background app required.
*Requires Aimlabs on Steam and a free Aimlabs account. Make sure the mouse and the wireless receiver are both running the latest firmware (see Step 6 of the STEP-BY-STEP MOUSE SETUP GUIDE).
Step 1 – Open PureVector in CORSAIR WEB HUB
A. Connect your mouse, open CORSAIR WEB HUB, and click [DPI] in the left sidebar.
B. Select the DPI stage you want to calibrate.
C. In the PureVector panel, click [Open AimLabs] to launch Aimlabs through Steam. If Aimlabs is not installed, click [Get it on Steam] to download it.
*After calibration, all other DPI stages will be disabled.
Step 2 – Sign in to Aimlabs
A. Launch Aimlabs.
B. Sign in, or create an Aimlabs account. An account is required to access PureVector features.
Step 3 – Open Mouselabs in Aimlabs
After you sign in, click [Go now] if you are prompted to open the PureVector page. You can also select Mouselabs in the top menu.
Step 4 – Run calibration
A. Click [Start calibrating].
B. Answer the setup questions, then click [Continue].
C. Select your grip style, then click [Continue].
D. Select your aim style, then click [Continue].
E. Select your mousepad size, then click [Continue].
F. Search for your mouse model and set your DPI (in-game sensitivity auto-filled from Aimlabs), then click [Start calibrating].
G. Click to begin. Calibration consists of 5 rounds of Spidershot tasks, 1 minute per round (about 5 minutes in total).
H. After the 5th round, click [Done] to save the calibration data to your mouse.
Step 5 – Review your results
A. Return to the Mouselabs panel. It now shows additional data, including the PureVector card on the left. Your setup is saved automatically.
B. Select the PureVector tab on the right to view the Before and After PureVector graphs.
C. All 5 calibration rounds are recorded. Click any round to watch its replay.
*The After PureVector graph appears only after you complete at least 5 more rounds of any Aimlabs task following your first calibration. Play more rounds to keep adding data to it.
Step 6 – Refine or reset your calibration
A. To run calibration again, click [Refine calibration].
B. To remove the calibration data from your mouse, click the Reset button.
BATTERY REMOVAL INFORMATION
BATTERY REMOVAL DIAGRAM NEEDED
This product uses a rechargeable battery and safety guidelines must be followed in the event that the product is disabled for disposal and recycling. To safely remove the battery for disposal and recycling, follow the numbered steps with the below diagrams.
CORSAIR MEMORY, Inc. encourages customers to recycle used electronic hardware and rechargeable batteries in accordance with local laws and regulations.
BATTERY CHARGING INFO
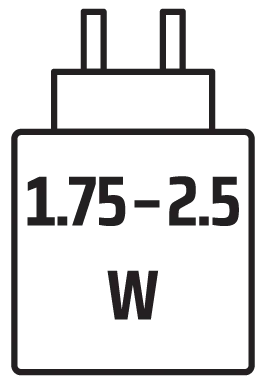
The power delivered by the charger must be between min 1.75 Watts required by the radio equipment, and max 2.5 Watts in order to achieve the maximum charging speed.
BATTERY INFORMATION
- M/N(型號): AHB521630HPJT
- Rating: 3.8V, 290mAh, 1.11Wh
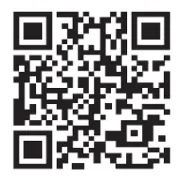
- Scan QR code for battery detail information
Mouse
M/N(型號): RGP0194
Rating(電壓電流): 5V  350 mA
Receiver
M/N(型號): RGP0195
Rating(電壓電流): 5V 50 mA
COPYRIGHT/LEGAL INFORMATION
© 2026 CORSAIR MEMORY, Inc. All rights reserved. CORSAIR and the sails logo are registered trademarks of CORSAIR in the United States and/or other countries. All other trademarks are the property of their respective owners. Product may vary slightly from those pictured.
CORSAIR MEMORY, Inc. 115 North McCarthy Blvd, Milpitas, CA 95035, USA
CORSAIR GmbH, Landshuter Allee 10, 80637 Munich, Germany
CORSAIR COMPONENTS Ltd. 1020 Eskdale Road, Winnersh Triangle, Wokingham, RG41 5TS, UK

FCC ID: 2AAFM-RGP0194 (Mouse)
FCC ID: 2AAFM-RGP0195 (Dongle)
IC: 10954A-RGP0194 (Mouse)
IC: 10954A-RGP0195 (Dongle)