MANUAL | QUICK START GUIDE
FRAME 4000D SERIES LCD MOUNTING KIT
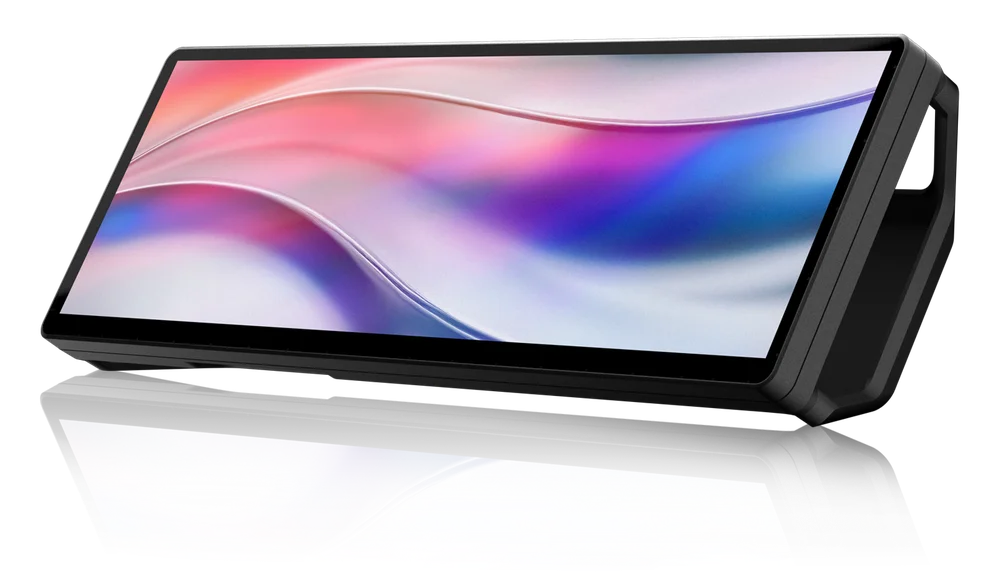
MOUNTING KIT FOR XENEON EDGE

BEFORE YOU START
IMPORTANT: Handle glass with care. This product is made with tempered glass. Avoid storage on or contact with hard surfaces like ceramic/porcelain tile, stone, masonry, or concrete. CORSAIR recommends removing all tempered glass side panels before placing the case or building on a hard surface. If necessary to place your finished build on a hard surface, it is recommended to elevate or isolate your case from the surface to avoid accidental contact, potential damage, or injury.
Replacement panels are available at corsair.com. Contact help.corsair.com for any assistance.
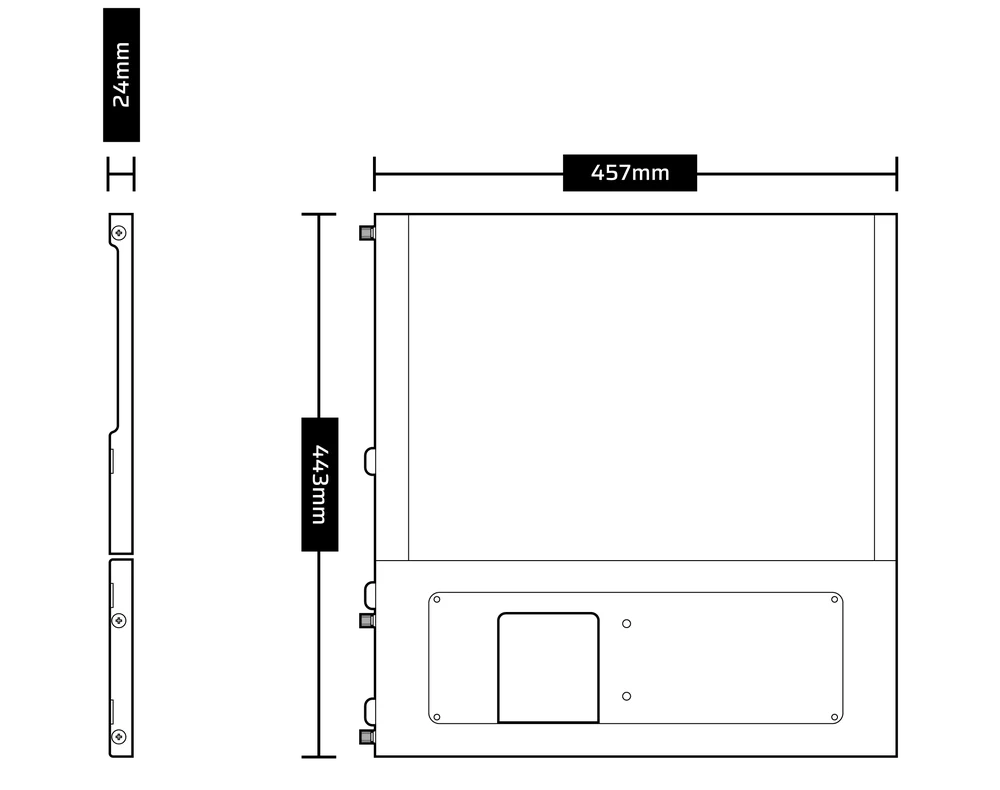
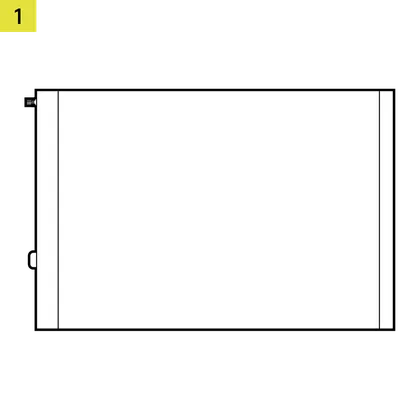
DIMENSIONS
KIT CONTENTS
1x Upper Glass Side Panel
1x LCD Screen Mounting Bracket
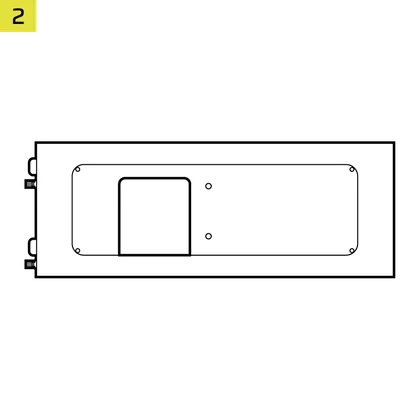
2x 1/4"-20 Screws
VIDEO TUTORIAL
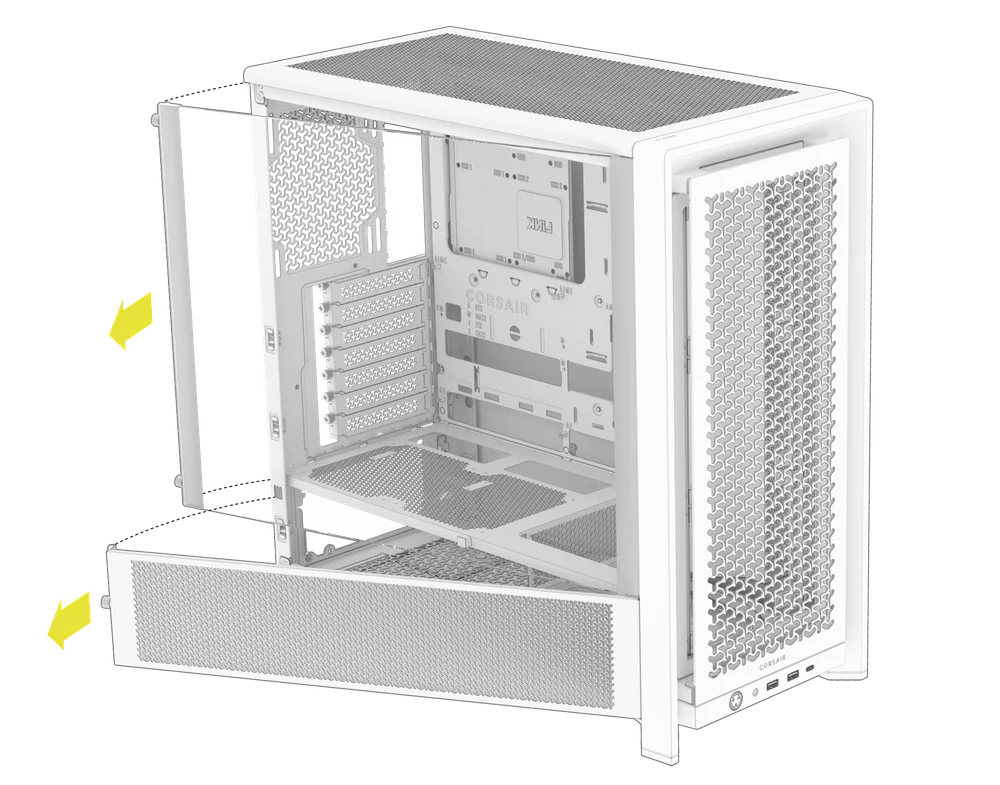
PREPARE YOUR FRAME 4000D
- Unscrew and remove the top three-quarter side glass panel and the lower quarter mesh side panel.
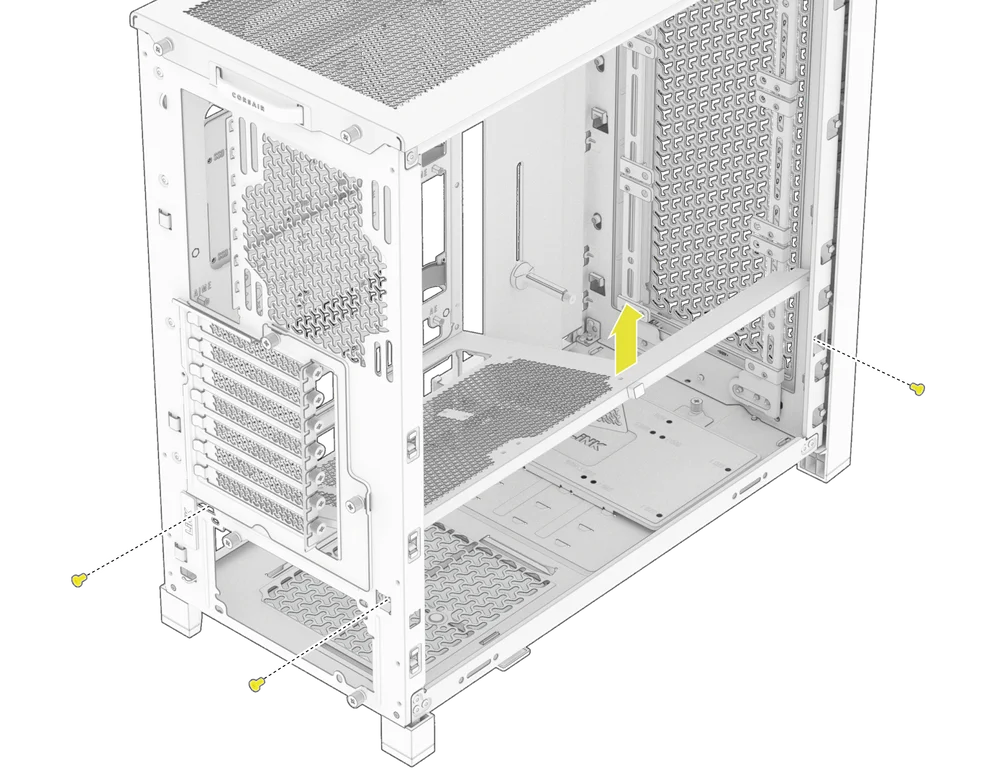
- Unscrew and remove the steel side panel.
- Unplug and remove your GPU.
- Remove the GPU Anti-sag Stabilization Arm mini mount if one is installed.
- Unscrew and remove the stock PSU shroud.
NOTE: The stock PSU shroud on the 4000D cannot be reinstalled without interfering with the XENEON EEDGE bracket. If you have fans mounted on the shroud, remove them before taking it out.
NOTE: To retain the option of vertically mounting your GPU or using fans above the PSU, you can install the compact PSU shroud (sold separately).
- OPTIONAL: Install the compact PSU shroud (sold separately).
- Reinstall the GPU Anti-sag Stabilization Arm mini mount.
- Reinstall and connect your GPU.
PREPARE THE LCD SCREEN MOUNTING BRACKET
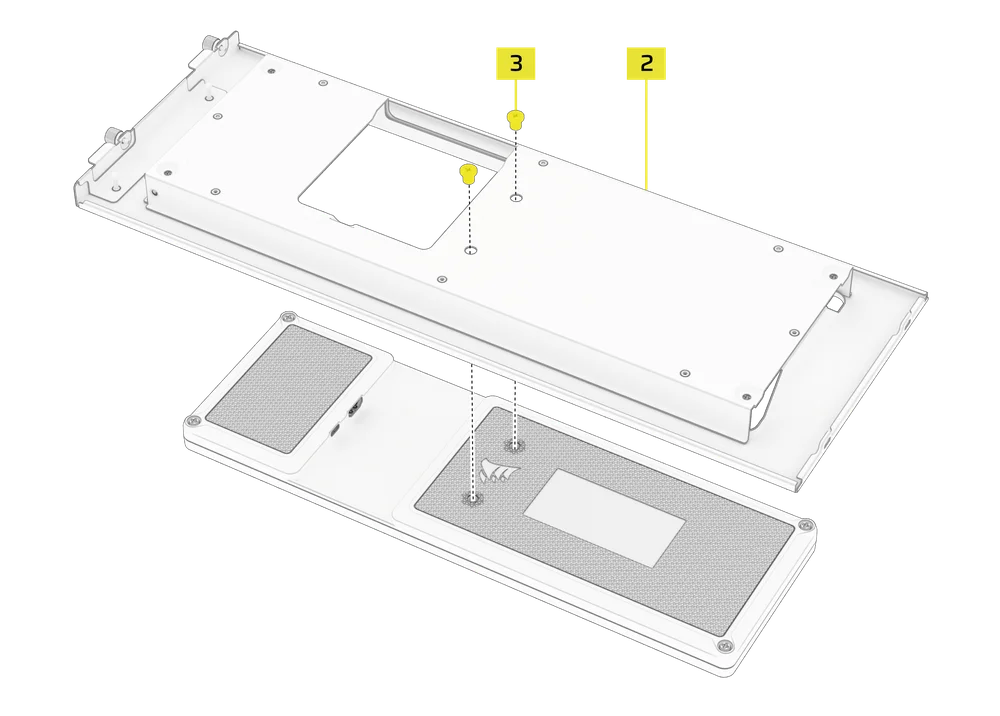
- Attach the XENEON EDGE to the LCD Screen Mounting Bracket (2) and secure it with the two 1/4"-20 Screws (3) included with the kit.
NOTE: You can also use the four corner screws of the XENEON EDGE LCD Screen as alternative mounting points if you misplace the 1/4"-20 Screws (3).
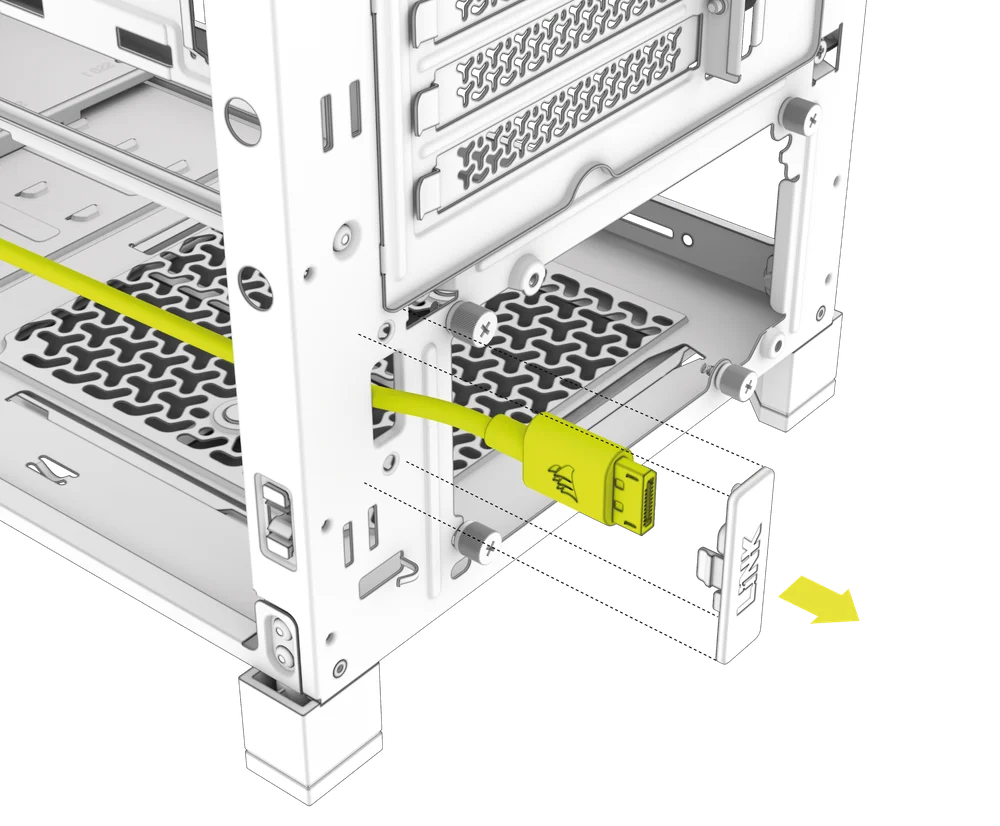
- Route the HDMI-to-DisplayPort cable (included with your XENEON EDGE) through the dedicated opening at the back of the case, and connect it to the DisplayPort output on your computer or GPU.
- Connect one end of the internal USB Type-C cable (included with your XENEON EDGE) to an available USB header on your motherboard.
- Connect the other ends of the HDMI-to-DisplayPort and USB Type-C cables to the corresponding ports on the back of the XENEON EDGE panel.
NOTE: For detailed instructions on how to connect your XENEON EDGE cables, please visit the XENEON EDGE Quick Start Guide.
INSTALL THE LCD MOUNTING KIT PANEL AND BRACKET
- Pull any excess cable slack into the PSU chamber for clean cable management.
- Attach the Upper Glass Side Panel (1) and secure it with the captive screw.

- Attach the LCD Screen Mounting Bracket (2) with your XENEON EDGE to the PC case and secure it with the pre-attached captive screws.
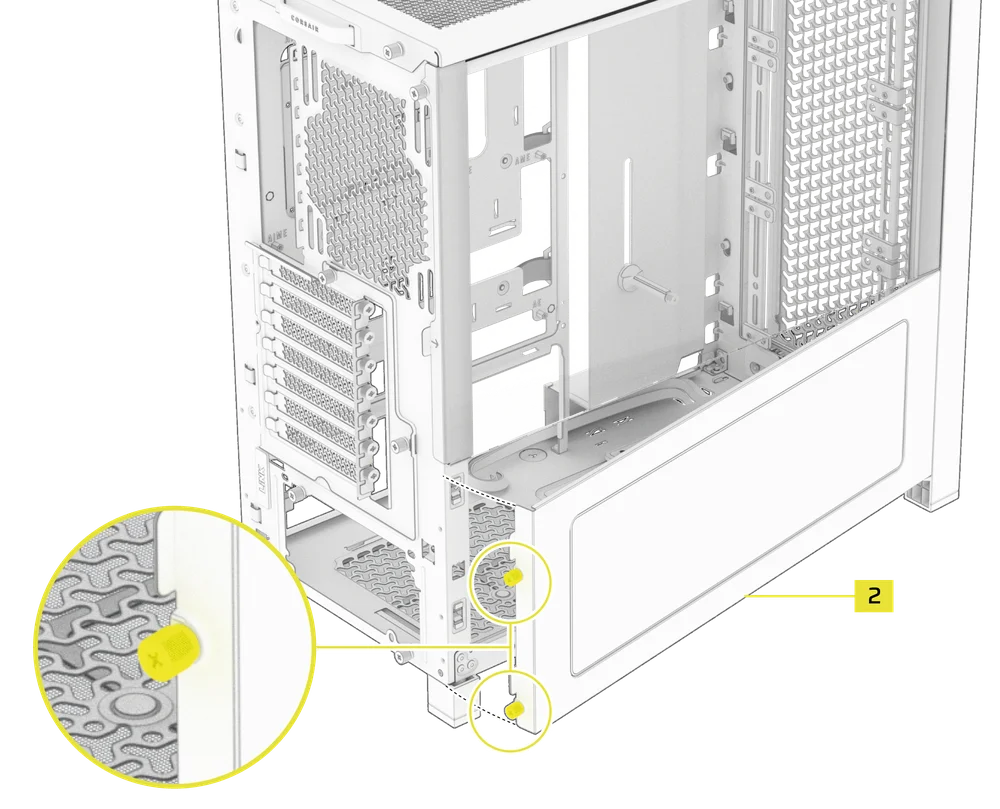
- Re-attach the steel side panel to the case and screw all exterior screws in to secure the paneling, as well as the XENEON EDGE.
ADDITIONAL INFORMATION

WARRANTY

The FRAME 4000D Series LCD Mounting Kit has a 2-year warranty.
LEGAL
© 2025 CORSAIR MEMORY, Inc. All rights reserved. CORSAIR and the sails logo are registered trademarks of CORSAIR in the United States and/or other countries. All other trademarks are the property of their respective owners. Product may vary slightly from those pictured.