MANUAL | QUICK START GUIDE
NOVABLADE PRO
WIRELESS HALL EFFECT LEVERLESS CONTROLLER
READ THIS FIRST – BEFORE YOUR FIRST USE: CORSAIR Firmware Update Utility to update your firmware.
FIRMWARE UPDATE
- Insert the wireless receiver to the host
- Switch the toggle to 2.4GHz mode
- Switch the toggle to PC mode
- Power on the controller to ensure 2.4GHz mode is workable
Use the following link to perform the firmware update: CORSAIR Firmware Update Utility.
After opening the link, follow the steps below to update both the wireless receiver and the controller:
- Select “NOVABLADE 2.4GHz RECEIVER” in CORSAIR Firmware Update Utility and update
- Once the wireless receiver update is complete, connect the controller via USB cable
- Switch the toggle to wired mode
- Select “NOVABLADE PRO Wireless Hall Effect Leverless Controller” in CORSAIR Firmware Update Utility and update
- If the controller and wireless receiver lose connection after the firmware update, manually perform 2.4GHz pairing using the steps below:
-
- Ensure the controller is powered off (not connected via USB)
- Switch the toggle to 2.4 mode
- Press and hold L3 + R3
- Power on the controller by pressing the HOME button at the same time
- Continue holding L3 + R3 + HOME buttons for 3 seconds to activate pairing mode
- Indicator - 360° LightEdge and all 15 buttons:
- Solid White for 2 seconds: Connected
- Pulsing White: Not connected
- Rapidly blink white for 2s during pairing
- Lighting returns to the last used setting after the pairing process is complete
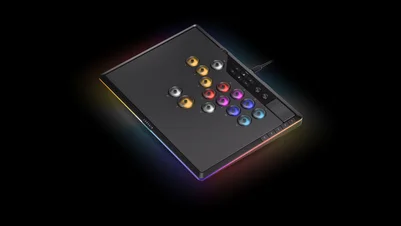
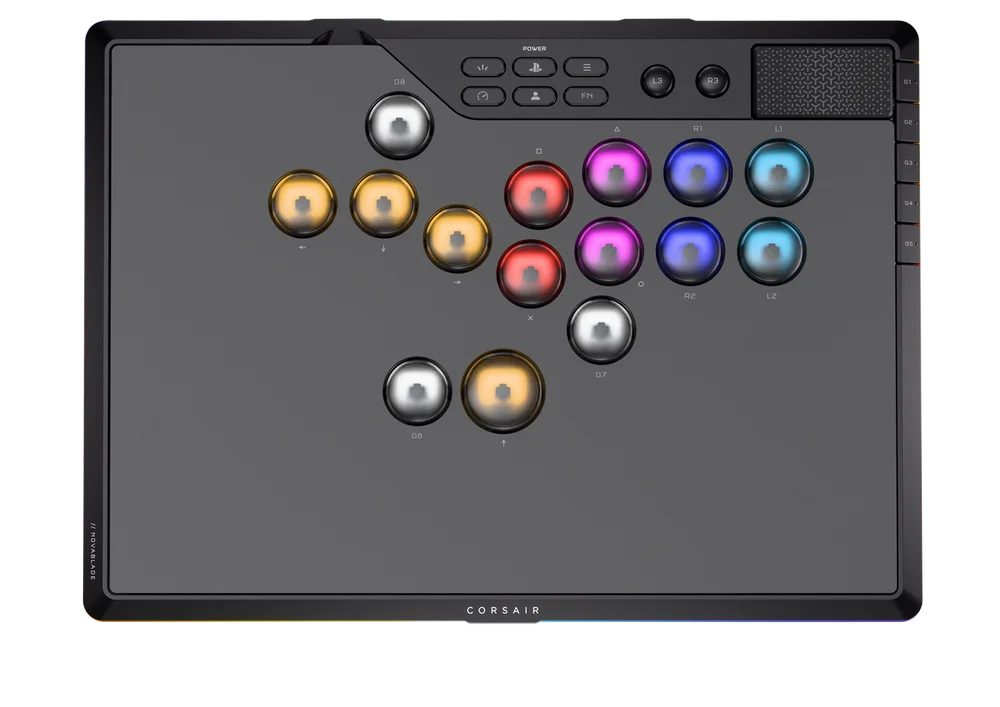
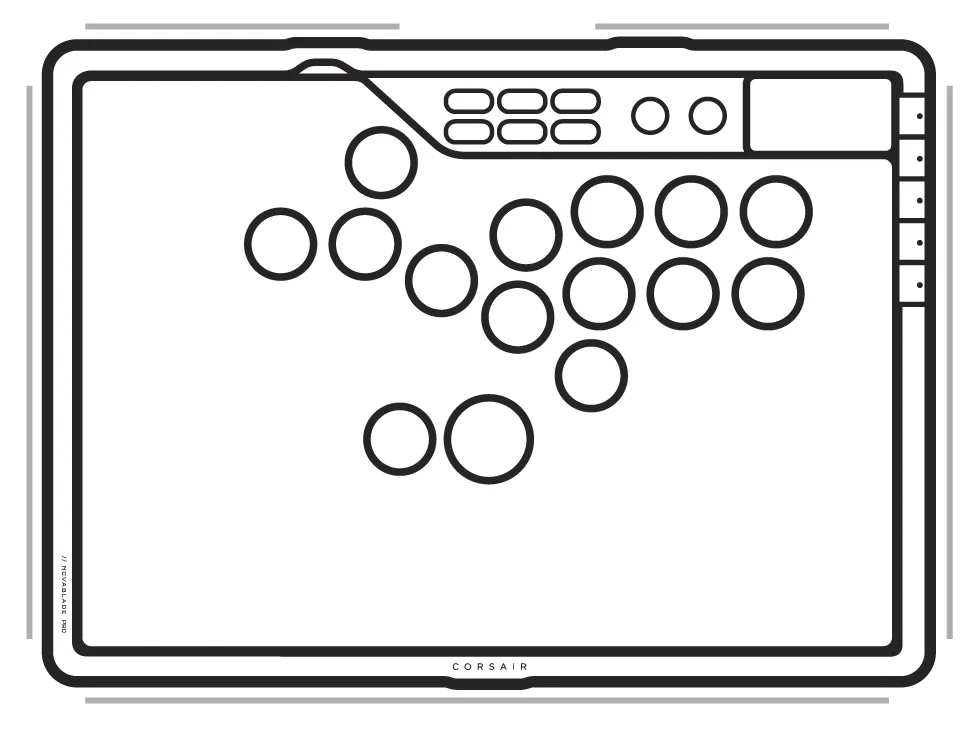
GETTING TO KNOW YOUR LEVERLESS CONTROLLER

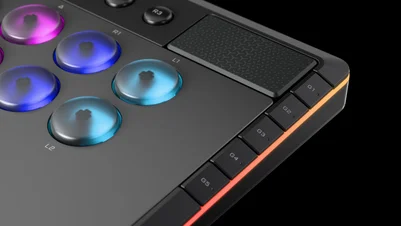
- 15 x MGX HYPERDRIVE SWITCH BUTTONS
- 8 x FUNCTION KEYS
- TOUCHPAD
- 5 x G-KEYS
- TRAVEL CASE
- USB TYPE-C PORT
- USB TYPE-C TO TYPE-A CABLE
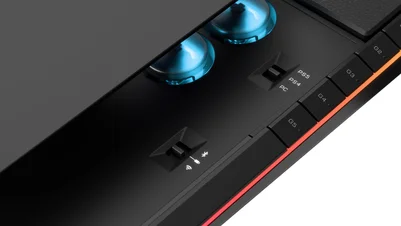
- SLIDER (CONNECTIVITY AND USB LATCH LOCK)
- WIRELESS RECEIVER
- PS/PC SWITCH
- 2.4GHz/BT/WIRED SWITCH
- MAGNETIC ALUMINUM TOP PLATE
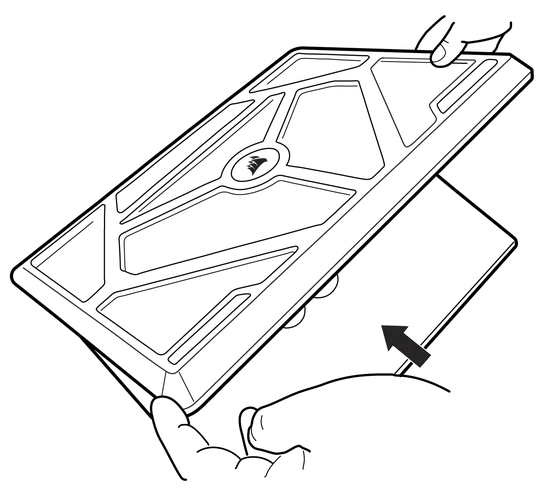
HOW TO OPEN THE TRAVEL CASE
The travel case can be opened at the following angles.

FACTORY RESET
- Switch to USB mode
- Unplug USB cable
- Hold L3 + R3
- Plug in USB cable
- Hold L3 + R3 for 2 seconds
Indicator-Solid white lighting across all 15 buttons until Factory reset complete.
POWER-OFF MODE
The device will be shut down after 30 minutes of inactivity in both PS and PC modes. Inactivity is defined as:
- No keyboard input detected
- Power cable disconnected
INDICATOR
- 360° LightEdge
- 15 BUTTONS
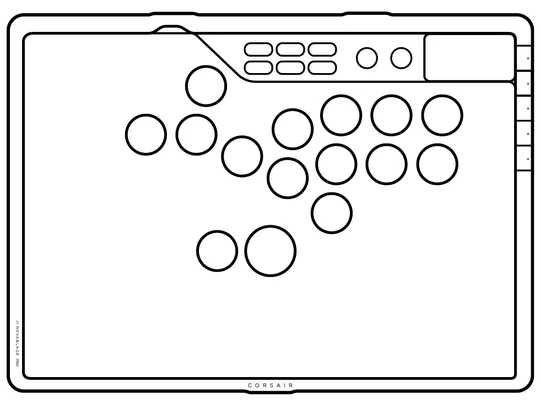
MGX HYPERDRIVE SWITCH BUTTONS (A)
All 15 x MGX Hyperdrive switch buttons are allowed for:
- User adjustable actuation points
- Rapid Trigger mode
- Press G4 or press and hold FN + R2 to toggle on or off
- Indication: 15 keycaps & 360° LightEdge
- Rapid trigger On:
- 360° LightEdge: Profile specific
- 15 keycaps rapidly blink red for 3 seconds then reverts to profile specific lighting - Rapid trigger Off:
- 360° LightEdge: Profile specific
- 15 keycaps shows static white for 3 seconds then reverts to profile specific lighting
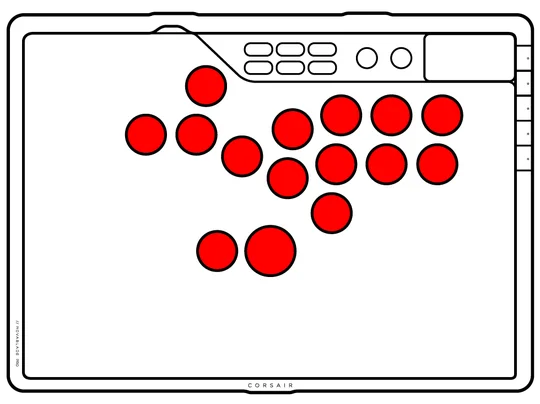
Rapid Trigger On
Rapid Trigger Off
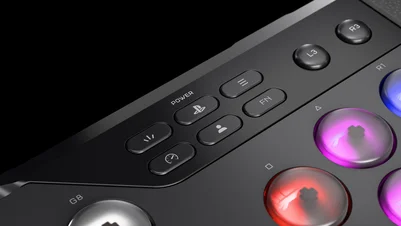
FUNCTION KEYS (B)
- Create, Home & Power (PS button), Options
- Game Mode, Profile, FN
- L3, R3
TOUCHPAD (C)
Capacitive touchpad with press function.
- In PC mode: Mousepad function
- In PS mode: Support PS4/PS5 TouchPad function
5 X G-KEYS (D)
- Programmable via macro recording (not allowed in PS mode)
- Specifically designed for PS mode (also available in PC mode)
- Default Functions on G1-G5 keys
For the default functions of G1–G5—when a specific function is selected, stay in that setting for 3 secs, then the setting will be saved automatically.
| G1 |
LIGHTING EFFECT CYCLE 1.Type lighting (Default) > 2. Horizon Static color pattern> 3. Horizon wave> 4. Rainbow wave > 5. Color shift > 6. Color pulse |
| G2 |
BRIGHTNESS CYCLE 1. 100% > 2. 75% > 3. 50% > 4. 25% > 5. 0% |
| G3 |
FLASHTAP (SOCD) CYCLE 1. Neutral (Default) > 2. Off > 3. Up > 4. First > 5. Last |
| G4 |
RAPID TRIGGER ON/OFF 1. Off > 2. On |
| G5 |
ACTUATION CYCLE 1. 1mm (Default actuation value) > 2. 2mm > 3. 3mm > 4. 4mm > 5. 0.5mm |
G5 default function actuation cycle-Lighting indication: Bottom LightEdge


1mm (Default actuation value)
2mm


3mm
4mm


0.5mm
GAME MODE
Game Mode on: Pressing Game Mode button for 3 seconds to turn on Game Mode
- Lock touchpad:
- Hold FN can temporarily unlock touchpad for as long as FN is held
- Lock Create, Power, Option buttons
- FlashTap (SOCD) On with Neutral (Default) mode
- FlashTap(SOCD) mode can be changed to other modes
- Up priority, First priority, Last priority, or NO SOCD - Using shortcuts FN + Circle or G3
- FlashTap(SOCD) mode can be changed to other modes
- Rapid trigger: On
- All G1-G8 keys disabled (Macro functions disabled)
- There could be up to 1 sec of switching time if you set a different polling rate within Game Mode vs default polling rate
- Intro effect
- All keys and lighting edge do marquee effect for 2 rounds in 3 seconds
- Color: Horizon
- After intro, show type-lighting effect
- Keycaps: Key lit up when actuated
- 360° LightEdge: Entire ring lit up when any key is actuated
- Color
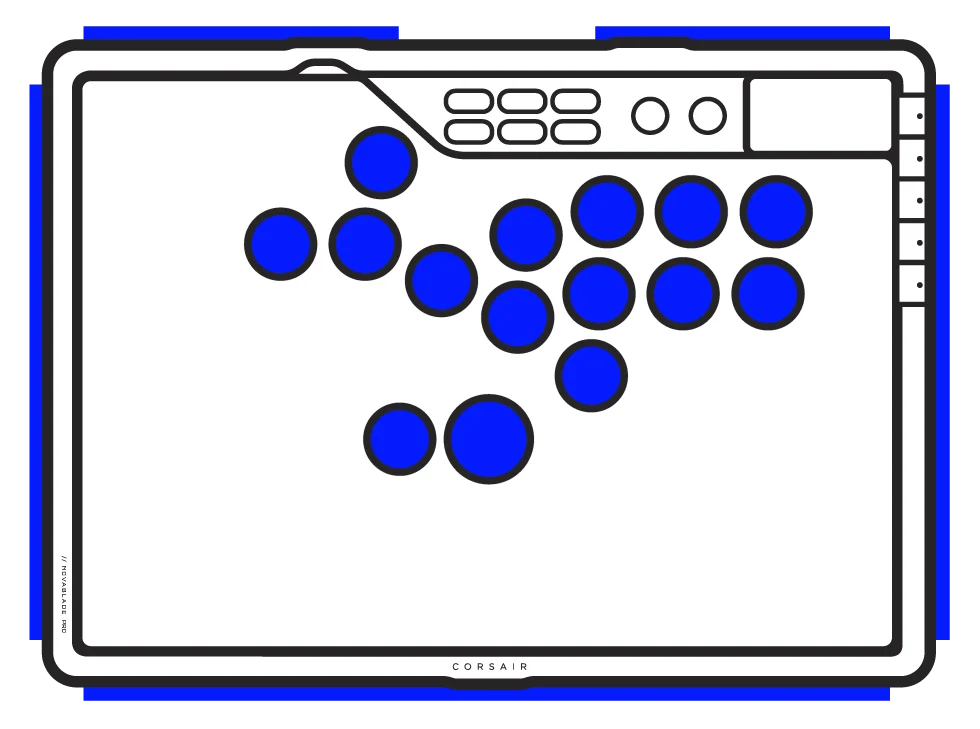
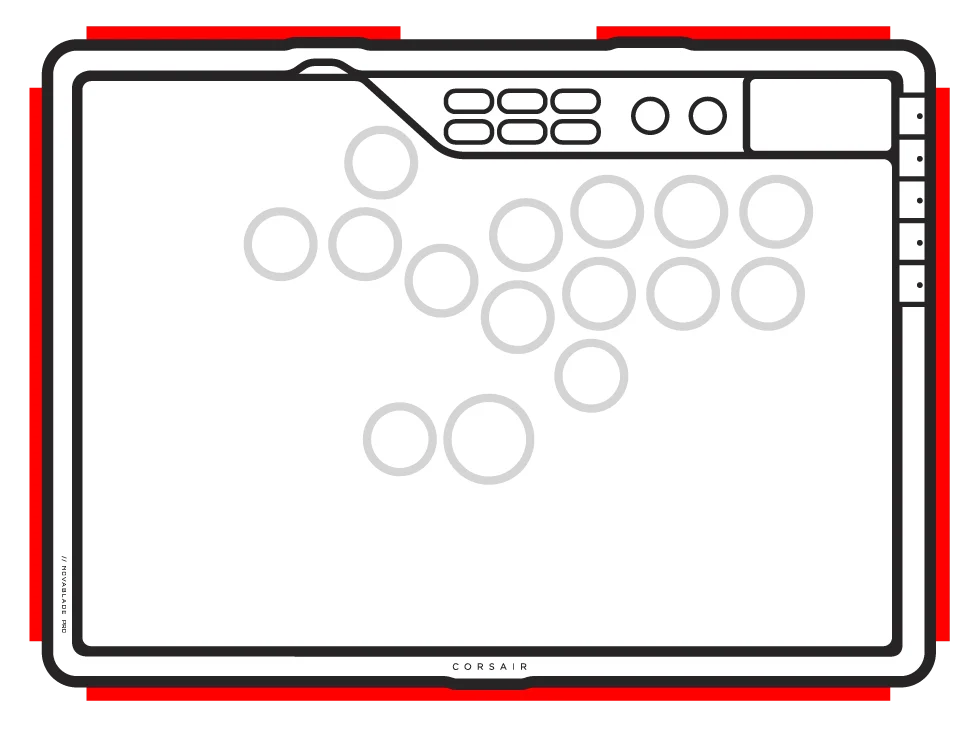
- PS mode: 1P red; 2P blue; 3P yellow; 4P green
- PC mode: All white
Game Mode off: All settings follow Profile settings (last used settings)
- FlashTap (SOCD): Off (depending on users’ last used settings)
- Unlock touchpad
- Unlock Create, Power, Option buttons
- Predefined polling rate
- Rapid trigger: Off (depending on users’ last used settings)
- Predefined lighting effect
REMAPPING
Only G6 & G7 & G8 can be remapped.
Remap
- Press and hold the Profile button for 2 seconds
- G6 and G7 G8 will blink white; all other 13 keys will turn off
- Press G6 once (if you plan to remap G6)
- G6 will blink white, G7 G8 turn off, the rest 13 keys will display Magenta, and L3/R3/Touchpad with no lighting
- Press the key you want to remap G6 to (either one of the 13 main keys or L3/R3/Touchpad)
- If you select one of the 13 main keys (e.g., the O key), G6 will blink in the same color as the O key, and all other keys will turn off
- If you select L3/R3/Touchpad, G6 will blink red
- Press and hold the Profile button again for 2 seconds to save the remap settings
Clean remap (Unmap)
- Press and hold the Profile button for 2 seconds
- G6 and G7 G8 will blink white; all other 13 keys will turn off
- Press G6 once
- G6 will blink white, G7 G8 turn off, the rest 13 keys will display Magenta, and L3/R3/Touchpad no lighting
- Not press any keys
- Press and hold the Profile button again for 2 seconds to save the unmap settings
FLASHTAP (SOCD)
Shortcuts:
- FN + Circle
- G3 default cycle: 1. Neutral (Default) > 2. Off > 3. Up > 4. First > 5. Last
| Mode | Behavior | Lighting Definition | |
| Neutral(Default) | No output, or neutral |
White
|
 |
| Up priority | Always go Up when up is pressed |
White
|
 |
| First priority | The first input is activated. Secondary inputs are ignored until the first input is released. |
Green
|
 |
| Last priority | The second (or most recent input) is activated |
Amber
|
 |
| No FlashTap (SOCD) | Left + Right and Up + Down presses are registered as is |
Lights off
|
 |
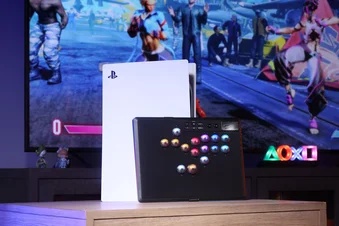
CONNECTIVITY MATRIX
- This controller uses 2.4GHz radio-frequency bandwidth. When PlayStation®5 and other products uses 2.4GHz radio-frequency bandwidth also, there is a possibility that wireless interference occurs
- Corsair validated this controller with PlayStation®5 (CFI-1000 series, CFI-2000 series and CFI-7000 series) including wireless testing and Corsair has product liability of this controller
- With PlayStation®5 1000 series, it is recommended to insert USB dongle of this controller to USB port on the front of PlayStation®5
Device is plugged in to PC or Console
| Mode Switch | Connectivity Switch | ||
| Wired |
2.4GHz Wireless (Receiver is plugged to host PC/PS) |
Bluetooth | |
| PS5 | Wired mode; Charging | 2.4GHz wireless mode; Charging | Not supported; Charging only |
| PS4 | |||
| PC | Bluetooth mode | ||
Device is not plugged in. The wireless receiver is plugged into the device selected by the mode switch
| Mode Switch | Connectivity Switch | ||
| Wired |
2.4GHz Wireless (Receiver is plugged to host PC/PS) |
Bluetooth | |
| PS5 | NA | 2.4GHz wireless mode | Not supported |
| PS4 | |||
| PC |
Bluetooth mode |
||
CONNECTING VIA 2.4GHz MODE
- Ensure the device is powered off (not connected via USB)
- Switch the toggle to 2.4GHz mode
- Press and hold L3 + R3
- Power on the device by pressing the HOME button at the same time
- Continue holding L3 + R3 + HOME buttons for 3 seconds to activate pairing mode
- Indicator - 360° LightEdge and all 15 buttons:
- Solid White for 2 seconds: Connected
- Pulsing White: Not connected
- Rapidly blink white for 2s during pairing
Lighting returns to the last used setting after the pairing process is complete.
CONNECTING VIA BLUETOOTH MODE
- Ensure the device is powered off (not connected via USB)
- Switch the toggle to BT mode
- Press and hold L3 + R3
- Power on the device by pressing the HOME button at the same time
- Continue holding L3 + R3 + HOME buttons for 3 seconds to activate pairing mode
- Indication - 360° LightEdge and all 15 buttons:
- Solid Blue for 2 seconds: Connected
- Pulsing Blue: Not connected
- Rapidly blink Blue for 2s during pairing
Lighting returns to the last used setting after the pairing process is complete.
CHARGING & BATTERY LIFE

| Shortcuts | Action | Desired Behavior | Indication (Lighting Edge) |
| FN+ G8 key | Battery Check | Show the battery level color/effect on the lighting edge for 3 seconds |
*When charging with cable plugged in, 360° LightEdge will show pulsing effect for 3 seconds in color of battery status. |
- Indication: 360° LightEdge
- 15 keycaps: Profile specific
STANDARD SHORTCUTS
All functions below assume FN key is being held and action is activated upon press unless otherwise noted.
| Shortcuts | Action | Desired Behavior | Notes |
| FN + X | LED Brightness - Keys | Cycles RGB LED brightness in 25% increments on main keys | |
| FN + Square | LED Brightness – 360° LightEdge | Cycles RGB LED brightness in 25% increments on LightEdge | |
| FN + Triangle | RGB Effect Cycle | Cycle to next onboard lighting effect |
Lighting zone: keycaps and lighting edge
|
| FN + Circle | SOCD Mode Cycle | Cycle between SOCD modes | |
| FN + R1 | Macro Recording | Press and hold for 2 sec to enter macro recording mode | *Available in PC mode only |
| FN + R2 | Rapid Trigger Toggle | Toggles Rapid Trigger ON/OFF | |
| FN + L1 | Actuation Raise | Raises actuation point in 0.1mm increments |
*For optimal accuracy the recommended range is 0.3mm-3.6mm. Setting the actuation outside the recommended range may result in higher sensitivity and effect consistency. Do the factory reset if experiencing issues with excessive sensitivity or inconsistent key behavior. |
| FN + L2 | Actuation Lower | Lowers actuation point in 0.1mm increments | |
| FN + L3 | Self-Calibration |
|
FN SHORTCUTS LIGHTING INDICATOR
When pressing FN key, all lighting will momentarily turn OFF except for keys that have secondary functions will have backlighting turned ON.
- The default color will be WHITE
- Color indication for profile currently in-use will take priority over FN Shortcuts lighting
MACRO RECORDING
Can not be allowed in PS mode
- Hold FN + R1 key
- This enters macro recording mode
- Indication: 360° LightEdge breathes red
- Press any series of standard keys to begin recording
- This includes shortcuts such as FN + key commands. Only standard keyboard functions can be recorded and not hot keys like:
- L3, R3
- Create
- Home & Power
- Options
- FN
- Profile
- Game Mode - Delays are also recorded
- Indication: 360° LightEdge blinks
- This includes shortcuts such as FN + key commands. Only standard keyboard functions can be recorded and not hot keys like:
- Press FN + R1 key for 2 seconds
- This stops recording and prepares macro to be saved or cleared
- Pressing this more than once has no added function
- Indication: 360° LightEdge rapidly blinks red
- Press any G keys (G1-G8 keys)
- If keys were recorded: Pressing any G key to save the macro
- If no keys were recorded: Pressing any G key clears any macro
- If there is a firmware shortcut normally bound to that combination, it is restored
5 ONBOARD PROFILES
With up to 5 custom profiles saved directly to onboard memory, you can quickly adapt on the fly. As you adjust your command scheme and settings to match your playstyle, these will be auto saved to currently used profile. By default, you will be on HW Profile 1. Press and hold the profile button for 3 seconds to cycle between profiles.
| Function Name | Default | Remarks |
| Profile Name | HW Profile 1 | Default profile |
| Profile color | White | Lighting color of Circle key, lit for 2 seconds then revert to profile specific lighting |
| Game Mode | Off | |
| Key Assignments | NA | |
| Lighting Effects | Type Lighting | |
| Profile Name | HW Profile 2 | |
| Profile color | Red | Lighting color of Circle key, lit for 2 seconds then revert to profile specific lighting |
| Game Mode | Off | |
| Key Assignments | NA | |
| Lighting Effects | Horizon Static color pattern | |
| Profile Name | HW Profile 3 | |
| Profile color | Green | Lighting color of Circle key, lit for 2 seconds then revert to profile specific lighting |
| Game Mode | Off | |
| Key Assignments | NA | |
| Lighting Effects | Horizon Wave | |
| Profile Name | HW Profile 4 | |
| Profile color | Blue | Lighting color of Circle key, lit for 2 seconds then revert to profile specific lighting |
| Game Mode | Off | |
| Key Assignments | NA | |
| Lighting Effects | Color Shift | |
| Profile Name | HW Profile 5 | |
| Profile color | Amber | Lighting color of Circle key, lit for 2 seconds then revert to profile specific lighting |
| Game Mode | Off | |
| Key Assignments | NA | |
| Lighting Effects | Color Pulse |
BATTERY REMOVAL INFORMATION
This product uses a rechargeable battery and safety guidelines must be followed in the event that the product is disabled for disposal and recycling. To safely remove the battery for disposal and recycling, follow the numbered steps with the below diagrams.
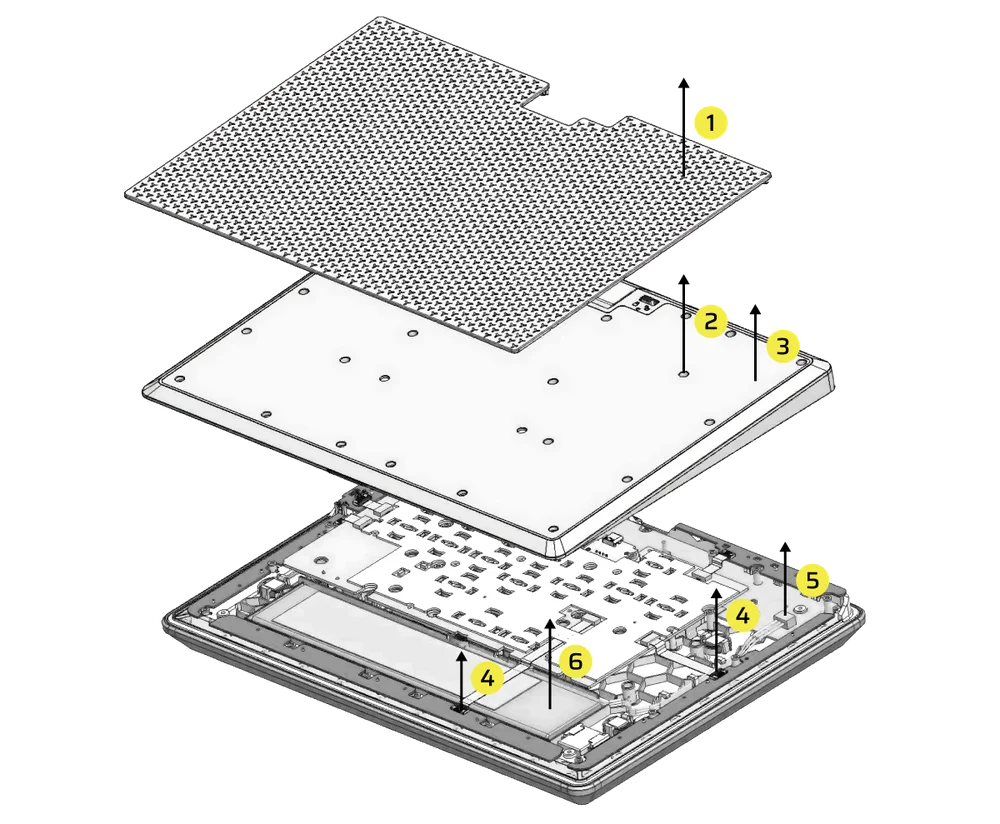
- Remove rubber footpad
- Remove 25 back cover screws
- Remove back cover assembly
- Remove 2 cable connectors
- Remove battery connector
- Remove battery
BATTERY INFORMATION
- Part Number: GSP6545108
- Rating: 3.7V, 7500mAh, 27.75Wh
- Scan QR code for battery detail information

Controller
M/N(型號): RGP0180
Rating(電壓電流): 5V ![]() 1.5A
1.5A
Dongle
M/N(型號): RGP0146
Rating(電壓電流): 5V ![]() 0.1A
0.1A
FCC ID: 2AAFM-RGP0180 (Controller)
FCC ID: 2AAFM-RGP0146A (Dongle)
IC: 10954A-RGP0180 (Controller)
IC: 10954A-RGP0146 (Dongle)

The power delivered by the charger must be between min 2.5 Watts required by the radio equipment, and max 7.5 Watts in order to achieve the maximum charging speed.
COPYRIGHT/LEGAL INFORMATION
© 2025 CORSAIR MEMORY, Inc. All rights reserved. CORSAIR and the sails logo are registered trademarks of CORSAIR in the United States and/or other countries. All other trademarks are the property of their respective owners. Product may vary slightly from those pictured.

RELATED CONTENT