As part of our expanding line up of 3D printable accessories we have added two more for you to enjoy if you're a FRAME 4000D owner.
The standard PSU shroud has a cut away area not just for airflow, but also to allow for very thick radiator options, or water cooling components such as our iCUE LINK XD6 RGB ELITE LCD Pump/Reservoir Combo.
But what if you don't need this and just want to cover it up, or improve GPU cooling? Well this is where these come in. The files are available for free from Printables and can be found here: FRAME 4000 stock PSU shroud covers & duct
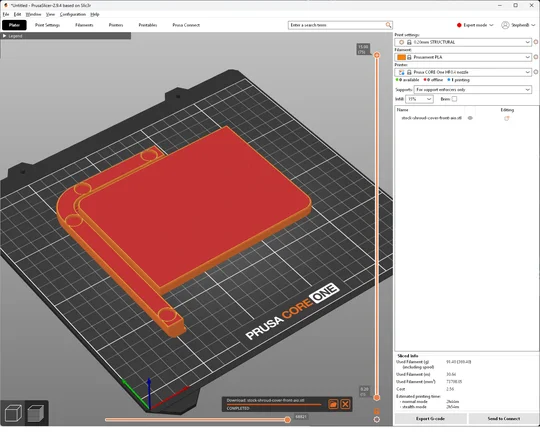
Flat PSU Shroud Cover
First we have the flat PSU shroud cover, though not the most exciting print in the world, it can be very good for tidying up your build. It comes in two lengths, one for just front fans and one for front fans with a front mounted AIO or radiator.
In order to reduce possible noise from the fan we have added an angled leading edge to both versions of this model.

Flat Cover (Left) and Fan Scoop (Right)
PSU Shroud Fan Scoop
Next, we have the front fan scoop, the idea behind this is to help direct air up toward your GPU. This supports front and side intake fans allowing the coolest air to be guided to the hottest components. Tis compatible with side mounted radiators, but not front mounted radiators due to clearance issues.
Print Settings
- Material: PLA, but PETG is also suitable
- Settings: 15% infill without brim
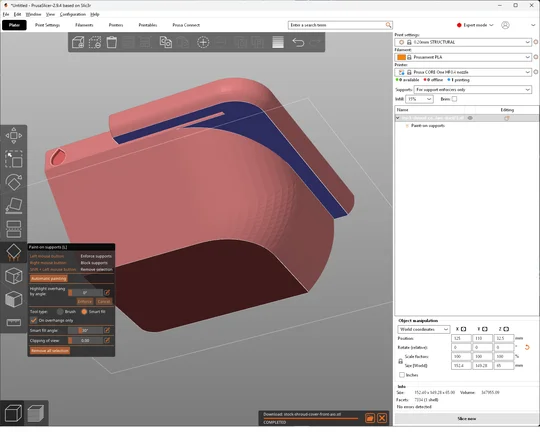
- Supports: For the Flat shroud cover there is no need for supports. This prints right side up with the magnet insert holes facing top. For the fan duct you need to add enforcer supports on the underside as shown in the image. Blue denoting where to add enforcers. Note we used smart fill for this to add enforcers and also prevent excess supports on the curved underside where it is not needed.
Installation
Installing the shrouds is very straightforward. You can either use 10mm x 2mm magnets glued into the holes, or you can use double sided tape along the lip where the magnet holes are located.
- Shut down the PC
- Next remove the upper and lower side panels
- Slot the 3D printed part in
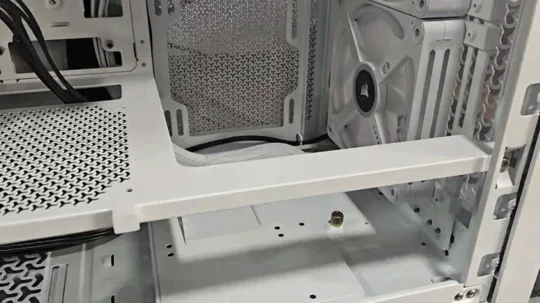
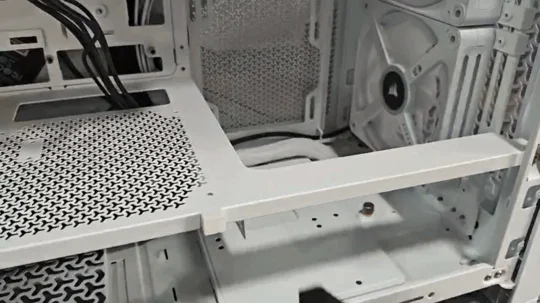
You will notice the hole in the prints that lines up with the downward tab on the end of the PSU shroud will help guide the part into place. You cannot push these shrouds too far due to this tab. Once it's fully pushed in lift it up slightly and the magnets (if used) will snap the shroud into place.
PRODUCTS IN ARTICLE
JOIN OUR OFFICIAL CORSAIR COMMUNITIES
Join our official CORSAIR Communities! Whether you're new or old to PC Building, have questions about our products, or want to chat about the latest PC, tech, and gaming trends, our community is the place for you.