MANUAL | QUICK START GUIDE
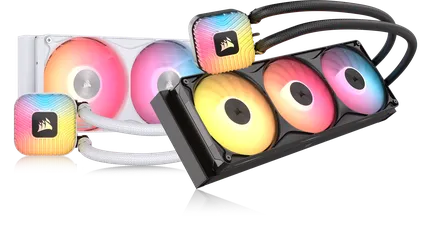
CORSAIR NAUTILUS 360 RS
PERFORMANCE LIQUID CPU COOLER
In this Guide
BEFORE YOU START
IMPORTANT: Before connecting multiple fans to a single CPU_FAN header, check your motherboard manual for its maximum current limit. Ensure the total current requirement of your fans does not exceed this limit. Please refer to the "POWER RATING" section at the bottom of this Quick Start Guide.
NOTE: Most newer PC cases have a cutout allowing access to the rear of the motherboard for easy installation of cooler backplates. If your case does not include a cutout, you will need to remove the motherboard from the case prior to installation.
NOTE: The NAUTILUS 360 RS AIO Cooler (CW-9061060-WW) is not compatible with the NAUTILUS RS LCD Screen Module (CW-9061029-WW / CW-9061030-WW).
GETTING TO KNOW
1. NAUTILUS 360 RS
| 1. NAUTILUS 360 RS | 4. Intel and AMD Mounting Brackets |
| 2. RS120 Fans | 5. PWM Extension Cable |
| 3. Radiator Mounting Screws |
2. RS FANS
| a. Male PWM Connector | b. Female PWM Connector |
BOX CONTENTS
1x Intel LGA 1851 / 1700
Mounting Bracket Set
1x Intel LGA 1851 / 1700
Backplate
1x AMD AM5 / AM4
Mounting Bracket Set
(Pre-installed)
12x Radiator Screws
3x RS120 Fans
(Pre-installed)
1x PWM Extension Cable
PREPARE YOUR NAUTILUS 360 RS FOR INSTALLATION
The NAUTILUS 360 RS cooler comes with RS fans pre-installed. Fan orientation can be adjusted based on radiator mounting direction to help keep cables out of view.
AMD INSTALLATION
1. PREPARE THE MOTHERBOARD FOR INSTALLATION
- Remove the existing AMD AM5 / AM4 mounting brackets shown.
2. INSTALL THE PUMP UNIT
- Align the pump with the pre-installed bracket over the motherboard mounting holes, then fasten the screws a few turns at a time in a cross pattern, alternating between opposite corners, until all four are tightened.
3. INSTALL THE RADIATOR
- Mount the NAUTILUS 360 RS (1) inside the case with the Radiator Screws (D) as shown.
INTEL INSTALLATION
1. PREPARE THE PUMP UNIT
- Remove the pre-installed AMD AM5 / AM4 Mounting Bracket Set (C).
- Attach the Intel LGA 1851 / 1700 Mounting Bracket (A).
2. INSTALL THE BACKPLATE
- Align the backplate (B), then adhere it with the self-adhesive side behind the motherboard.
3. INSTALL THE PUMP UNIT
- Align the pump with the installed bracket over the motherboard mounting holes, then fasten the screws a few turns at a time in a cross pattern, alternating between opposite corners, until all four are tightened.
4. INSTALL THE RADIATOR
- Mount the NAUTILUS 360 RS (1) inside the case with the Radiator Screws (D) as shown.
CONNECT YOUR NAUTILUS 360 RS
1. CONNECT THE PUMP UNIT
- Connect the 4-pin PWM cable from the NAUTILUS 360 RS pump to the AIO_PUMP header on your motherboard.
NOTE: If your motherboard doesn't come with an AIO_PUMP header, connect the 4-pin PWM cable from the NAUTILUS 360 RS pump to the CPU_OPT or SYS_FAN header.
2. CONNECT THE PWM EXTENSION CABLE TO THE FANS
- Connect the female PWM connector of the fan group to the male connector of the PWM Extension Cable (F).
3. CONNECT THE PWM EXTENSION CABLE TO THE MOTHERBOARD
- Connect the female connector of the PWM Extension Cable (F) to a CPU_FAN header on the motherboard.
ADDITIONAL SETUP
INSTALL FAN MANAGEMENT SOFTWARE
The CORSAIR NAUTILUS 360 RS connects to your motherboard and uses the software provided by your motherboard manufacturer for fan control, allowing you to monitor and adjust fan speeds for groups of connected fans. This varies depending on your motherboard manufacturer, so download, install, and run the software provided by your motherboard manufacturer. Examples of this software include ASUS Fan Xpert, MSI Afterburner, GIGABYTE Control Center, etc.
- Visit our CORSAIR EXPLORER page for additional setup, configuration, and tips.
FREQUENTLY ASKED QUESTIONS
Can I control the pump and fans using CORSAIR iCUE software?
Yes. You can use the CORSAIR COMMANDER DUO Lighting and Fan Controller (sold separately) to control the pump and fans through iCUE. For more details, please refer to the following links:
How do I know the direction of the airflow of the fan?
An arrow located on the side of the fan indicates the direction of airflow.
What orientation should I install my radiator?
Figure 1 shows the ideal radiator orientation. If case layout or clearance prevents this, use alternative setups as shown in Figure 2 and Figure 3. Whichever orientation you choose, always ensure the top of the radiator sits higher than the CPU pump.
Can I reuse the pre-applied thermal paste on the cooler for re-installation?
Re-installation of the NAUTILUS 360 RS CPU cooler will require you to clean off the pre-applied thermal paste and apply a new layer of thermal paste. We recommend using CORSAIR XTM70, sold separately.
What should I do if I've lost or damaged a specific part of the NAUTILUS 360 RS CPU cooler?
Replacement parts for the NAUTILUS 360 RS CPU coolers are sold through the CORSAIR webstore.
POWER RATING
NAUTILUS RS pump: 12Vdc Max 1A
RS120 Fans: 12Vdc 0.4A
WARRANTY

The CORSAIR NAUTILUS 360 RS cooler has a 5-year warranty.
LEGAL
© 2026 CORSAIR MEMORY, Inc. All rights reserved. CORSAIR and the sails logo are registered trademarks of CORSAIR in the United States and/or other countries. All other trademarks are the property of their respective owners. Product may vary slightly from those pictured.
RELATED CONTENT