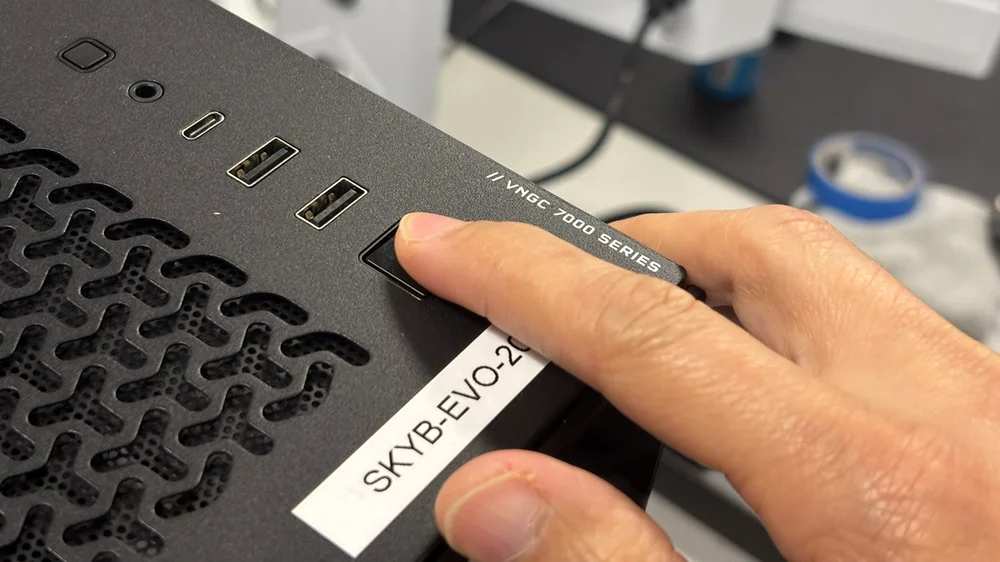
What do you do if, one day, you hit the power button on your PS5 and it doesn't turn on? Well, this issue could be caused by a many things, but there are a few go-to solutions that we're going to talk about now.
Check PSU
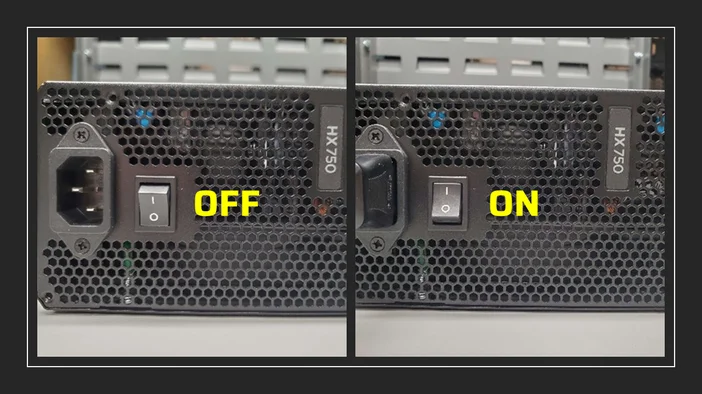
The power supply unit (PSU) is the component in your PC that supplies power, acting like the heart of your system’s electrical network. If the PSU is faulty or not correctly connected, the PC won’t turn on. Start by ensuring that the power cable is securely connected to both the PSU and the wall outlet. Also, verify that the PSU’s on/off switch is in the “ON” position.
Power Cycle
Another basic troubleshooting method is to unplug the PSU power cable from the wall to perform a hard reset.
Hold the power button for 10-20 seconds. What it does is drain residual electricity from your PC’s components, resetting their settings and clearing any temporary data, such as software glitches, that may be preventing your PC from powering on.
Once the reset is complete, plug the PSU back into the wall outlet and try powering the PC back on.
Check Hardware Power Internal Connections
All the key components in your PC are connected to the PSU. If your system won’t turn on, it’s always good practice to check that all cables from the PSUs are properly connected and secured to their respective components.
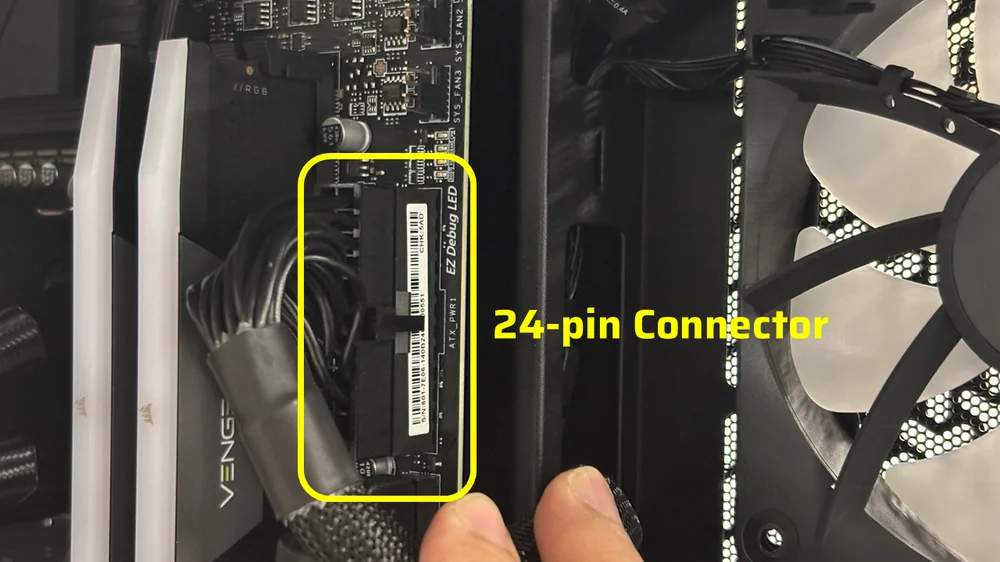
Begin with your motherboard's 24-pin connector. Ensure it is firmly seated. If needed, unplug it to check for any obstructions. Once confirmed clear, reconnect it and verify the latch on the connector is securely fastened to the motherboard's 24-pin power port.
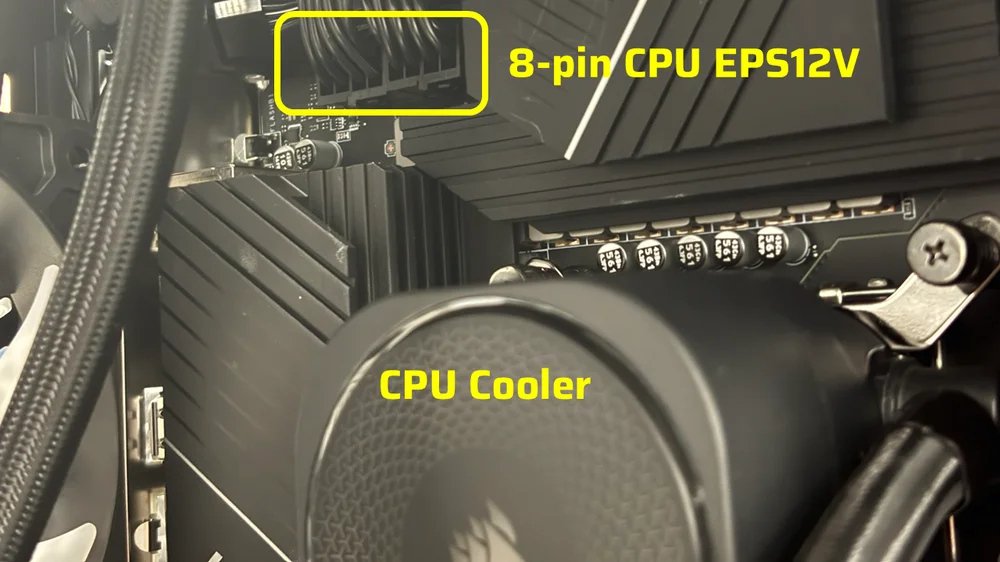
In addition to the 24-pin motherboard connector, the CPU also needs power from the PSU via an 8-pin CPU EPS12V connector, usually located above the CPU socket in the top-left corner on most motherboards. High-performance motherboards often have two 8-pin CPU EPS12V connectors, whereas mainstream ones usually have only one. To check the 8-pin EPS12V connector, disconnect it and then reconnect it to ensure it is properly seated and secured.
Note that you need to have two 8-pin EPS12V connectors plugged in if you are running high-performance CPUs, such as Intel Core i9s or Ryzen 9s, which, by spec, draw more power than mainstream CPUs, especially under load. Otherwise, one 8-pin CPU EPS12V connector is sufficient to power a CPU.
The graphics card, or GPU, is an important component that requires power from the PSU. Sometimes, your PC might not turn on if the video card isn’t seated properly in the PCIe slot on your motherboard, or if the 12V-2x6 or 8-pin PCIe connector isn’t plugged in correctly, causing a short circuit and a failed POST (power-on self-test). Just a quick check to make sure everything is in place can often resolve the issue.
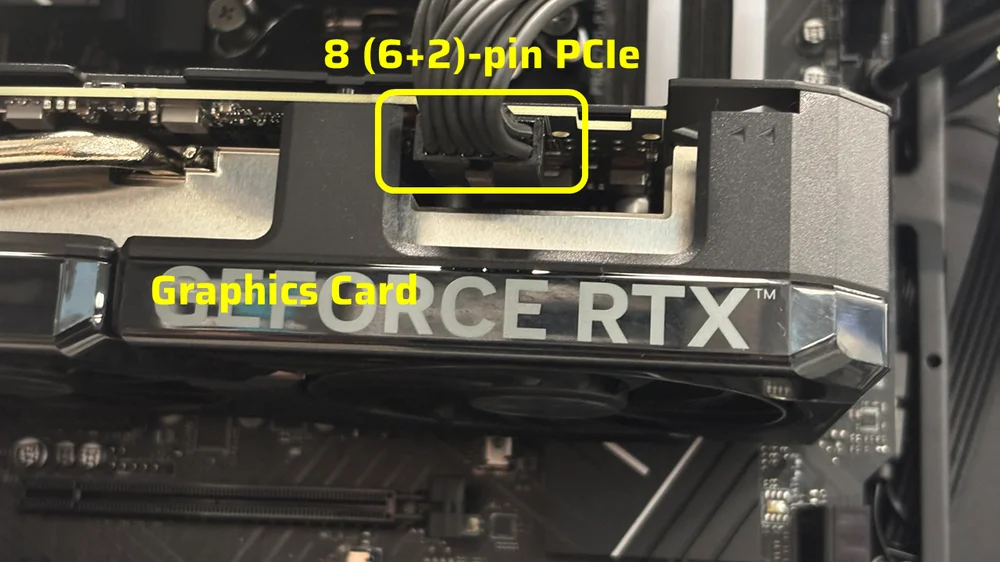
Unplug the 12V-2x6 or 8-pin PCIe connector from the GPU, then remove the GPU from the motherboard’s PCIe slot. Reseat the graphics card in the PCIe slot and ensure the latch is secured. Finally, reconnect the 12V-2x6 or 8-pin PCIe connector to the GPU.
Reseating DRAM
Sometimes, as simple as the RAM not being properly seated in the DIMM slots, can cause your PC not to power on. So, it’s worth checking that your RAM sticks are properly installed. Reseating the RAM in your PC is one of the easiest troubleshooting steps you can perform to eliminate what is causing your PC stability issues, including power issues.
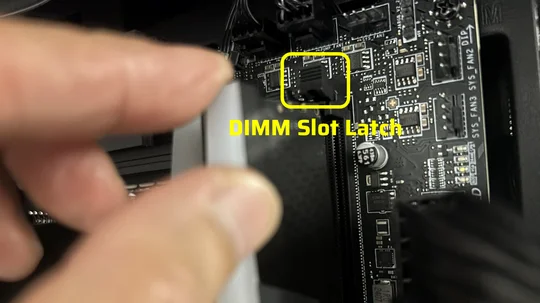
Remove the RAM sticks by pushing down the latches on both ends of the DIMM slots. Once the RAM sticks are removed, test each RAM by inserting it back into the second DIMM slot away from the CPU. If one of the RAM sticks is preventing your PC from turning on, it’s likely the culprit.
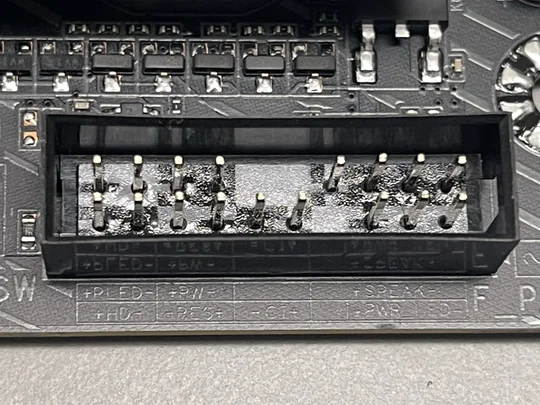
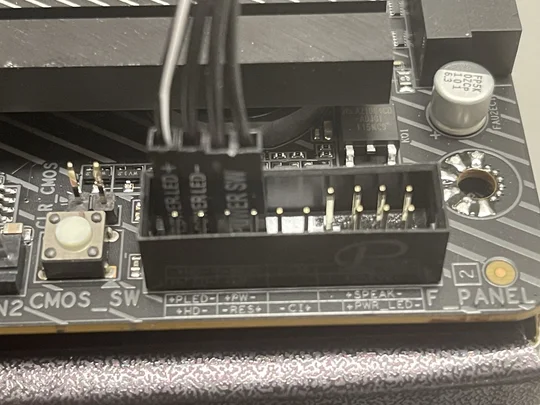
Front I/O Panel (Power Button)
This troubleshooting step is for those who build their own PCs. That said, if you have a pre-built PC that isn’t powering on, it won’t hurt to check the front I/O panel connections, because you never know, the connections might have been compromised during assembly
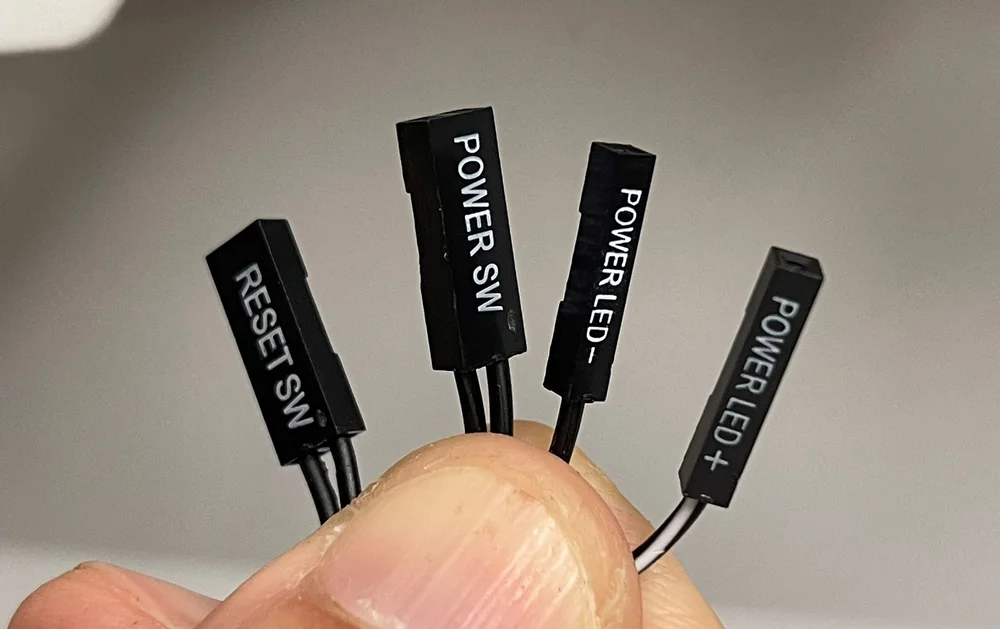
Your PC’s front I/O panel typically is made up of the following connectors: Power LED, HDD LED, Reset Switch, and Power Switch. In some cases, the Power Switch is plugged into the wrong front I/O terminal on the motherboard, preventing the PC from powering on.
Check your motherboard’s manual or the manufacturer’s website to find the front I/O connectors, which are usually located in the lower-left corner of the motherboard. Just double-check with the official manual to be certain. Once you find it, look for the Power Switch terminals, often labeled “PWR SW” or “PWR.” Make sure the front I/O connector from your case, labeled “POWER SW,” is connected to these terminals. If it’s connected to a different one, like “RESET SW” or “PWR LED,” your PC will not power on.
JOIN OUR OFFICIAL CORSAIR COMMUNITIES
Join our official CORSAIR Communities! Whether you're new or old to PC Building, have questions about our products, or want to chat about the latest PC, tech, and gaming trends, our community is the place for you.