MANUAL | QUICK START GUIDE
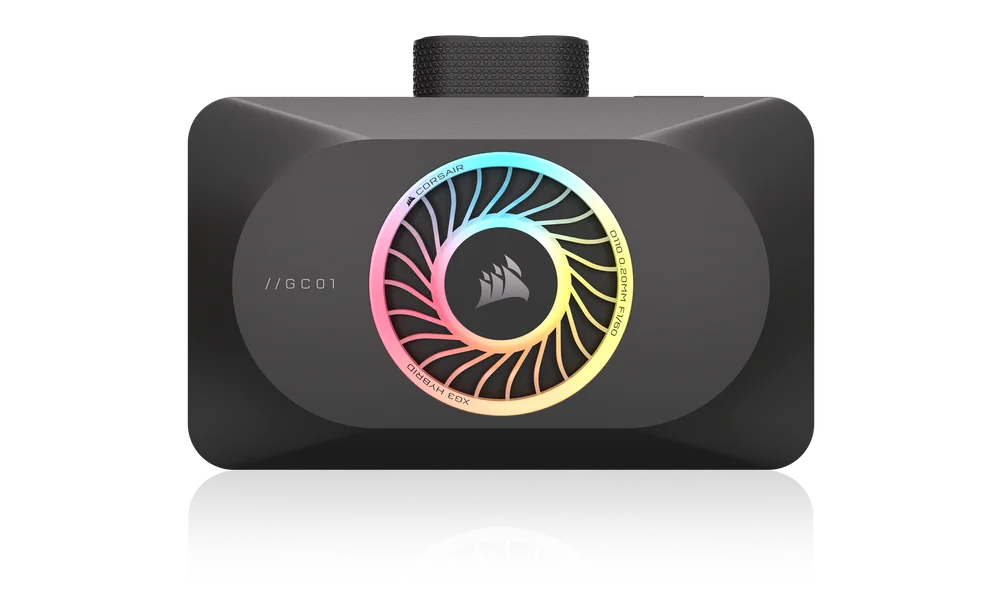
CORSAIR XG3 RGB HYBRID
5080 / 5070 Ti / 5070 HYBRID GPU WATER BLOCK
BEFORE YOU START
Please download the latest version of iCUE from www.corsair.com/downloads.
Learn more about iCUE LINK System Hub from CORSAIR iCUE LINK System Hub.
PACKAGE CONTENTS

1x XG3 RGB HYBRID GPU Water Block

2x M2.5x5mm Screws

2x M2.5 Hex Nuts

1x iCUE LINK 90° Cable 600mm

8x Washers
PREREQUISITES (NOT INCLUDED)
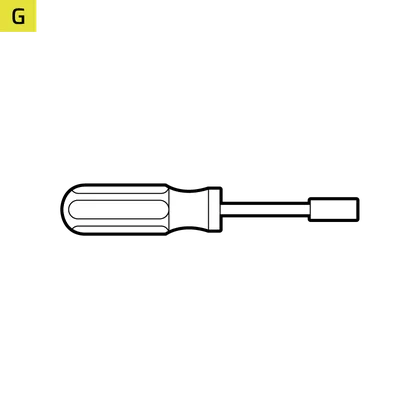
Various Size Phillips-head Screwdriver(s) for Electronics
4mm Hex Socket
(depends on the graphics card make and model)
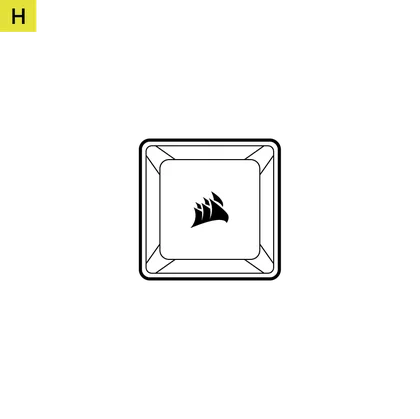
iCUE LINK System Hub

Microsoft Windows 11 or Higher

iCUE Version 5 or Higher
REMOVAL OF THE HEATSINK FAN
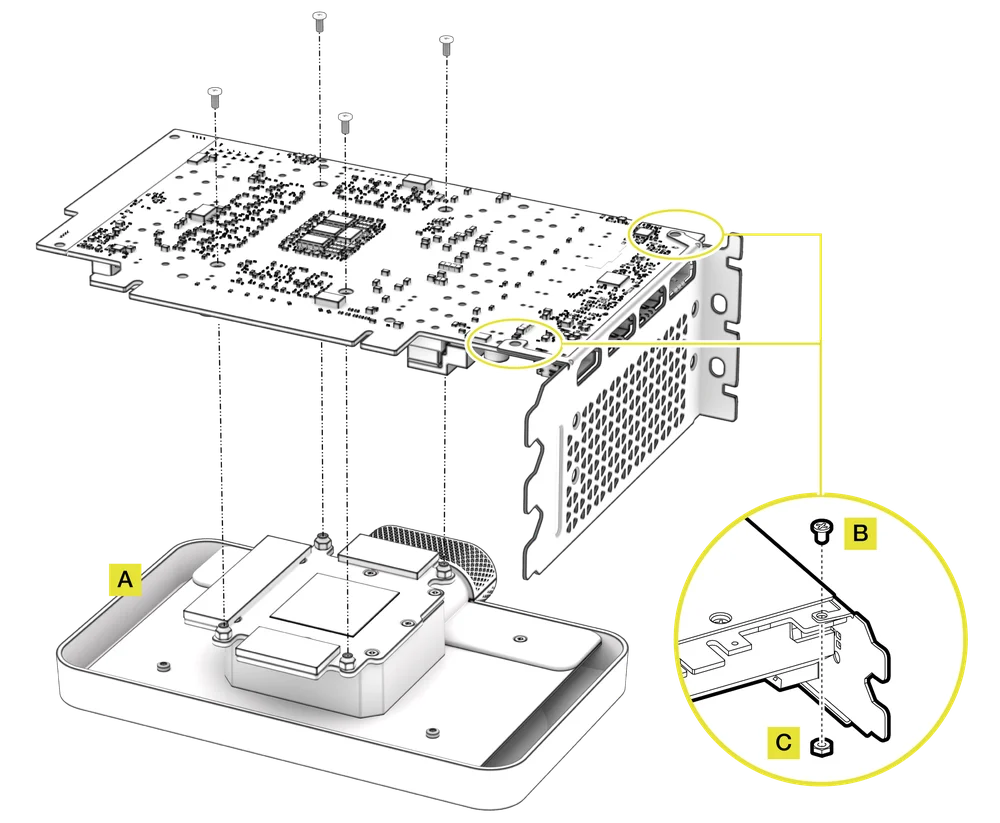
- Unscrew all fasteners attaching the original heatsink fan assembly to the graphics card circuit board. Traditionally this includes:
– Heatsink with fan
– Backplate and / or front plate
– I/O bracket reinforcement - Disconnect all cables connecting the heatsink fan assembly to the graphics card circuit board (heatsink assembly fan(s) and (RGB) LED illumination).
- Wipe off any remains of the original thermal compound and pads until there are no leftovers on the graphics card circuit board and GPU. Use isopropyl alcohol if necessary.
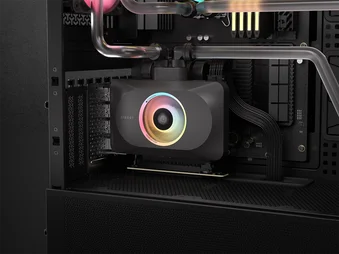
WATER BLOCK INSTALLATION
- Remove the protective film from the thermal pads and place the XG3 RGB HYBRID GPU Water Block on a suitable smooth surface, e.g. packaging box, with aesthetic cover and fan facing down. Place it so that the front of the water block slightly overhangs the box. This is to prevent the graphics card’s protruding I/O ports from interfering with installation.
- Align the holes and carefully place the bare graphics card onto the XG3 RGB HYBRID GPU Water Block with the pre-installed thermal material.
- Secure the XG3 RGB HYBRID GPU Water Block assembly by reusing the original M2 screws that were used to secure the stock heatsink fan assembly, and fasten them with a Phillips-head screwdriver.
- Some graphics cards, notably NVIDIA® GeForce RTX™ models, also require you to fasten the I/O bracket to the circuit board after the installation of an aftermarket cooler. Secure this bracket by using the enclosed M2.5x5mm Screw (B) and an M2.5 Hex Nut (C).
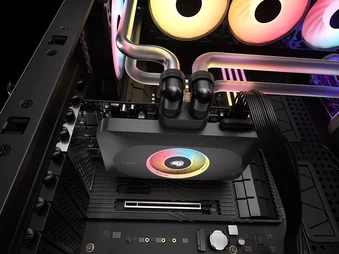
FITTING AND TUBING INSTALLATION
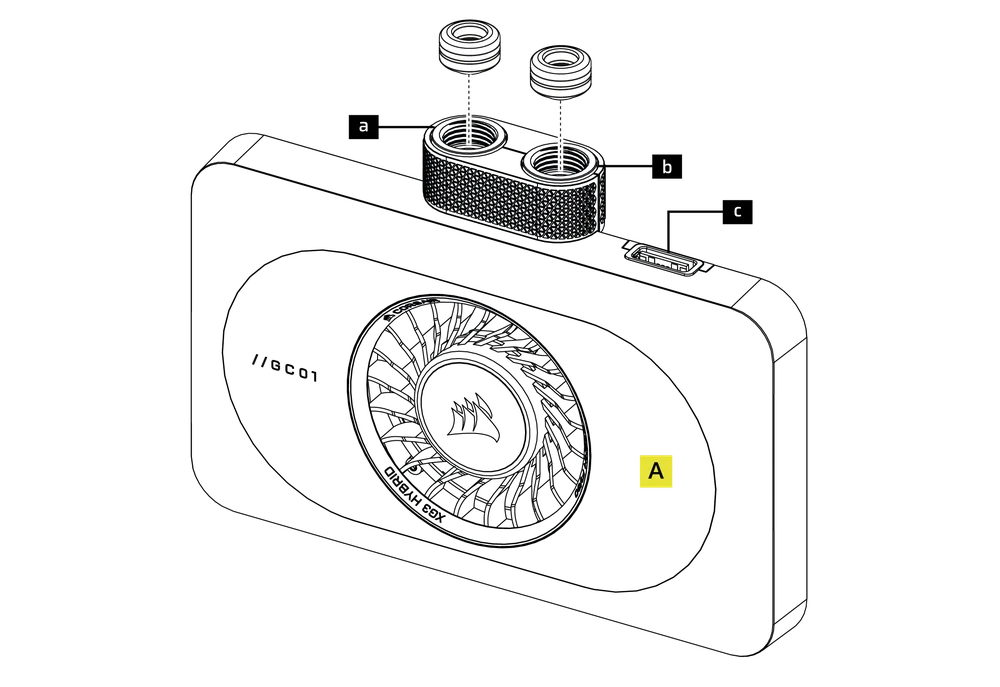
- Install the two (2) appropriate CORSAIR XF G1/4-BSPP threaded-type fittings (not included) into the water block ports and tighten them by hand. Do not use any tools to tighten (e.g. pliers).
- Install appropriate tubing for your CORSAIR XF compression-fitting type and secure it using the locking ring to complete the addition of the water block to the water-cooling loop. Use the appropriate securing method when using fittings other than compression fittings.
|
a. Inlet Port
|
c. iCUE LINK Connector |
| b. Outlet Port |
iCUE LINK CONNECTION
CONNECTING AND USING THE INTEGRATED SMART FEATURES
Please download the latest version of iCUE from www.corsair.com/downloads.
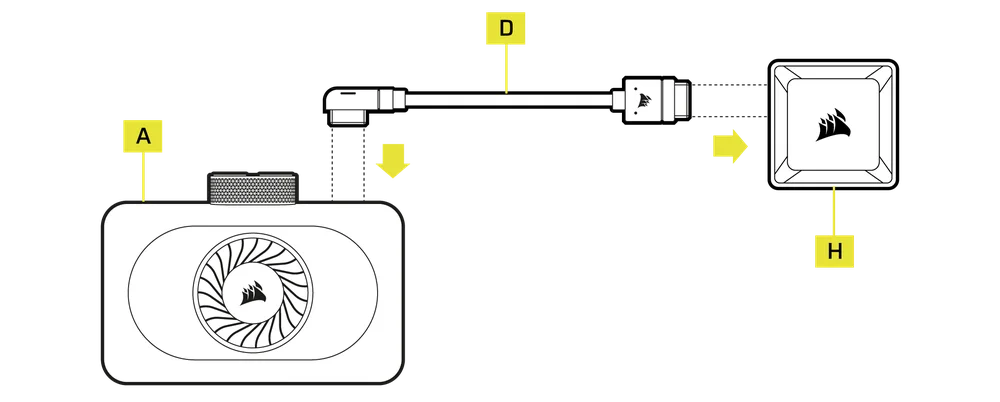
You must have an iCUE LINK System Hub (H) to use the XG3 RGB HYBRID GPU Water Block (A).
- Connect the included iCUE LINK 90° Cable (D) from the iCUE LINK header on the GPU block housing (A) to the iCUE LINK System Hub (H).
The XG3 RGB HYBRID GPU Water Block can be used with other iCUE LINK hardware by placing it anywhere on the channel string using a direct connection, Y-cable accessory, or 4-way splitter.
SOFTWARE SETUP
1. INSTALL iCUE SOFTWARE
- Download and install the latest version of iCUE from www.corsair.com/downloads
2. UPDATE iCUE SOFTWARE
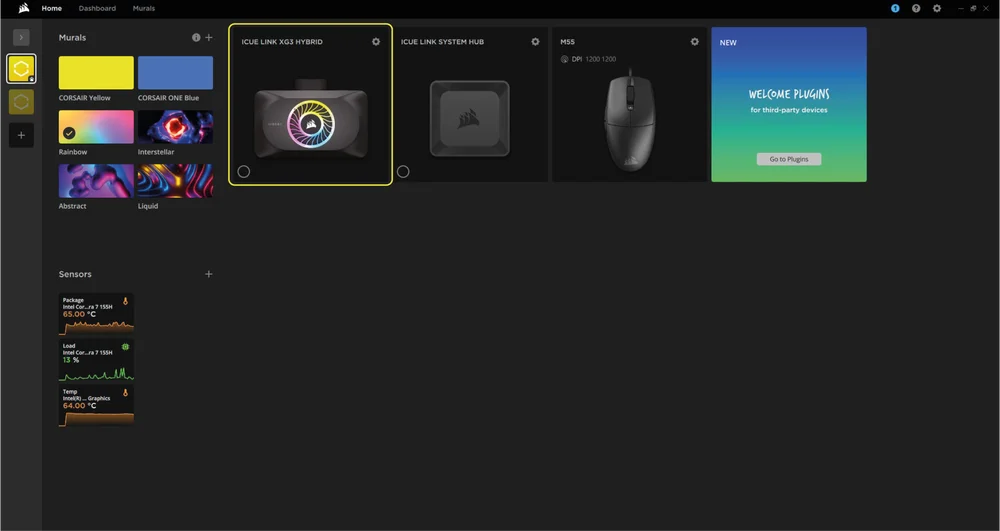
- Once iCUE is installed, run the software. The iCUE LINK XG3 HYBRID GPU Water Block will appear in the iCUE interface.
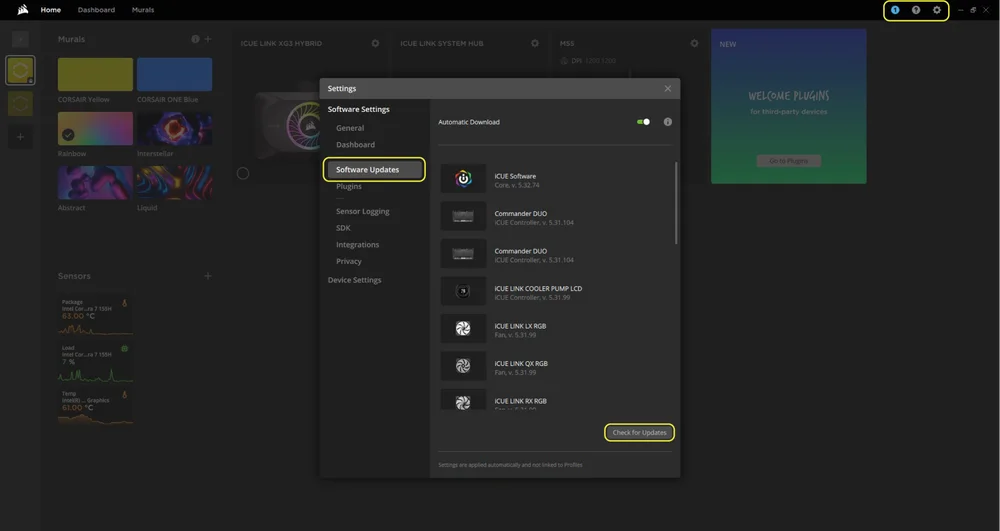
- If any of the connected devices need a firmware update, you will be prompted to perform an update via a notification in the top-right corner. You can also click the settings (cogwheel icon in the top right corner) and check for the software and firmware updates manually.
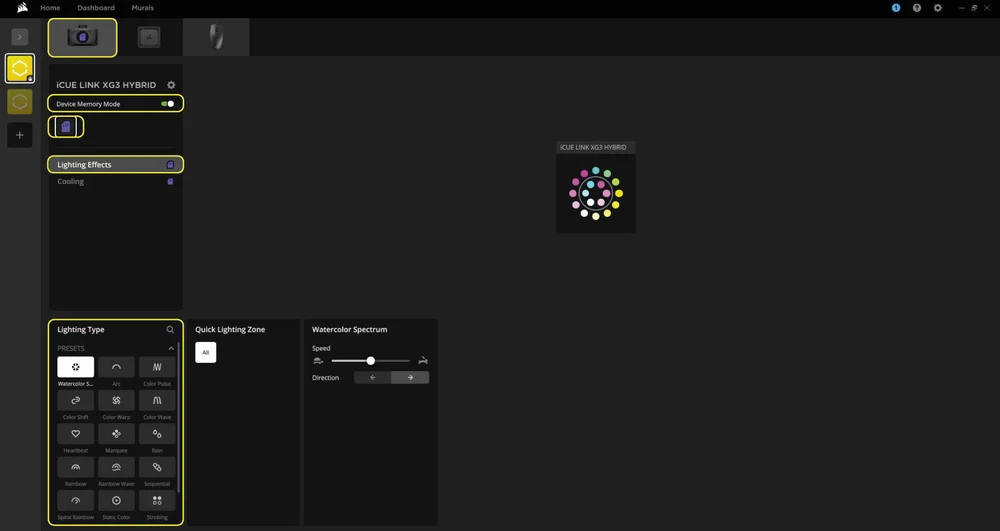
3. LIGHTING SETUP
Choose which lighting effect will be displayed when the iCUE software is running:
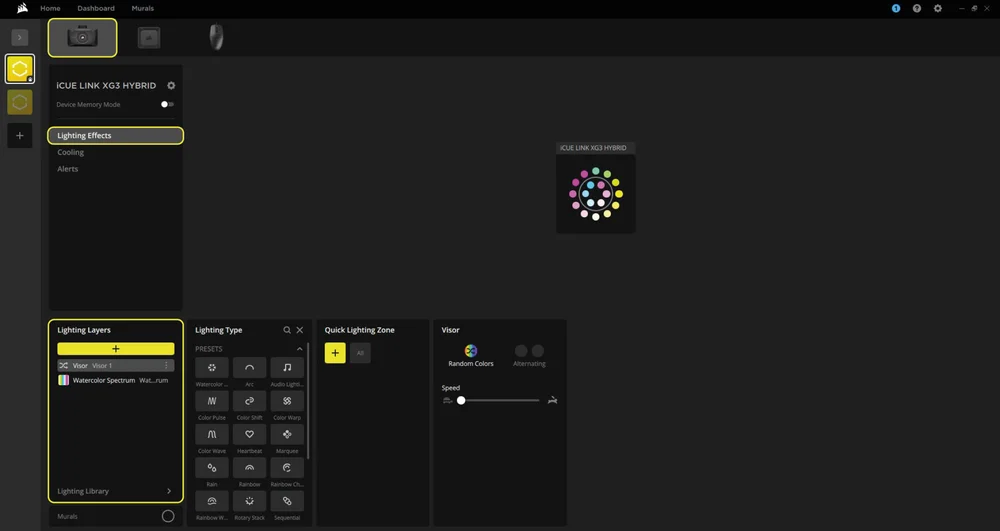
- Select iCUE LINK XG3 HYBRID from the navigation bar.
- Select "Lighting Effects".
- Select the desired lighting effect by clicking on one of the available options in the "Lighting Layers" panel or click on the "+" icon to add additional lighting effects.
Choose which lighting effect will be displayed when the iCUE software is not running, usually during computer startup:
- Select iCUE LINK XG3 HYBRID from the navigation bar.
- Select "Lighting Effects".
- Toggle the Device Memory Mode by clicking on the button.
- Select the desired lighting effect by clicking on one of the available options in the "Lighting Type" panel, and click on the save icon.
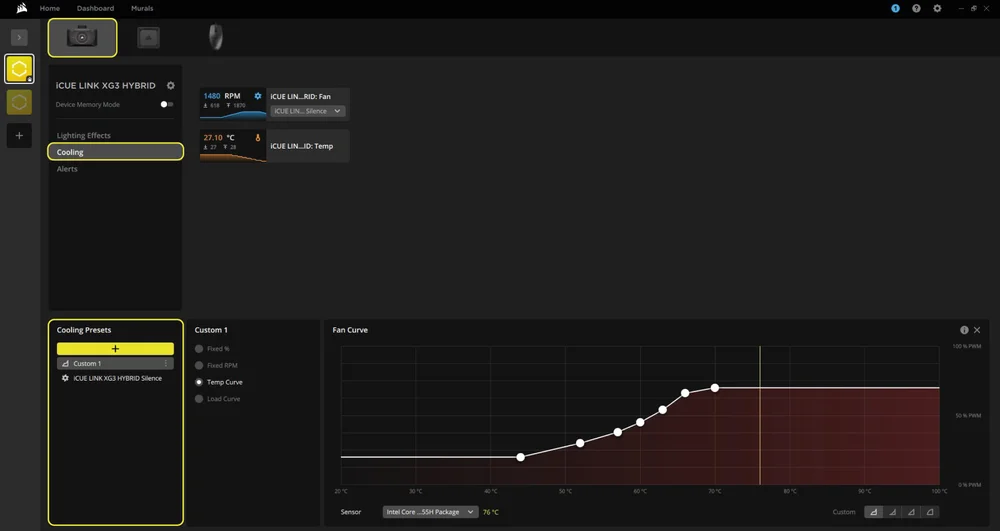
4. COOLING SETUP
Select your desired cooling presets for the fan on the iCUE LINK XG3 HYBRID GPU Water Block, or create your own custom curve:
- Select iCUE LINK XG3 HYBRID from the navigation bar.
- Select "Cooling".
- Select a predefined cooling preset or add a custom one by clicking the "+" button in the "Cooling Presets" panel.
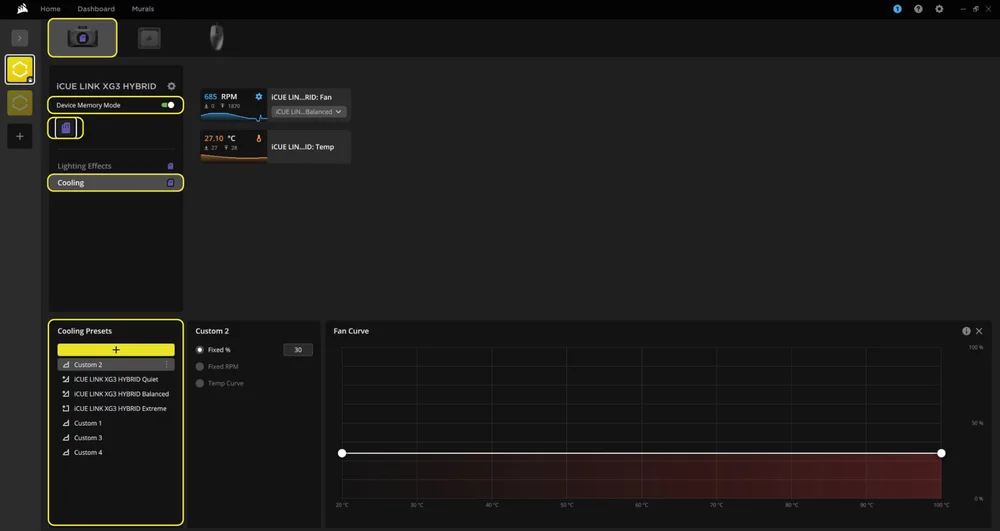
Choose how your fans will perform when the iCUE software is not running, usually during computer the startup phase:
- Select iCUE LINK XG3 HYBRID from the navigation bar.
- Select "Cooling".
- Toggle the Device Memory Mode by clicking on the button.
- Add a custom cooling preset by clicking the "+" button in the "Cooling Presets" panel.
- Choose one of the available options in the middle panel, customize the curve, and click on the save icon.
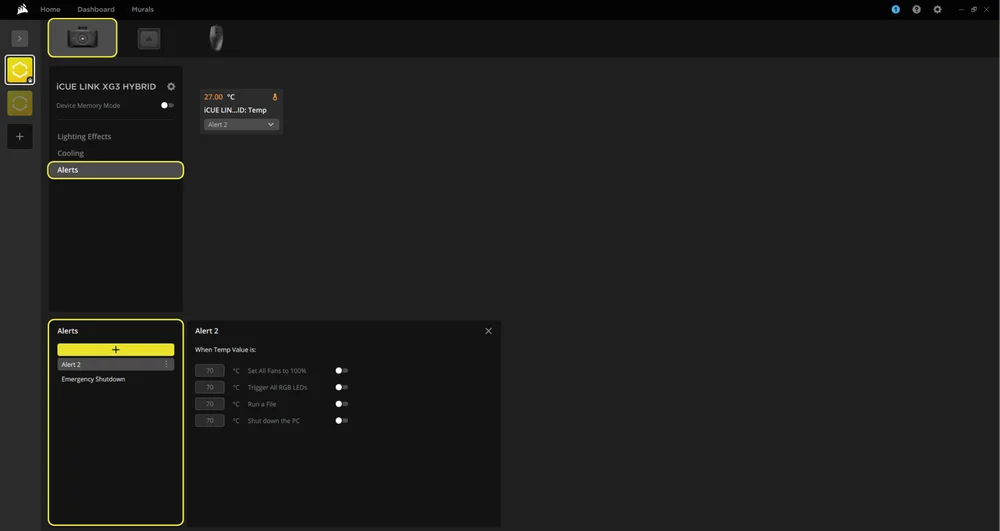
5. ALERTS
The "Alerts" feature allows you to set custom alerts or trigger specific actions when your device reaches a certain temperature:
- Select iCUE LINK XG3 HYBRID from the navigation bar.
- Select "Alerts".
- Choose one of the predefined alerts in the bottom "Alerts" panel or create a custom one by clicking the "+" icon.
- Use the toggle switches to set the the temperature values for triggering a specific alert action.
FREQUENTLY ASKED QUESTIONS
Is the XG3 RGB HYBRID water block compatible with my graphics card?
Support varies from model to model. Please consult http://www.coolyourgpu.com for an up-to-date list of supported models prior to installation.
Can I use the XG3 RGB HYBRID as a standalone part?
No, this is a water block for your graphics card which requires a complete custom water-cooling system, including a pump and radiator. For more information, please visit http://www.coolyourgpu.com.
Can I reuse the pre-applied thermal paste on the XG3 RGB HYBRID water block for re-installation?
Re-installation of the XG3 RGB HYBRID water block requires cleaning off the pre-applied thermal paste and apply a new layer of thermal paste. We recommend using CORSAIR XTM70, sold separately. However, the thermal pads can be reused.
What thermal paste is used on the XG3 RGB HYBRID?
CORSAIR XTM70 Extreme Performance Thermal Paste. Learn more.
WARRANTY

The XG3 RGB HYBRID GPU water block has a 3-year warranty.
LEGAL
© 2025 CORSAIR MEMORY, Inc. All rights reserved. CORSAIR and the sails logo are registered trademarks of CORSAIR in the United States and/or other countries. All other trademarks are the property of their respective owners. Product may vary slightly from those pictured.
RELATED CONTENT