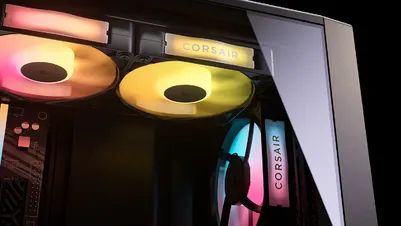
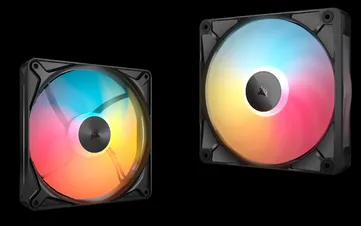
MANUAL | QUICK START GUIDE
CORSAIR iCUE LINK RX II RGB
PWM FANS
In this Guide

CONTENTS
120mm Expansion Fan
- One (1) Fan
- One (1) iCUE LINK Cable
- One (1) iCUE LINK Active Connector
- One (1) iCUE LINK Passive Connector
- Four (4) QuikTurn® Mounting Screws
140mm Expansion Fan
- One (1) Fan
- One (1) iCUE LINK Cable
- One (1) iCUE LINK Active Connector
- One (1) iCUE LINK Passive Connector
- Four (4) QuikTurn® Mounting Screws
360mm Starter Kit
- One (1) Unified Frame Fan
- One (1) iCUE LINK System Hub
- Two (2) iCUE LINK Cables
- One (1) USB Cable
- Four (4) QuikTurn® Mounting Screws
360mm Expansion Kit
- One (1) Unified Frame Fan
- One (1) iCUE LINK Cable
- Four (4) QuikTurn Mounting Screws
GETTING TO KNOW YOUR RX II RGB
| A. iCUE LINK RX II RGB Fan | E1. 135mm iCUE LINK Cable |
| B. iCUE LINK System Hub | E2. 600mm iCUE LINK Cable |
| C. QuikTurn® Mounting Screws | F. iCUE LINK Port |
| D. USB Cable | G. Bridge Connector Port |
The pre-installed decorative plate on RX II RGB is detachable. The fan can be used with or without the decorative plate depending on your preference.
GETTING TO KNOW YOUR SYSTEM HUB
| H. iCUE LINK Ports | J. USB Input |
| I. Power Input | K. Tach Output |
FAN INSTALLATION
BEFORE YOU START
IMPORTANT:
- Turn the computer off prior to the installation of the RX II RGB and accessories.
- To ensure proper operation, keep the active ports free of any foreign objects/materials.
- Please use the RX II RGB and accessories as defined in this document.
NOTE: Update iCUE to version 5.37 or higher, and the iCUE LINK System Hub to version 3.11.646 or higher. Both are required for proper operation and control of iCUE LINK devices.
360 STARTER KIT / 360 EXPANSION KIT INSTALLATION
- Insert the 600mm iCUE LINK Cable (E2) into an open iCUE LINK Port (F) on your RX II RGB fan frame.
- Attach the fan frame to your computer case using four QuikTurn® Mounting Screws (C).
NOTE: QuikTurn® Mounting Screws thread much faster than the traditional self-tapping screws. To avoid over-threading, hand tighten the screws with a screwdriver only.
- Connect your power supply unit to the Power Input (I) on the iCUE LINK System Hub (B), using the 6-pin PCIe power cable included with it.
- Connect one end of the USB Cable (D) to the USB Input (J) on the iCUE LINK System Hub (B), and the other end (9-pin USB 2.0 connector) to a USB 2.0 header on your motherboard.
- Connect the other end of the 600mm iCUE LINK Cable (E2) into one of the iCUE LINK System Hub's iCUE LINK Ports (H).
NOTE: If you are not using an iCUE LINK CPU cooler, the iCUE LINK System Hub 2-pin tach cable does not need to be connected.
120mm / 140mm EXPANSION FAN INSTALLATION
- Connect the RX II RGB Expansion fan into an existing fan group by aligning and inserting the iCUE LINK Active and Passive Connectors into the open iCUE LINK (F) and Bridge Connector (G) Ports. Alternatively, you can connect it using the 135mm iCUE LINK Cable (E1).
- Insert the 600mm iCUE LINK cable (E2) into an open iCUE LINK Port (F) on your RX II RGB fan.
- Connect your power supply unit to the Power Input (I) on the iCUE LINK System Hub (B), using the 6-pin PCIe power cable included with it.
- Connect one end of the USB Cable (D) to the USB Input (J) on the iCUE LINK System Hub (B), and the other end (9-pin USB 2.0 connector) to a USB 2.0 header on your motherboard.
- Connect the other end of the 600mm iCUE LINK Cable (E2) from the fan group to one of the iCUE LINK System Hub's iCUE LINK Ports (H).
SOFTWARE SETUP
1. INSTALL iCUE SOFTWARE

2. UPDATE iCUE SOFTWARE
- Once iCUE is installed, run the software. The iCUE LINK RX II RGB tile will appear in the iCUE interface.
- If any of the connected devices need a firmware update, you will be prompted to perform an update via a notification in the top right corner. You can also click the settings (cog wheel icon in the top right corner) and check for the software and firmware updates manually.
3. NEW DEVICE DETECTION
While the iCUE LINK System Hub and RX II RGB fans do not support hot-plugging, you can still quickly detect newly connected devices without powering down your PC by following these steps:
- Click on Settings cogwheel in the iCUE LINK System Hub tile.
- Click Start next to Device Enumeration to re-detect all connected devices.
4. LIGHTING EFFECTS
Choose which lighting effect will be displayed when the iCUE software is running:
- Select the iCUE LINK RX II RGB tile.
- Select "Lighting Effects" in the left-hand panel.
- If present, click an existing layer in the "Lighting Layers" panel to edit it, or click on the "+" button to create a new lighting layer.
- Select the desired lighting effect by clicking on one of the available options in the "Lighting Type" panel.
- In the "Quick Lighting Zones" panel, select the product you want to apply the selected effect to. Choose "All" to apply the selected effect to all listed products.
5. LIGHTING EFFECTS - DEVICE MEMORY MODE
Choose which lighting effect will be displayed when iCUE software is not running, usually during computer the startup phase:
- Toggle the Device Memory Mode by clicking the button.
- Select the desired lighting effect by clicking on one of the available options in the "Lighting Type" panel.
- Click on the memory card icon to save the setting.
6. COOLING SETUP
- Click “Cooling” to access the cooling performance.
- Select the desired cooling preset for each device.
- Alternatively, click the “+” icon under “Cooling Presets” to create a custom fan curve.
7. COOLING SETUP - DEVICE MEMORY MODE
Choose how your fan(s) will perform when iCUE software is not running, usually during computer the startup phase:
- Toggle the Device Memory Mode by clicking the button.
- Select the desired setting by clicking on one of the available options in the "Cooling Presets" panel.
- Alternatively click the “+” icon under “Cooling Presets” to create a custom fan curve.
- Click on the memory card icon to save the setting.
8. ALERT SETUP
The "Alerts" feature allows you to set custom alerts or trigger specific actions when your device reaches a certain temperature:
- Click “Alerts” to access the alerts page.
- Set the temperature values for triggering specific alert action.
FREQUENTLY ASKED QUESTIONS
Is the RX360 II RGB recognized as one device or three devices in iCUE?
The RX360 II RGB is detected as a single device in iCUE, with fan speed and lighting effects controlled and synchronized together.
How many fans can be chained through one channel?
Up to twelve (12) RX II RGB fans can be chained and connected simultaneously through one (1) channel on the iCUE LINK System Hub. Please note that connecting a large number of iCUE LINK devices to a single channel may affect overall LED brightness, depending on the power draw of the devices used.
POWER RATING
- System Hub Output rating: 12Vdc / 7A (per port)
- RX120 II RGB Input rating: 12Vdc / Max 0.46A / Typical 0.25A
- RX140 II RGB Input rating: 12Vdc / Max 0.46A / Typical 0.25A
- RX360 II RGB Input rating: 12Vdc / Max 1.39A / Typical 0.8A
WARRANTY

CORSAIR iCUE LINK RX II RGB Series fans have a 5-year warranty.
LEGAL
© 2026 CORSAIR MEMORY, Inc. All rights reserved. CORSAIR and the sails logo are registered trademarks of CORSAIR in the United States and/or other countries. All other trademarks are the property of their respective owners. Product may vary slightly from those pictured.
RELATED CONTENT