快速启动指南
SABRE v2 PRO 无线 CF
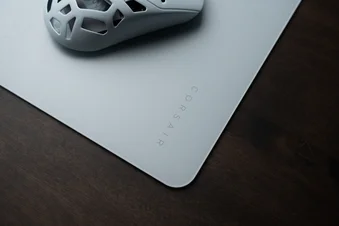
碳纤维游戏鼠标
为鼠标充电
重要提示:首次使用前,请确保将 SABRE v2 PRO WIRELESS CF 完全充满电。为获得最佳体验,请通过 CORSAIR WEB HUB 更新固件。
使用 USB 充电/数据线 (L) 将鼠标连接到电脑上任一空闲的 USB 2.0 或 3.X 端口。
鼠标中键/滚轮(C)下方的指示灯会根据电池电量状态亮起,充电完成后将显示为绿色常亮。
了解您的鼠标
- 鼠标左键
- 鼠标右键
- 中键 / 滚轮
- “前进”按钮
- “返回”按钮
- MARKSMAN 光学传感器
- USB 充电/数据接口
- 100% 原生级 UPE 滑鼠滑板
- 电源/无线模式开关
- DPI 和蓝牙配对按钮(按住 3 秒)
- USB 无线接收器
- USB充电/数据线
设置 2.4GHz 无线网络
- 将 USB 无线接收器 (K) 连接到 USB 充电/数据线 (L),然后将数据线的另一端插入电脑前面板或附近的可用 USB 2.0 或 3.x 端口。
- 将“电源/无线模式开关 (I)”切换至 2.4GHz 无线模式,即可开启鼠标电源。
- 当成功连接到接收器时,位于“中键/滚轮”(C)下方的 LED 指示灯将亮起稳定的绿色。
设置蓝牙
蓝牙无线技术最适合日常计算任务、提高工作效率以及办公应用。
- 在您的蓝牙 4.0 或更高版本设备上启动蓝牙配对。
- 将“电源/无线模式开关(I)”切换至“蓝牙”位置,即可开启鼠标电源。
- 连接后,位于“中键/滚轮”(C)下方的 LED 指示灯将闪烁蓝色,随后变为蓝色常亮。
- 如果需要重新配对或更换蓝牙配对设备,请先切换至蓝牙配对模式。长按 DPI 和蓝牙配对按钮 (J) 3 秒,或直至 LED 指示灯开始蓝光闪烁,即可进入蓝牙配对模式。
*SABRE v2 PRO WIRELESS CF 只能与一台设备配对。如果您需要与另一台设备配对,请进入重新配对模式以初始化配对流程。
循环遍历 DPI 配置文件
支持DPI循环功能,便于快速配置。
- 按一下 DPI 和蓝牙配对按钮 (J),即可切换到下一个 DPI 档位。
- 切换到相应的DPI档位时,鼠标滚轮上的指示灯会以对应的DPI颜色闪烁3次,然后熄灭。
- 重复上述步骤以切换到下一个DPI档位。系统将依次循环经过5个DPI档位,然后返回第1档。
您可通过CORSAIR WEB HUB进行高级设置。
鼠标状态与指示
无线连接和电池状态通过“中间点击/滚轮”(C)下方的指示灯显示。
| DPI 状态 - 预设 | LED指示灯 |
| 第一阶段 - 400 | 红色 |
| 第2阶段 - 800 | 蓝色 |
| 第3阶段 - 1200 | 绿色 |
| 第4阶段 - 1600 | 黄色 |
| 第5阶段 - 2000年 | 紫色 |
| 电池状态 | LED指示灯 |
| 电量低时充电 | 《呼吸的红色》 |
| 电池充电(中等) | 绿色呼吸 |
| 电池已充满 | 纯绿色 |
| 电池电量不足,请尽快充电 | 《呼吸的红色》 |
鼠标设置分步指南
Step 1 – Connect Your SABRE v2
- Plug in the SABRE v2 PRO WIRELESS CF’s receiver via Type-C.
- Make sure the power switch on the mouse is set to 2.4 GHz.
Step 2 – Open CORSAIR WEB HUB and Select the Mouse
- Go to http://www.corsair.com/web-hub/index.html
- Click [Authorize].
- Choose SABRE v2 PRO WIRELESS CF receiver.
Step 3 – Create or Select a Profile
- At the top-left, open the profile dropdown Menu.
- Click the profile you want to edit (for example: “Profile 1”).
- This profile will store your DPI, and button assignments.
Step 4 – Set DPI Levels
- Click [DPI] in the left sidebar.
- Choose how many DPI stages you want(1~5).
- Enable the DPI stages you want to use (for example, 800 / 1200 / 1600).
Recommended starting DPI:
-
- Desktop/general: 1200–1600 DPI
- FPS games: 800–1200 DPI
- MOBA/MMO: 1600–2400 DPI.
Step 5 – Remap Buttons (Actions / Key Assignments)
- Click [Key Assignments] in the left sidebar.
- Click the button on the mouse diagram you want to change.
- Choose the Assignment Type:
- Keyboard (remap to a key like R, E, or P)
- Macro (record multiple keystrokes)
- etc
- Confirm the assignment and test it.
Step 6 – Set Macro Manager
- Click [Macro manager] in the left sidebar.
- Click [ + ] to add a new Macro (For example: “Profile 1”).
- Click [Record Macro] on the right.
- Press the keyboard keys or mouse events you want to record.
- Click [Record Macro] again to stop recording.
Step 7 – Insert Macro events manually
- Click [Macro manager] in the left sidebar.
- Choose the Macro you want to edit.
- At the insert event bar, choose whether you want to insert keyboard or mouse events with the first dropdown menu.
- Choose the event you want to insert with the second dropdown menu.
- Click [Insert].
Step 8 – Device setting
- Click Device Setting at bottom left.
- Device Settings.
-
- Battery – Wireless connectivity or battery status.

- Polling Rate – Select [ 1000 Hz / 1 msec ] polling for 1000Hz polling.

- Sleep Time – Adjust time after mouse transitions to Sleep Mode.

- Motion Sync – Aligns mouse movement data with USB polling intervals to deliver more consistent and stable cursor tracking.
- Lift Height – Sensor cut off height.

- Angle Snapping – Smooths out mouse movement via sensor prediction when ON.
- Ripple Control – Smooths mouse movement by filtering out small, unintended jitter at the cost of slightly reduced raw input precision.
- Pair Wireless receiver – Pair or reset the wireless receiver.
- Reset Device Default – Reset your SABRE v2 PRO WIRELESS CF to default setting.
- Battery – Wireless connectivity or battery status.
Step 9 – Update firmware
- Click [Device Setting] at bottom left.
- Click [Check for Updates] to ensure you are running the latest device firmware.
- Follow the steps to update the firmware if needed.
Step 10 – Pair wireless receiver
- Click [Device Setting] at bottom left.
- Click [Pair].
- Follow the steps to pair the USB receiver.
电池拆卸说明
本产品使用可充电电池,在将产品拆解以进行废弃处理和回收时,必须遵守相关安全指南。为安全地取出电池以便废弃处理和回收,请按照下图所示的编号步骤操作。
- 拆下脚架 x2
- 拧下4颗螺丝
- 拆卸顶箱子总成
- 取出电池
CORSAIR MEMORY, Inc. 鼓励客户按照当地法律法规回收废旧电子硬件和可充电电池。
电池信息
- 型号:TW 602030
- 容量(电池容量):3.7V,300mAh,1.11Wh
- 扫描二维码查看电池详情

鼠标
型号:RGP0184
额定值(电压/电流):5V ![]() 400mA
400mA
接收器
型号(M/N): RGP0185
额定值(电压电流): 5V ![]() 50mA
50mA
FCC ID:2AAFM-RGP0184(鼠标)
FCC ID:2AAFM-RGP0185(接收器)
IC:10954A-RGP0184(鼠标)
IC:10954A-RGP0185(接收器)

充电器提供的功率必须在无线电设备要求的最低2.5瓦特与最高10瓦特之间,才能达到最快的充电速度。
建议在5°C至40°C(41°F至104°F)的温度范围内充电,以获得最佳性能。
版权/法律信息
©2026 CORSAIR MEMORY, Inc. 保留所有权利。CORSAIR 及船帆标志是 CORSAIR 在美国和/或其他国家/地区的注册商标。所有其他商标均为其各自所有者的财产。产品可能与图片所示略有不同。

相关内容