CPU Core Parking is a feature where, depending on the needs of your system, certain CPU cores get “parked”, which basically means they are temporarily shut down. They’re then turned on again if your system decides they’re needed again.
It’s a good concept, as it saves power, which is especially useful if you’re using a laptop or are strongly concerned about electricity consumption. However, sometimes the core parking feature can get a bit sticky, with cores refusing to unpark even when you need all the power your system can muster. This means that if you’re a gamer, you might want to disable core parking.
How to Tell if Core Parking is Enabled
Before trying to disable core parking, first check if your cores are even being parked at all. To do this, close down any applications you’ve got going, then do the following:
- Open the Windows search menu and type in “Resource Monitor,” and open it.
- Click the CPU tab and look at the graphs on the right.
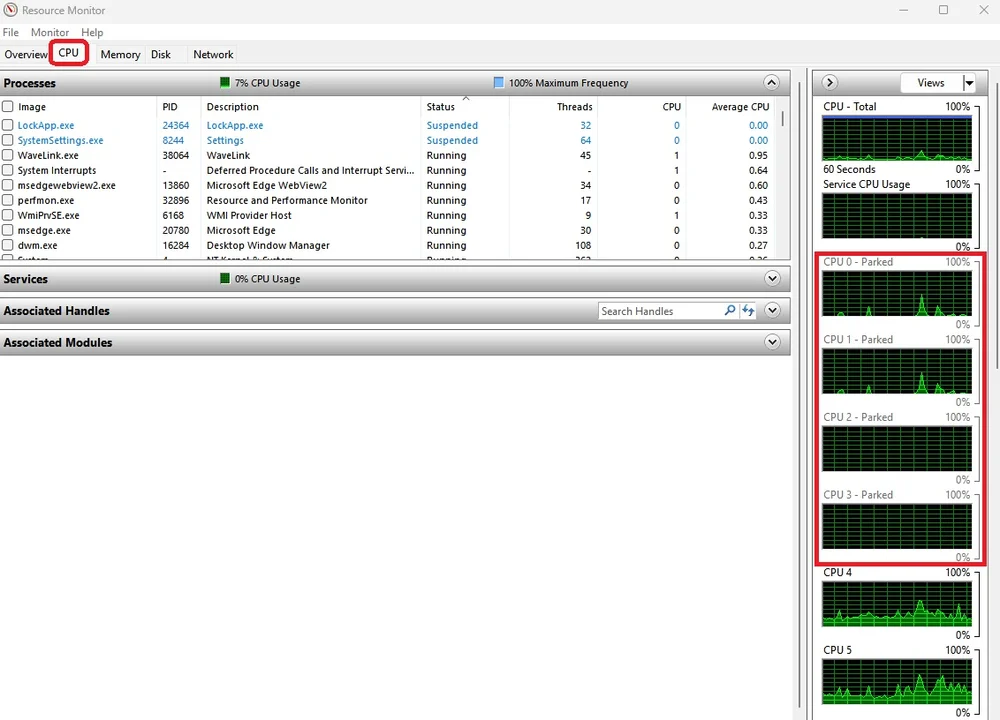
As CPU usage has dropped to 7%, four cores have been parked, meaning that core parking is enabled.
Here you will see a list of your CPU cores. If some of them are marked as “Parked,” then core parking is enabled and you might be losing some CPU performance. If this is the case for you, then here’s how to disable core parking.
How To Disable Core Parking
Luckily, this process is pretty simple, and for once we don’t need to restart or take a trip to the BIOS. What a treat.
- Open the Windows search menu again and type in “Control Panel,” then open it up.
- From here, select “Hardware and Sound” and then “Power Options.”
If your cores were getting parked, then chances are that either the “Balanced” or the “Power Saver” power plans were selected.
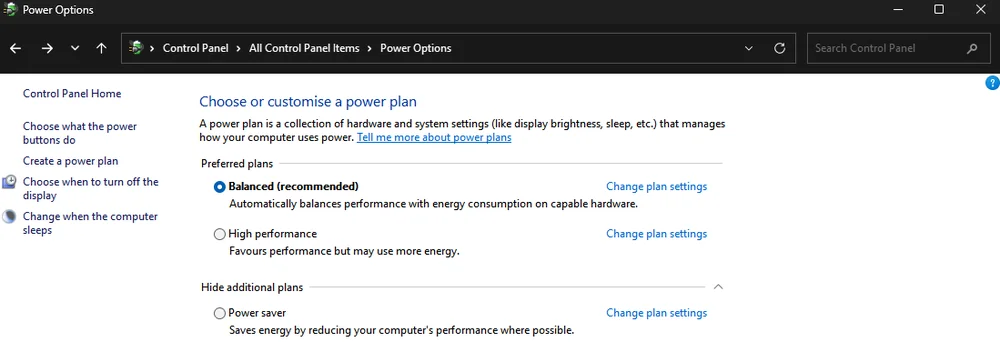
- Now select “High performance.” Once this power plan is enabled, your CPU cores won’t get parked no matter how little work the PC is doing.
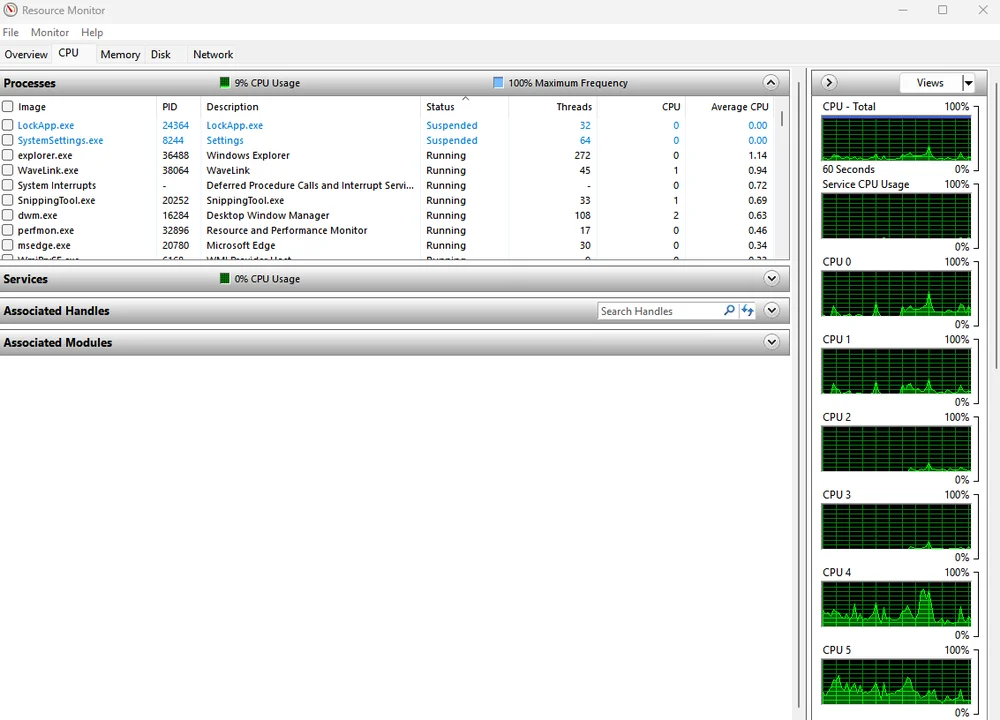
Despite only 9% CPU usage, no cores are parked. This means that core parking has been disabled.
This will increase your electricity consumption of course, so if you’re a laptop user you may want to stick with one of the other power plans. Now close everything down and open up the Resource Monitor again. Now, despite how few resources are being consumed, no cores should be marked as “Parked.”
How To Adjust Core Parking
For very specific use cases, you might want some of your cores to be parkable, but not others. This is also a quick process.
- Choose the Power plan you want and click “Change plan settings."
- On the next screen select “Change advanced power settings.”
- This will open a new window. Scroll down and open the “processor power management” subsection. Then open the “Processor performance core parking min cores” section.
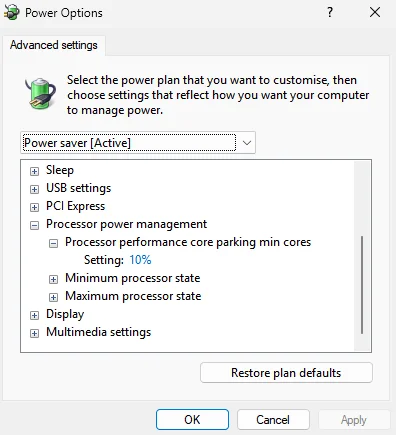
In here you will see a percentage that you can change that refers to what percentage of your cores will remain unparked regardless of system workload. For example, if you set this to 60%. Then only maximum 40% of your cores can be parked. Setting this to 100% will disable core parking regardless of the power plan.
JOIN OUR OFFICIAL CORSAIR COMMUNITIES
Join our official CORSAIR Communities! Whether you're new or old to PC Building, have questions about our products, or want to chat about the latest PC, tech, and gaming trends, our community is the place for you.