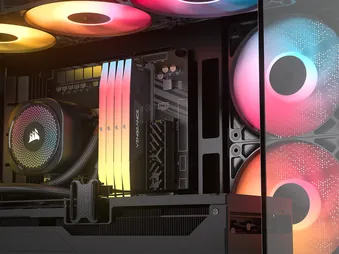
КРАТКОЕ РУКОВОДСТВО ПОЛЬЗОВАТЕЛЯ
CORSAIR 2800X SERIES
PANORAMIC GLASS MICRO-ATX CASE
В этом руководстве
- CASE SPECIFICATIONS
- ACCESSORY KIT CONTENTS
- CASE EXPANDED VIEW
- PANEL INSTALLATION / REMOVAL
- MOTHERBOARD INSTALLATION
- TOP I/O CABLES INSTALLATION
- FAN INSTALLATION
- RADIATOR INSTALLATION
- INSTALLATION OF STORAGE DEVICES AND CONTROLLERS
- POWER SUPPLY INSTALLATION
- GRAPHICS CARD INSTALLATION
- CONNECTING YOUR FANS
- MAINTENANCE
- WARRANTY STATEMENT
- SPARE PART LISTING
- LEGAL
- СОПУТСТВУЮЩИЙ КОНТЕНТ
CASE SPECIFICATIONS
|
PCI Slot Configuration |
4 Horizontal |
|
Motherboard Compatibility |
Mini-ITX, Micro-ATX |
|
HDDs |
1x |
|
SSDs |
2x |
|
Colors Available |
Black, White |
|
Left Side Panel Material |
Tempered Glass |
|
Rear Cable Space |
24mm |
|
Dust Filters |
Top, Side, Bottom |
|
Front I/O |
1x USB 3.2 Gen 1 Type-A 1x USB 3.2 Gen 2x2 Type-C 1x PWR 1x Combo Mic / Headphone |
1. FAN LOCATIONS
|
Front |
Top |
Rear |
Side |
PSU Shroud | Bottom | |
|
None |
3x 120mm 2x 140mm |
1x 120mm |
3x 120mm |
2x 120mm |
1x 120mm |
|
2. INCLUDED FANS & CONTROLLERS
|
Included Fans |
Included Controllers | |
|
3x RS120-R ARGB (Pre-Installed) |
None | |
3. RADIATOR COMPATIBILITY
|
Front |
Top |
Rear |
Side |
PSU Shroud |
|
None |
240mm 280mm 360mm |
None |
240mm |
None |
4. CASE DIMENSIONS
| Dimensions |
436mm x 232mm x 447mm |
|
Max GPU Length |
410mm |
|
Max CPU Cooler Height |
170mm |
|
Max PSU Length |
200mm |
ACCESSORY KIT CONTENTS
12x Motherboard/HDD Screws (6-32 UNC; 6mm)
8x QuikMount Motherboard Screws
8x SSD Screws (M3 x 0.5; 5mm)
4x QuikTurn® Fan Screws
12x Long Fan Screws
1x Spare Motherboard Standoff
2x Spare Ball Snaps
12x Zip Ties
1x Front I/O Adapter
3x RS120-R ARGB Fans
CASE EXPANDED VIEW
| A. Tempered Glass Side Panel | F. Drive Plate |
| B. PCI Covers | G. Steel Side Panel |
| C. Top Filter | H. Side Filter |
| D. GPU Anti-sag Stabilization Arm | I. Tempered Glass Front Panel |
| E. Bottom Filter |
PANEL INSTALLATION / REMOVAL
WARNING: This product contains tempered glass. Handle with care.
- To prevent damage or injury, avoid placing or storing the case on hard surfaces such as ceramic or porcelain tile, stone, masonry, or concrete.
- CORSAIR strongly recommends removing all tempered glass side panels before positioning the case or beginning your build on a hard surface.
- If you must place the finished build on a hard surface, elevate or isolate the case to minimize the risk of accidental contact, damage, or personal injury.
- Tempered glass panels include an anti-shatter film for safety reasons. Do not remove this safety film from the glass or it will damage the panel.
Replacement panels are available at www.corsair.com. Contact help.corsair.com for any assistance.
1. SIDE PANELS REMOVAL
The 2800X Tempered Glass Side Panel (A) and Steel side Panel (G) are retained by two ball snaps at the top.
- Grab the panels from the finger-grab, pull the top of the panels outward, tilt them toward the floor, then lift them off the side of the case.
- Place the side glass panel somewhere soft/safe, such as a couch or wooden table, while you are working on your PC to ensure you don’t experience accidental damage.
2. FRONT PANEL REMOVAL
IMPORTANT: Remove the Tempered Glass Side Panel (A) first to access and remove the Front Panel (I).
- Pull the Tempered Glass Front Panel (I) outward. It's secured by four ball snaps - two at the top and two at the bottom.
- Place the front glass panel somewhere soft/safe, such as a couch or wooden table, while you are working on your PC to ensure you don’t experience accidental damage.
3. TOP PANEL I/O REMOVAL
The top panel I/O is replaceable, if necessary. It is mounted to the top section of the case with four screws.
- Remove the Top Filter (C) and the Steel Side Panel (G) from the case to allow access to the four screws holding the I/O in place.
- To remove the top I/O, simply unscrew the screws, and the entire I/O assembly can be pulled off.
- Repeat in reverse to reassemble.
MOTHERBOARD INSTALLATION
The 2800X supports mini-ITX and micro-ATX motherboards, including reverse connector motherboards such as ASUS BTF, MSI Project Zero, and GIGABYTE Project Stealth with power connections on the back of the board for a clean build with no visible cables.
- Align the motherboard with the standoffs and secure it with the provided Motherboard Screws (1).
NOTE: Before installation, ensure your motherboard I/O shield is in place, if required.
TIP: If the pre-installed standoffs don't align with the holes on your motherboard, remove any unused ones and reposition them to match the open mounting points on your motherboard.
TOP I/O CABLES INSTALLATION
1. STANDARD INTEL MOTHERBOARDS
- Connect the FPANEL plug to the front panel I/O header on your motherboard, aligning it with the keyed layout. This header is often labeled JFP1 on some motherboards.
NOTE: Reference your motherboard product manual for pin out information.
TIP: If your PC doesn't power on or shows issues when using the FPANEL plug, try using the included Front I/O Adapter (9) to ensure proper connection to the motherboard header.
2. NON-STANDARD INTEL OR AMD MOTHERBOARDS
Use the included Front I/O Adapter (9) to connect the FPANEL plug to the individual Top-mounted Front I/O header pins.
3. TOP I/O EXPLANATION
| a. 1x USB 3.2 Gen 2x2 Type-C Port (20 Gbps) | c. Headphone / Mic Combination Jack |
| b. 1x USB 3.2 Gen 1 Type-A Port (5 Gbps) | d. Power Button + LED |
NOTE: Bandwidth support is dependent on motherboard chipset support.
4. TOP I/O CONNECTIONS
| a. HD Audio (Headphone, Microphone) | c. USB 3.2 Gen 1 IDC 20-pin (5 Gbps) |
| b. FPANEL (Power LED, Power Button) | d. USB 3.2 Type-E (20 Gbps) |
FAN INSTALLATION
|
Front |
Top |
Rear |
Side |
PSU Shroud | Bottom | |
|
None |
3x 120mm 2x 140mm |
1x 120mm |
3x 120mm |
2x 120mm |
1x 120mm |
|
1. INSTALLING FANS IN THE TOP AND SIDE
- Align your fans to the fan mounting positions and secure them using the screws included with your fans.
NOTE: If you have misplaced your fan screws, CORSAIR offers custom fan screws designed for fans that use self tapping plastic mounting screws. CORSAIR custom fan screws are available on the webstore.
2. INSTALLING FANS ON THE PSU SHROUD AND THE BOTTOM
- Align your fans to the fan mounting holes on the PSU Shroud.
- Secure the fans with Long Fan Screws (5) from the top.
3. INSTALLING A FAN IN THE REAR
- Align your fan to the fan mounting holes.
- Use the screws included with the fan to secure it to the case.
RADIATOR INSTALLATION
The 2800X features built-in fan and radiator installation points throughout the case.
TIP: For optimal noise, thermal performance, and reliability, ensure the radiator is mounted higher than the pump when using an all-in-one liquid CPU cooler (AIO).
|
Front |
Top |
Rear |
Side |
PSU Shroud |
|
None |
240mm 280mm 360mm |
None |
240mm |
None |
1. INSTALLING A RADIATOR ON TOP
Top mounting provides optimal noise performance, but other mounts can be utilized based on your build preferences. Consult your cooler's product manual for more tips on usage and best practices.
2. INSTALLING A RADIATOR ON THE SIDE
INSTALLATION OF STORAGE DEVICES AND CONTROLLERS
The 2800X provides mounting space for two SSDs or one HDD on the removable Drive Plate (F).
1. DRIVE PLATE REMOVAL
- Remove the Drive Plate (F) from the case by unscrewing the retaining screw.
1. INSTALLING AN SSD
- Secure the SSD(s) onto the Drive Plate (F) by securing them using the included SSD Screws (3).
3. INSTALLING AN HDD
- Install the HDD onto the Drive Plate (F) by securing it using the included HDD Screws (1) found in the accessory box.
POWER SUPPLY INSTALLATION
1. STANDARD POWER SUPPLY INSTALLATION
- Install the power supply with the fan facing down.
- Secure the power supply to the chassis with the two captive screws located on the back of the case.
- For additional security, secure the power supply using two Motherboard Screws (1) in the corners of the rear panel.
2. CORSAIR SHIFT POWER SUPPLY INSTALLATION
The 2800X is designed with SHIFT power supplies with side-mounted connectors in mind, meaning all SHIFT power supplies are fully compatible and have ample space to bend and route cables to necessary locations.
A CORSAIR SHIFT power supply installs identically to a standard ATX power supply.
GRAPHICS CARD INSTALLATION
The 2800X natively only supports horizontal GPU installations.
TIP: For easier assembly, install the GPU as the final step.
1. INSTALLING THE GRAPHICS CARD
- Unscrew the PCI slot covers and remove them.
- Insert the card into the PCI slot until it clicks into place with the PCI slot's retention mechanism.
- Align the bracket with the PCI slots and secure the card to the case.
2. USING THE GPU ANTI-SAG STABILIZATION ARM
The GPU Anti-sag Stabilization Arm supports your graphics card, preventing it from bending or sagging under the weight of its heatsink. This not only helps protect your graphics card and PCIe slot, but also contributes to a cleaner, more professional-looking build.
- Adjust the GPU Anti-sag Stabilization Arm by loosening the front-facing thumbscrew and sliding the arm up or down.
CONNECTING YOUR FANS
Please visit the CORSAIR RS120-R ARGB Quick Start Guide for instructions on fan installation.
MAINTENANCE
1. CLEANING YOUR CASE FILTERS
The 2800X features three removable dust filters. A magnetic side filter, a magnetic top filter and a slide-in bottom filter.
- To remove the Top Filter (C), simply lift it out of place.
- To remove the magnetic Side Filter (H), remove the Steel Side Panel (G), and pull the filter of the panel.
- To remove the Bottom Filter (E), grab the pull notch from the front of the case and pull forward.
NOTE: Filters can be cleaned with pressurized air or water. If you rinse your filter, ensure filters are fully dry before reinstalling.
2. CABLE MANAGEMENT TIPS
The 2800X includes various cable management features such as:
- Multiple positions for hook and loop straps to accommodate standard or reverse-connector motherboards.
- Zip tie points are strategically placed for routing power cables to specific devices.
- Support for most reverse connector motherboards (MSI, ASUS, GIGABYTE) that feature connectors on the rear of the board for a build with no visible motherboard cables.
WARRANTY STATEMENT

CORSAIR 2800X cases come with a 2-year warranty.
SPARE PART LISTING
| CC-8901210 |
2800X Replacement Front Glass Panel, Black
|
| CC-8901211 |
2800X Replacement Front Glass Panel, White
|
| CC-8901216 |
2800X Replacement Right Side Steel Panel, Black
|
| CC-8901217 |
2800X Replacement Right Side Steel Panel, White
|
| CC-8901218 |
2800X Replacement Left Side Tempered Glass Panel, Black/Clear
|
| CC-8901219 |
2800X Replacement Left Side Tempered Glass Panel, White/Clear
|
| CC-8901220 |
2800X Replacement Top Dust Filter, Black
|
| CC-8901221 |
2800X Replacement Top Dust Filter, White
|
| CC-8901222 |
2800X Replacement Bottom Dust Filter, Black
|
| CC-8901223 |
2800X Replacement Bottom Dust Filter, White
|
| CC-8901224 |
2800X Replacement Front (Top) Panel I/O, Black
|
| CC-8901225 |
2800X Replacement Front (Top) Panel I/O, White
|
| CC-8901226 |
2800X Replacement Accessory Box & GPU Anti Sag, Black
|
| CC-8901227 |
2800X Replacement Accessory Box & GPU Anti Sag, Black
|
LEGAL
©2026 CORSAIR MEMORY, Inc. All rights reserved. CORSAIR and the sails logo are registered trademarks of CORSAIR in the United States and/or other countries. All other trademarks are the property of their respective owners. Product may vary slightly from those pictured.
СОПУТСТВУЮЩИЙ КОНТЕНТ