BLOG
Introducing the FRAME 4000 Series ELITE Front Panel I/O Upgrade
The FRAME series of cases were designed with modularity and upgradability in mind, and with the inevitable move away from full size USB Type-A ports to USB Type-C, users might themselves wanting the option of a more modern Front Panel I/O in the future.
Hence the FRAME 4000 Series ELITE Front Panel I/O Upgrade. This is a drop-in accessory that swaps out the default FRAME 4000 I/O with a module housing a more future-proof set of ports. It's available in Black or White to match or indeed contrast with your current case. You can check out our article about the other FRAME series accessories to see just how customizable these cases are.
Build your own custom FRAME 4000 Case with the FRAME Configurator.
Elite Front Panel I/O vs Stock Front Panel I/O
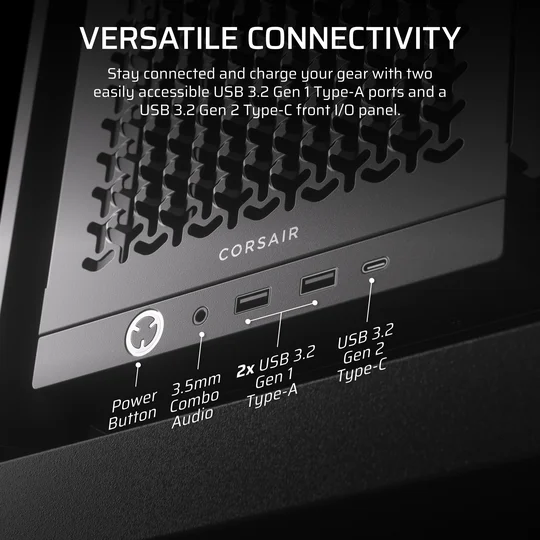
Original FRAME 4000 Front I/O
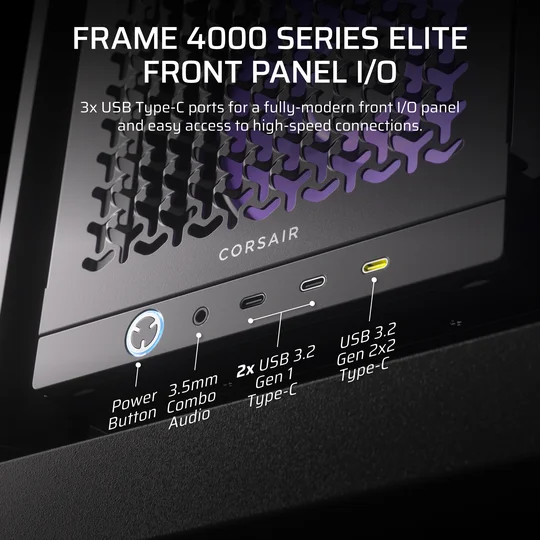
FRAME 4000 ELITE Front I/O (preinstalled on FRAME 4000D LCD RS ARGB and FRAME 4000D Vault Series Cases)
In short, the upgrade takes you from 2x USB Type-A and 1x USB Type-C to a full sweep of USB Type-C ports alongside a significantly improved power button. The biggest advantage here is the USB 3.2 Gen 2x2 Type-C port (the yellow one.)
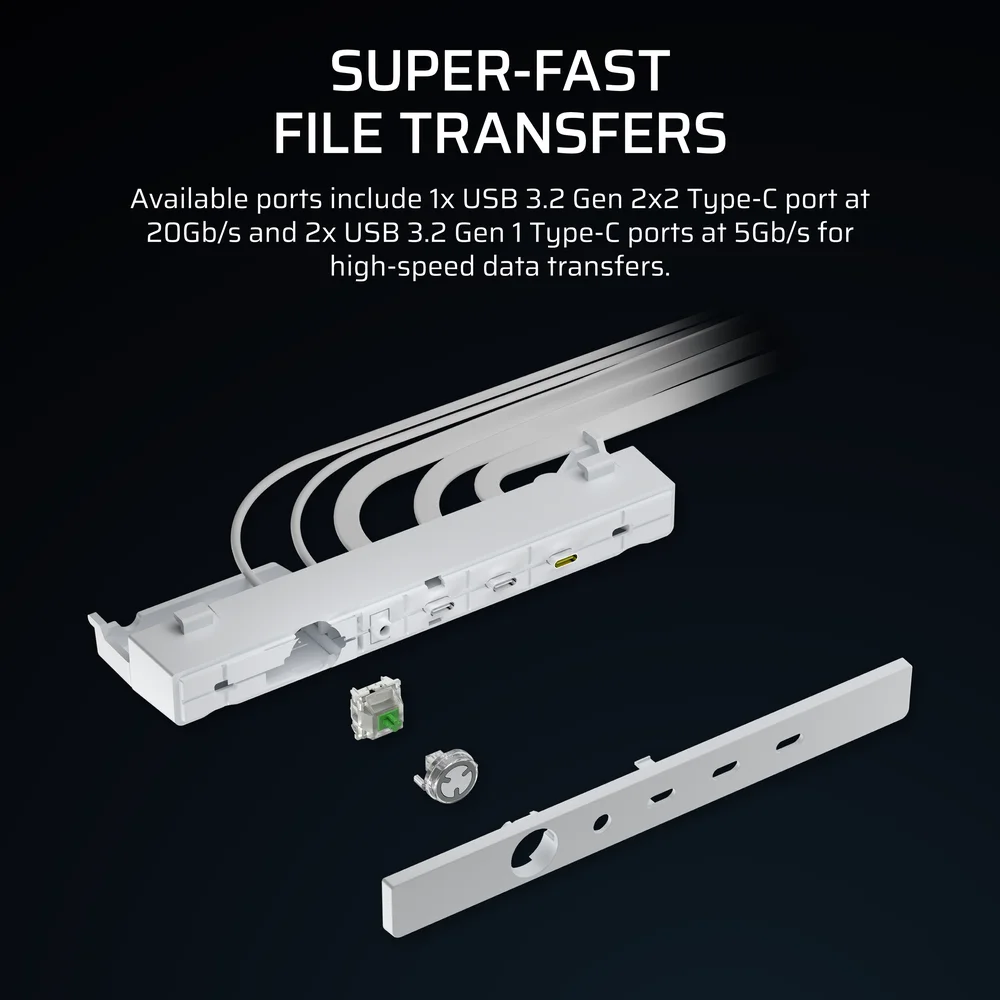
This port provides 4x faster data transfer speeds (up to 20Gb/s) than the other two Type-C ports or any of the ports found on the front panel included with the base FRAME 4000D.
Key Switch RGB Power Button
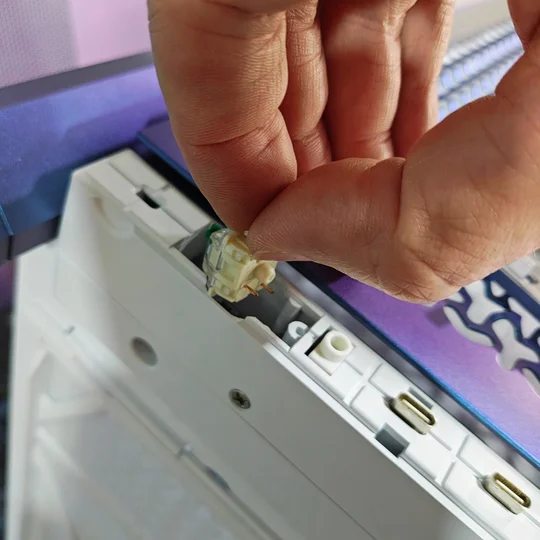
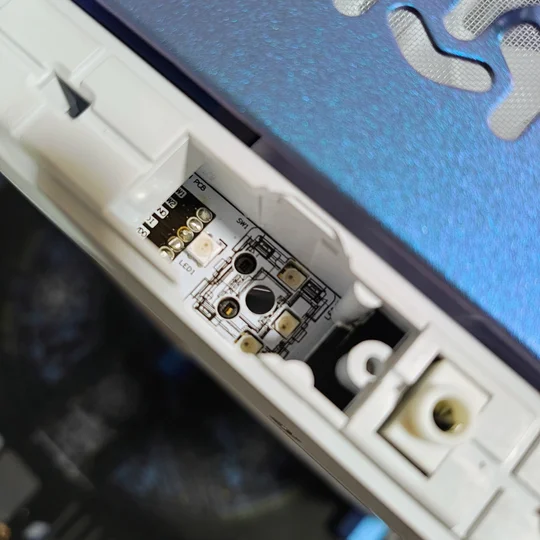
The Elite Front Panel power button is also a step up from the base FRAME 4000. Here we house an MX Green key switch which makes for a more tactile and satisfying click when you turn the PC on. Hidden behind the switch are three ARGB LEDs that shine through the switch housing and the translucent edge of the power button.

You can swap out this switch with ant 3-pin MX-style key switch you like, and the RGB can be controlled from an ARGB header on your motherboard, or any hub that accepts 5V ARGB like the COMMANDER DUO. This means you can sync the lighting on the new power button with everything else in your system.
How to Install the FRAME 4000 Series ELITE Front Panel I/O Upgrade
Installing the ELITE Front Panel Upgrade will only take a few minutes. You’ll need a small screwdriver and something to snip zip ties.
- Make sure the PC is fully shut down and unplug the front panel headers from the motherboard.
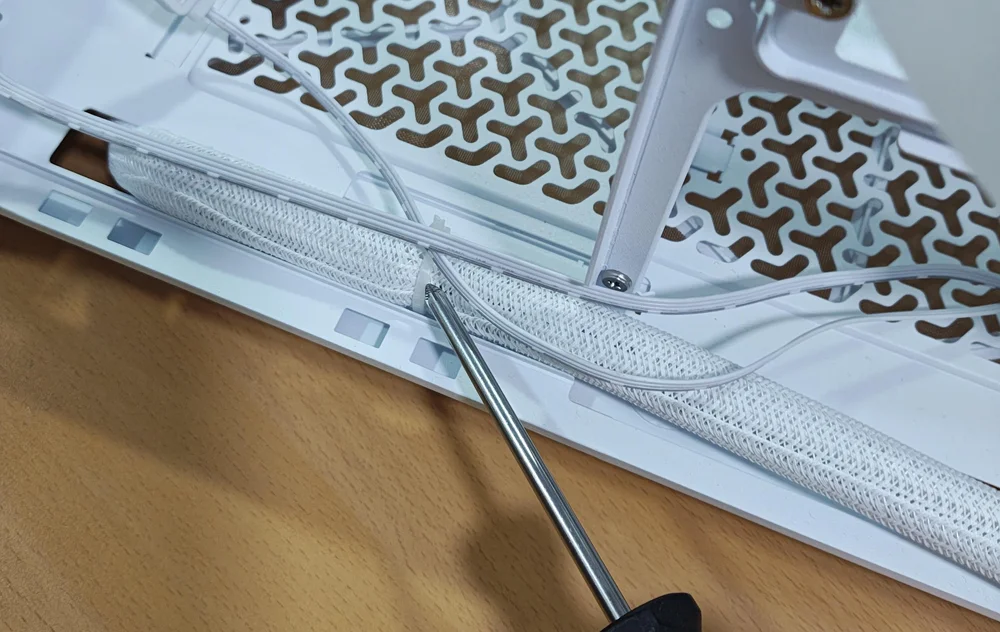
- Lay the PC on its side and open the side panel. Locate the mesh cable wrap on the bottom of the case that runs alongside the bottom fan filter that holds the headers cables you just unplugged. Carefully snip any zip ties holding this in place.
- Now remove the two screws from underneath the stock front panel I/O. (Note that you need to remove the two screws closest to the front of the case, not the two that are recessed further into the plastic.)
- Gently pull the I/O module forward and it will release from the case. Now hold the cables and carefully pull them through behind the module. Be careful here just in case you forgot to unplug one of these cables.
- Now install the ELITE Front Panel Upgrade. If you opt to reuse the cable wrap you removed earlier, then wrap that around the cables from the new I/O and secure it with a zip tie before feeding the cables back through the hole on the underside of the case.
- Once they’re through, use the two screws you removed earlier to secure the front panel module to the case.
- Now plug the cables into the corresponding ports on the motherboard and you’re done.
How to Change the Key Switch Behind the Power Button
Luckily, if you want to change out the key switch for the power button, no tools are needed. Here’s how.
- Lay the case down on its side and look for two small grooves behind the front cover on the I/O panel. Use these to gently pull the front cover off.
- Pull the power button cover out.
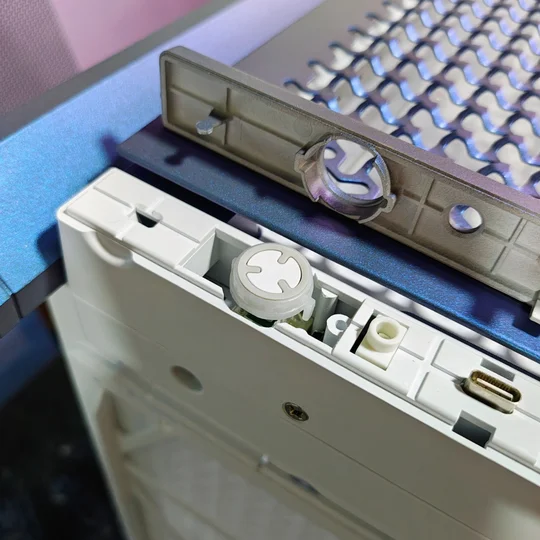
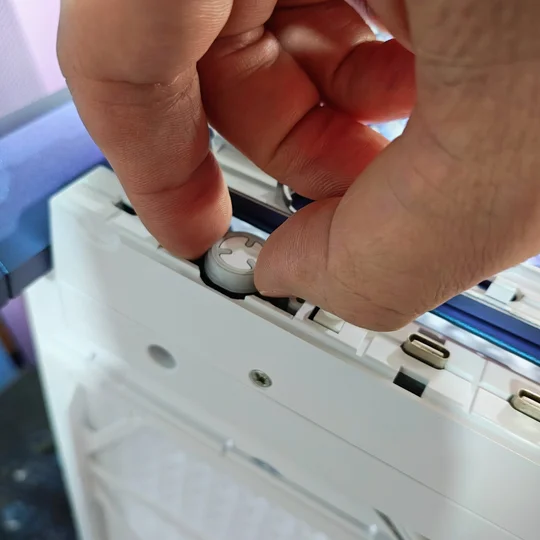
- After this you will be able to see down into the I/O panel and locate the switch. Grab this and pull it out. This might take a little force and will be easier if you have a key switch puller.
- Now simply press your preferred 3-pin switch into the socket. It will only fit in one orientation so make sure the pins are lining up with the holes.
- Place the power button cover back onto the switch and put the front cover back on, making sure to line up the central tab first then press on both sides to click it securely in place.
JOIN OUR OFFICIAL CORSAIR COMMUNITIES
Join our official CORSAIR Communities! Whether you're new or old to PC Building, have questions about our products, or want to chat about the latest PC, tech, and gaming trends, our community is the place for you.